Full Text Searchable PDF User Manual
1
For more information see www.shef.ac.uk/cics/creativemedia
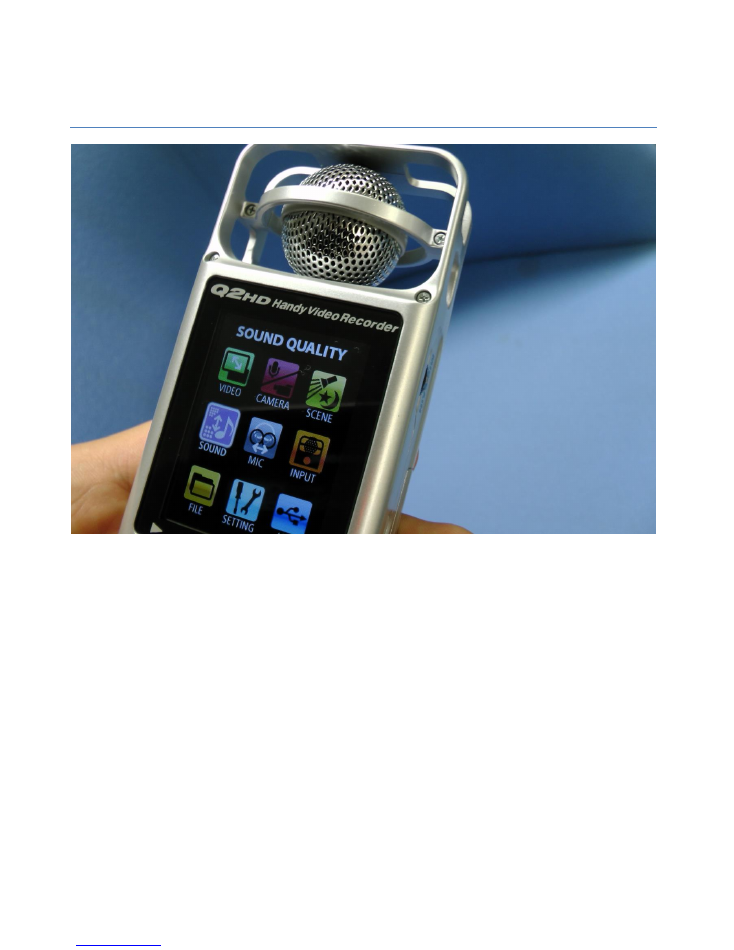
Zoom Q2HD Handy Video Recorder
Contents
Before You Begin: ................................................................................................................................. 2
Contents of Kit ............................................................................................................................................... 2
Control Layout ................................................................................................................................................ 3
Right-hand Side .............................................................................................................................................. 3
Left-hand Side ................................................................................................................................................ 4
Recording ............................................................................................................................................. 4
Recommended Record Settings (Video) ........................................................................................................... 5
Recording Audio Only ........................................................................................................................... 5
Recommended Record Settings (Audio) .......................................................................................................... 6
Playback Your Recordings ..................................................................................................................... 7
Deleting Your Recordings ...................................................................................................................... 7
Using the Menu .................................................................................................................................... 8
Transferring Your Recordings ................................................................................................................ 9
2
For more information see www.shef.ac.uk/cics/creativemedia
Editing Your Recordings ........................................................................................................................ 9
Attaching a Tripod .............................................................................................................................. 10
Connecting to a TV .............................................................................................................................. 11
Replacing the Batteries ....................................................................................................................... 12
Before You Begin:
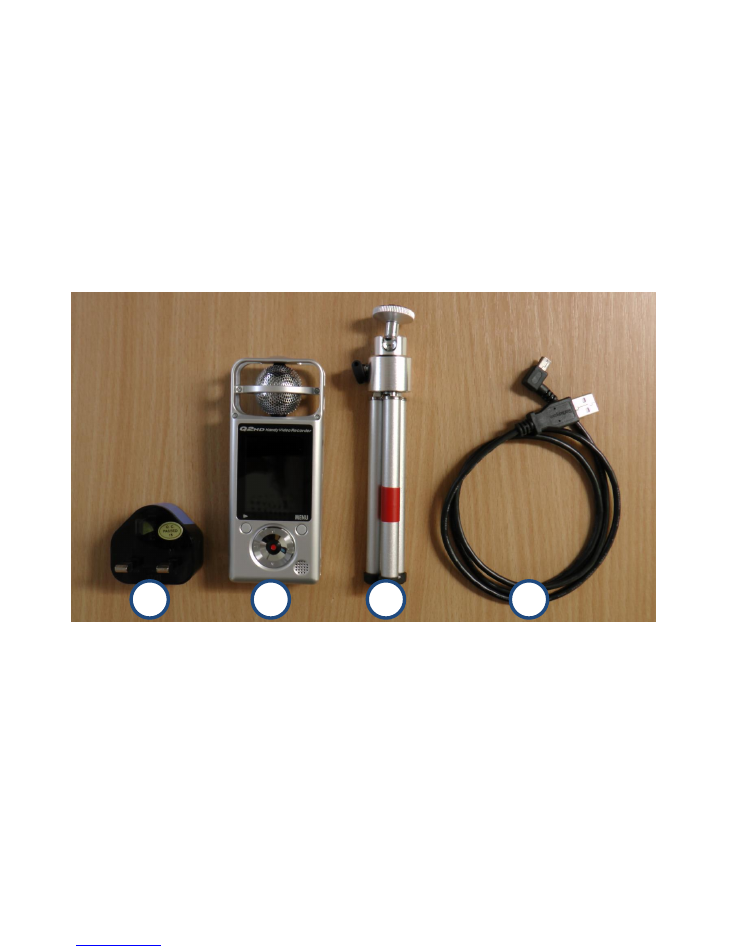
Contents of Kit
1. USB Plug Adapter
2. Q2HD Handy Video Recorder
3. Mini Tripod
4. USB Cable
1
2
3
3
4
3
For more information see www.shef.ac.uk/cics/creativemedia
Control Layout
Right-hand Side
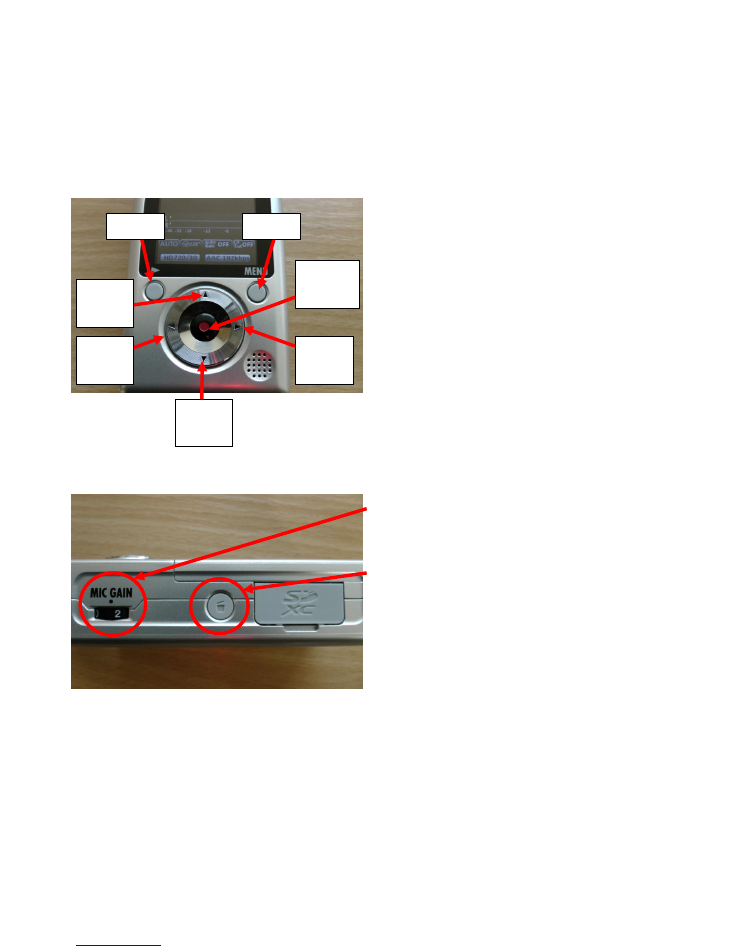
MIC GAIN
controls how much noise the mic
picks up. The higher the number, the louder
your recording will be.
DELETE
allows you to delete clips.
Record/
OK
Cursor
down
Cursor
right
Cursor
up
Cursor
left
Menu
Play
4
For more information see www.shef.ac.uk/cics/creativemedia
Left-hand Side
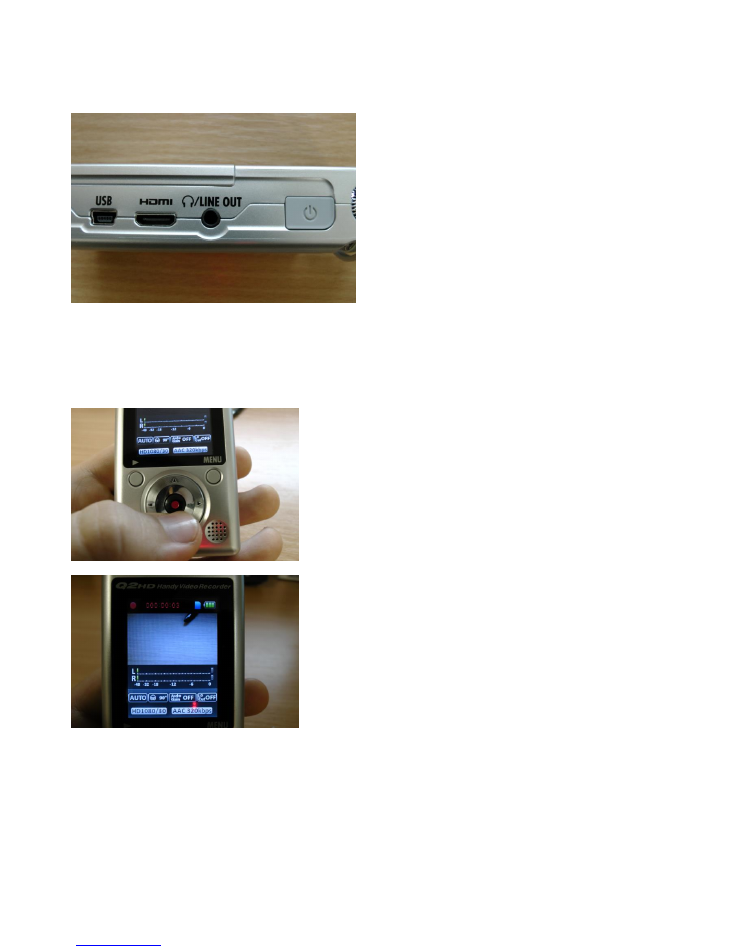
USB Port
allows you to connect a USB to a
computer to transfer files.
HDMI Port
allows you to plug into a TV with an
HDMI port for HD playback.
Line Out
allows you to plug headphones in for
listening back to recordings.
Power Button
turns the device on/off.
Recording
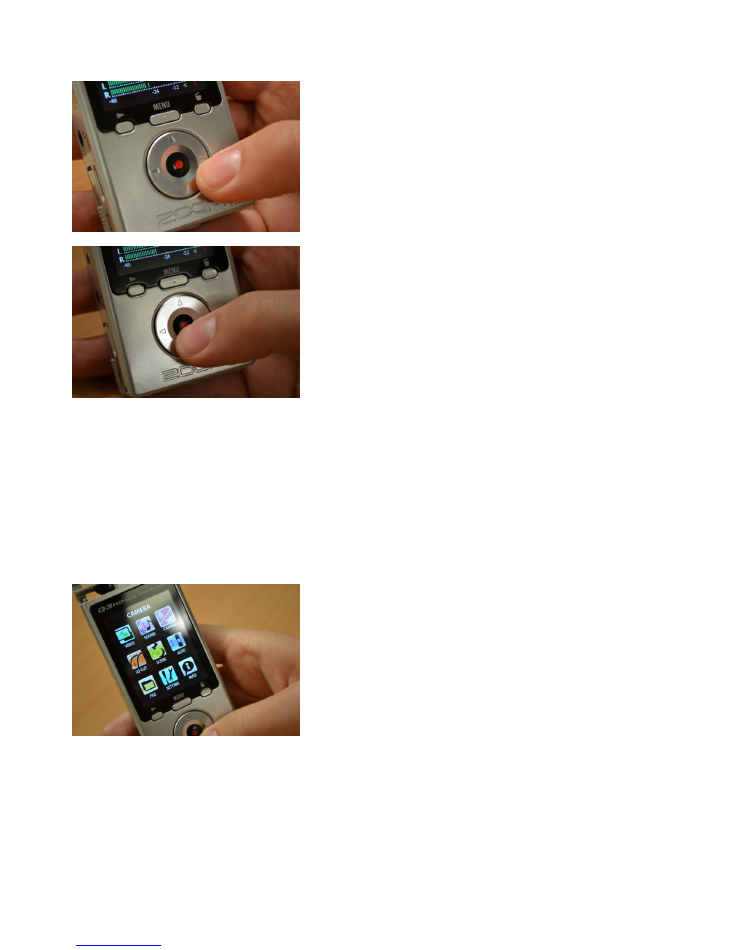
Press the
record
button.
A red circle will appear on the top left of the
screen to show that you are recording, and a
red timer at the top of the screen will show the
duration of your current recording.
5
For more information see www.shef.ac.uk/cics/creativemedia
Whilst recording you can
zoom
in and out by
pressing the cursor button left or right.
Press the
record
button to stop your recording
Recommended Record Settings (Video)
Video: HD720/25
Sound: Format-AAC, Bit Rate-96kbps
See ‘Using The Menu’ on page 8 for instructions on how to select these settings
Recording Audio Only
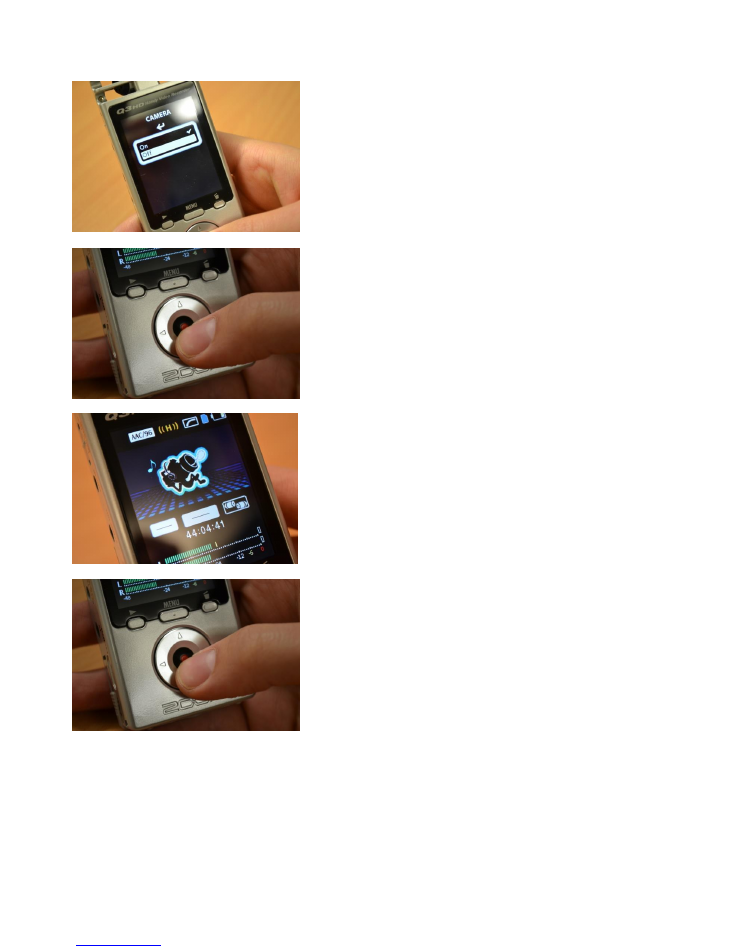
Press the
menu
button to access the menu
Select ‘Camera’ using the cursor and OK
buttons
6
For more information see www.shef.ac.uk/cics/creativemedia
Select ‘Off’ using the cursor and OK buttons
Press the
menu
button repeatedly until you
have fully exited the menu.
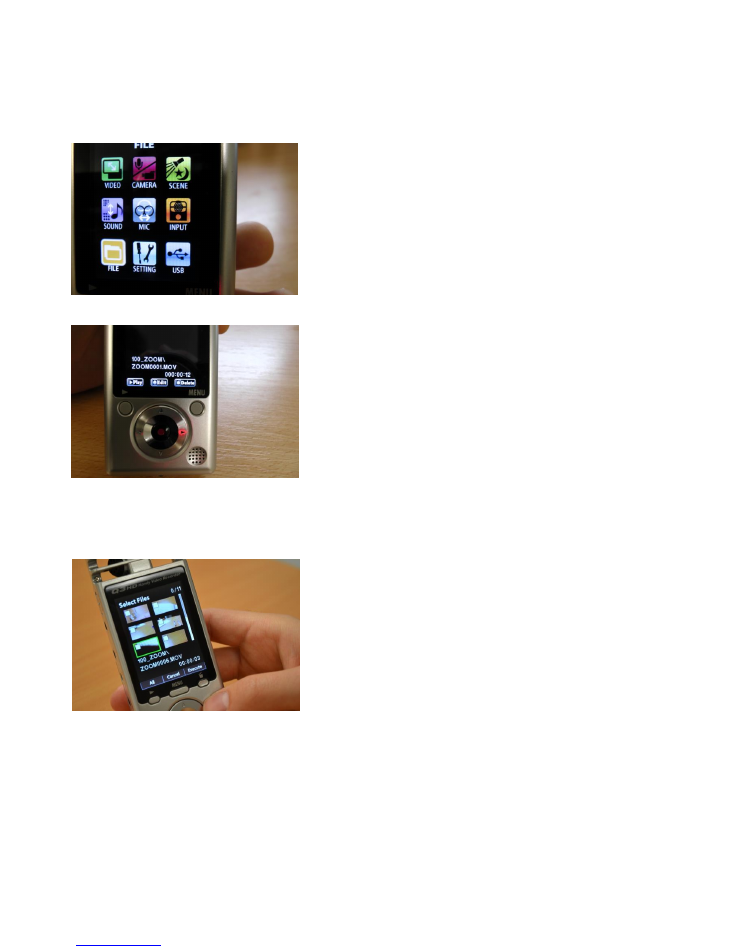
Press the red
record
button
Press the
record
button to stop your recording
A red icon will appear on the top left of the
screen to show that you are recording, and a
timer at the bottom of the screen will show the
duration of your current recording.
Press the
record
button to stop your recording
Recommended Record Settings (Audio)
Sound: Format-PCM, Sample Rate-48kHz, Bit length-16bit
See ‘Using The Menu’ on page 8 for instructions on how to select these settings.
7
For more information see www.shef.ac.uk/cics/creativemedia
Playback Your Recordings
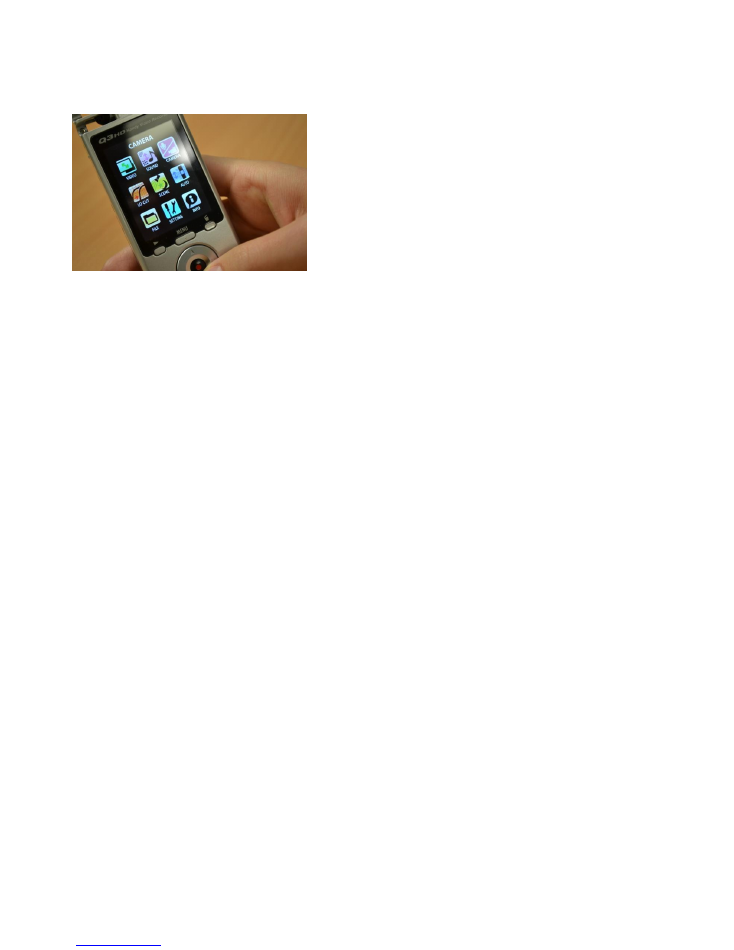
In the menu, select
File
.
To switch between different recordings, press
the cursor button left and right.
To turn the playback audio volume up or down,
press the cursor button up or down.
With a clip selected, press the
Play
button to
play clip.
Press the red
Record
button to
Edit
the clip.
Press
Delete
, on the side of the device, to
delete the clip.
Deleting Your Recordings
Press the
delete
button on the side of the
device.
Press the
delete
button again to access the
‘select files’ screen
Use the cursor and OK button to select the
recordings you want to delete
Press the
delete
button, then use the cursor
and OK to delete all selected recordings
8
For more information see www.shef.ac.uk/cics/creativemedia
Using the Menu
Press the
menu
button
Navigate by using the cursor button (moving
left, right, up and down), and pressing the OK
button to select settings
Press the
menu
button to go back
The main menu items are as follows:
Video –
This sets video quality. The higher the quality, the less recording time you will have.
Camera
– This switches the camera on or off – switch off if you just want to record audio.
Scene –
Sets light settings to various presets, which are either Auto, Concert Lighting or
Night (leave in Auto for most instances)
Sound –
This sets the Format, Sample Rate and Bit Rate of the sound. We recommend
recording in PCM 48/16, though for lossless recording use AAC 320kbps.
Mic
– Set the Mic Angle. This is the direction the mic is pointing in, so a small angle is
useful when recording one-person interviews, a wide-angle is useful for recording a room
full of people.
Input
– Contains Lo Cut, Auto Gain, and Sound Monitor.
File
– This is where your recordings can be stored, viewed, edited and deleted.
Setting
– Adjust system settings such as date, screen brightness, HDMI out, etc.
USB
– Use in conjunction with iPad and USB cable. Decide between card-reader and Mic.
Press the
MENU
button repeatedly until you have fully exited the menu
9
For more information see www.shef.ac.uk/cics/creativemedia
Transferring Your Recordings
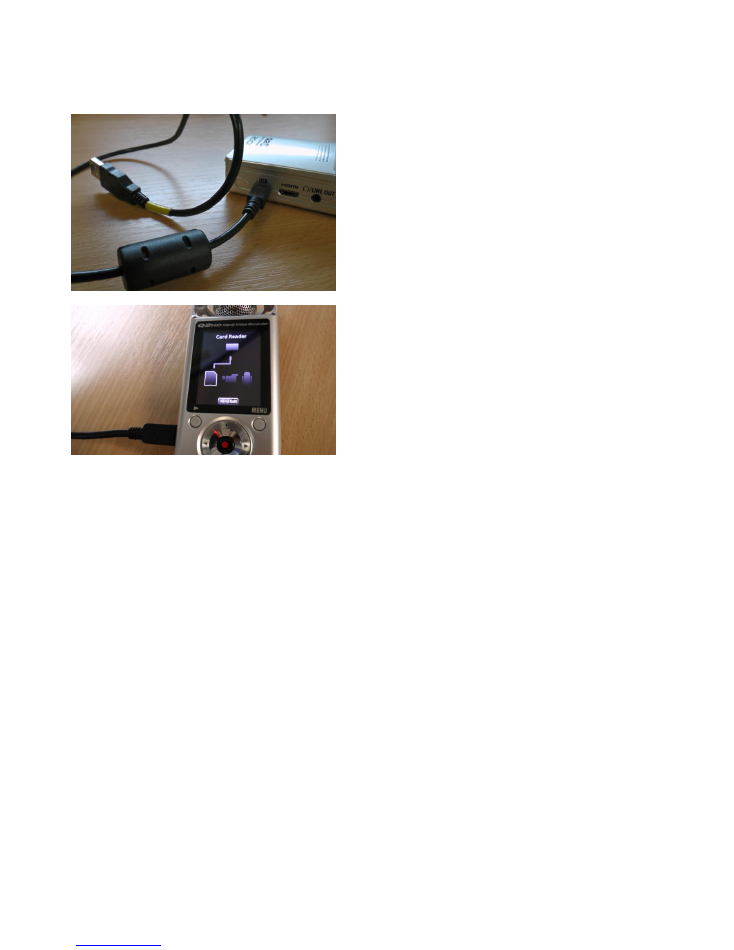
Insert a
USB cable
into the
USB Port
on the
side of the device.
Plug the other end into the USB Port of your
laptop or computer. Make sure the device is on.
Once inserted, select ‘
Card Reader’
on the
screen using the directional arrows and press
the record button.
Your computer should be able to read the device as a portable drive. Your recordings will be in
the 100_Zoom folder, which is within the DCIM folder.
Copy and paste your recordings
Once your files have been copied you can delete your recordings using your computer
Editing Your Recordings
You can edit your recordings using the following applications:
Microsoft Windows Live MovieMaker (Windows 7)
iMovie (Mac)
Final Cut (Mac)
Adobe Premiere
You cannot edit your recordings using the Windows XP version of MovieMaker, however you
could convert them to be usable as a WMV file. Please contact a member of staff for advice on
how to do this.
10
For more information see www.shef.ac.uk/cics/creativemedia
Attaching a Tripod
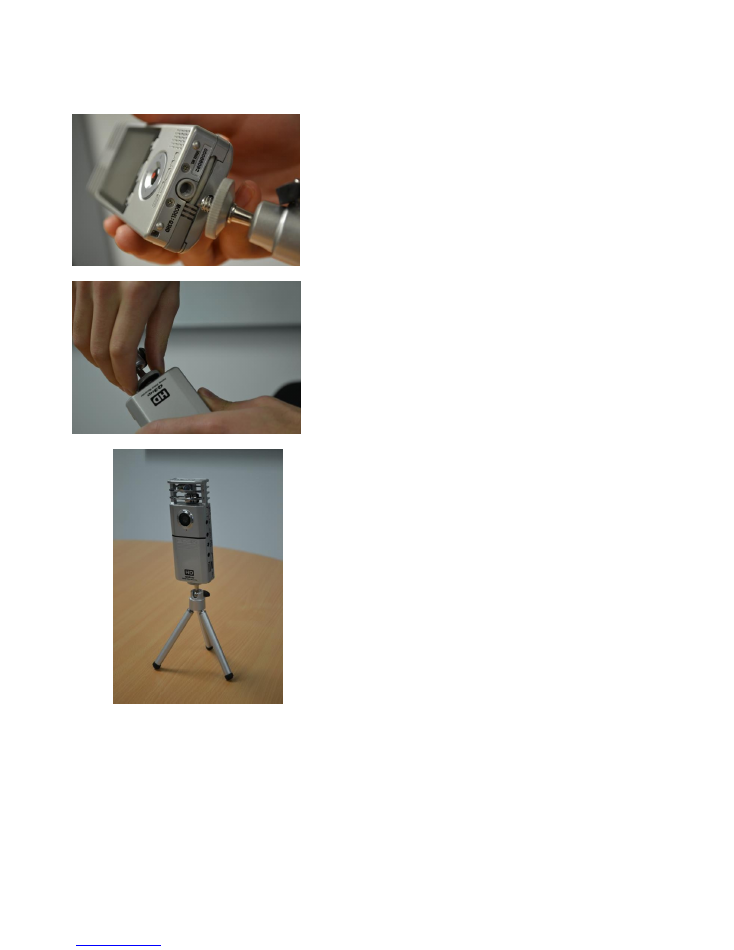
Line the tripod head with the hole in the
bottom of the camera.
Screw the tripod tightly into the bottom of the
camera but turning either the tripod or camera.
Open the tripod legs to stand on a surface.
11
For more information see www.shef.ac.uk/cics/creativemedia
Connecting to a TV
You can connect the camera to a TV to view your recordings.
.
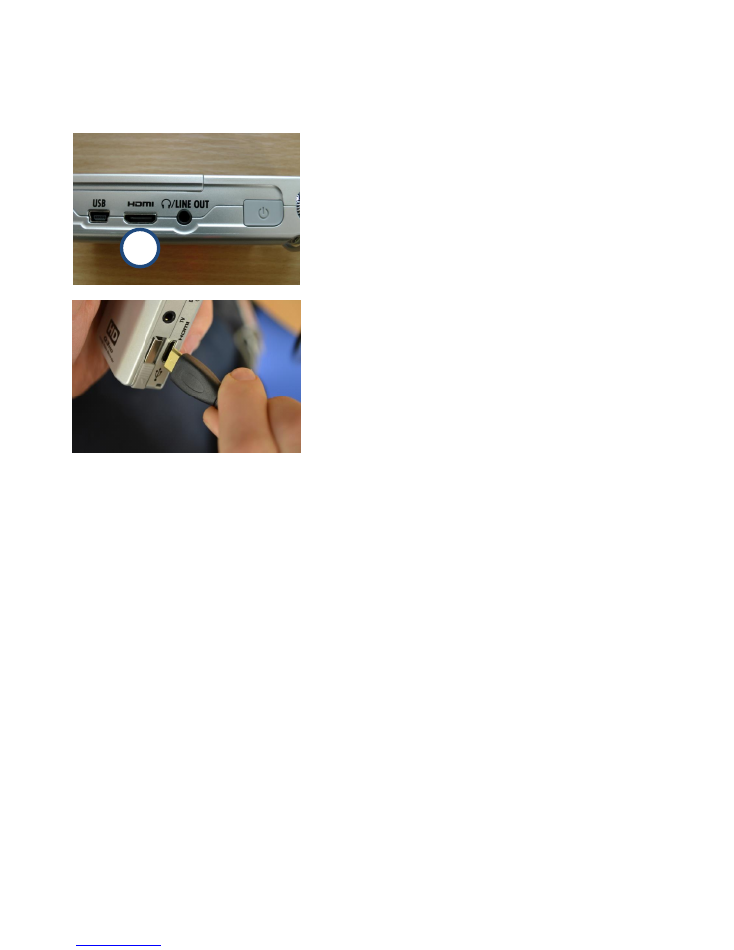
To connect to an
HDMI socket
, use the cable
provided and plug the smaller end into the
socket (1) above.
1
12
For more information see www.shef.ac.uk/cics/creativemedia
Replacing the Batteries
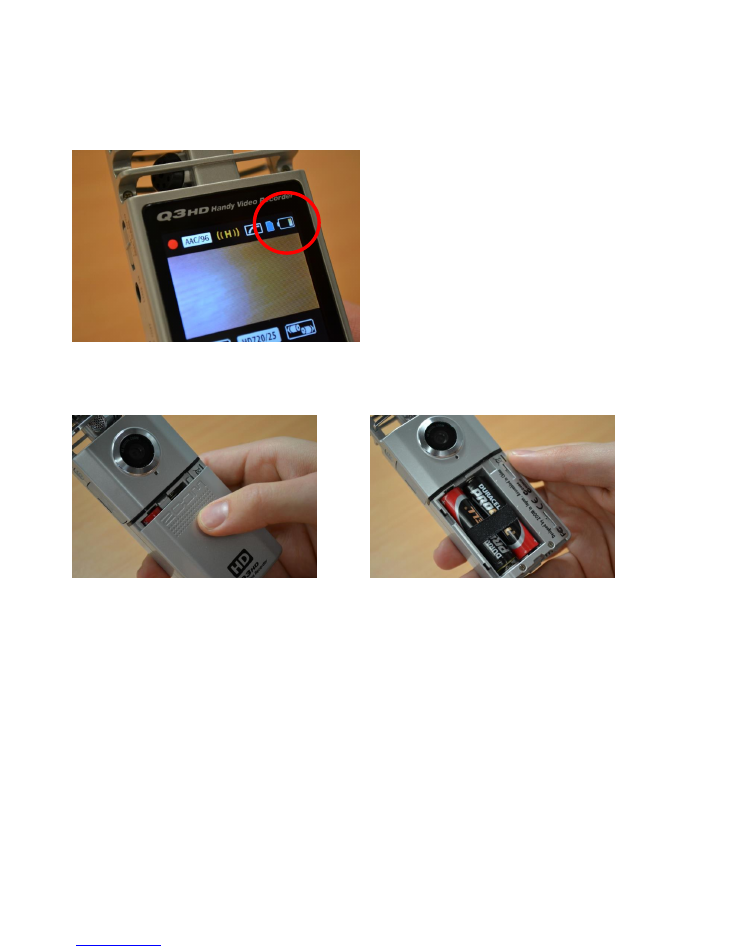
The battery icon on the screen will give an indication of how much battery is remaining
If low, you can replace the batteries by sliding the battery cover
Remove the existing batteries, and replace with new ones, ensuring they are inserted the correct
way round
Use AA batteries only.