Full Text Searchable PDF User Manual
MANUAL DE INSTRUCCIONES
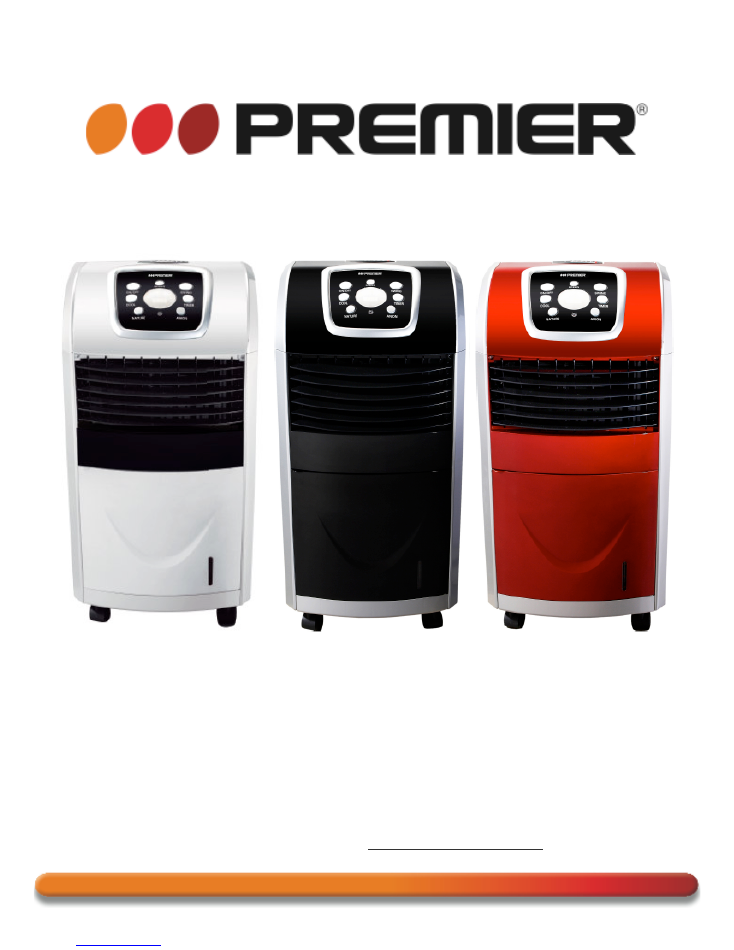
ENFRIADOR/CALEFACTOR DE AIRE PORTÁTIL
ESTIMADO CLIENTE
Con el fin de que obtenga el mayor desempeño de su producto, por favor lea este manual de
instrucciones cuidadosamente antes de comenzar a utilizarlo, y guárdelo para su futura referencia.
Si necesita soporte adicional, no dude en escribir a:
info@premiermundo.com
CR-4928R
CR-4929R
P-1
PRECAUCIÓN
RIESGO DE CHOQUE
ELÉCTRICO , NO ABRA
Precaución: Para reducir el riesgo de choque eléctrico, no
retire la cubierta, no hay partes manipulables por el usuario al
interior de la unidad. Refiera todo mantenimiento o
intervención técnica a personal técnico calificado.
Este símbolo indica la existencia de voltaje peligroso al
interior de esta unidad, que constituye un riesgo de choque
eléctrico.
Este símbolo indica que hay importantes instrucciones de
operación y mantenimiento en la literatura que acompaña a
esta unidad.
LÍNEAS DE SERVICIO AL CLIENTE PREMIER
Venezuela:
0800 – ELECTRIC (353-2874)
Panamá:
300-5185
Sitio Web:
www.premiermundo.com
E-mail:
servicioalcliente@premiermundo.com
NOTA
Nos reservamos el derecho de modificar las especificaciones, características y/u operación de esta
unidad sin previo aviso, con el fin de continuar las mejoras y desarrollo del mismo.
P-2
INSTRUCCIONES DE SEGURIDAD
6.
Velocidades del ventilador: Alta - Media - Baja. (Para enfriador)
7. Caja de hielo y tanque de agua para la salida de aire más fresco.
8. Filtro para remover pequeñas substancias dañinas, tales como el polvo y el polen.
P-3
PRECAUCIONES
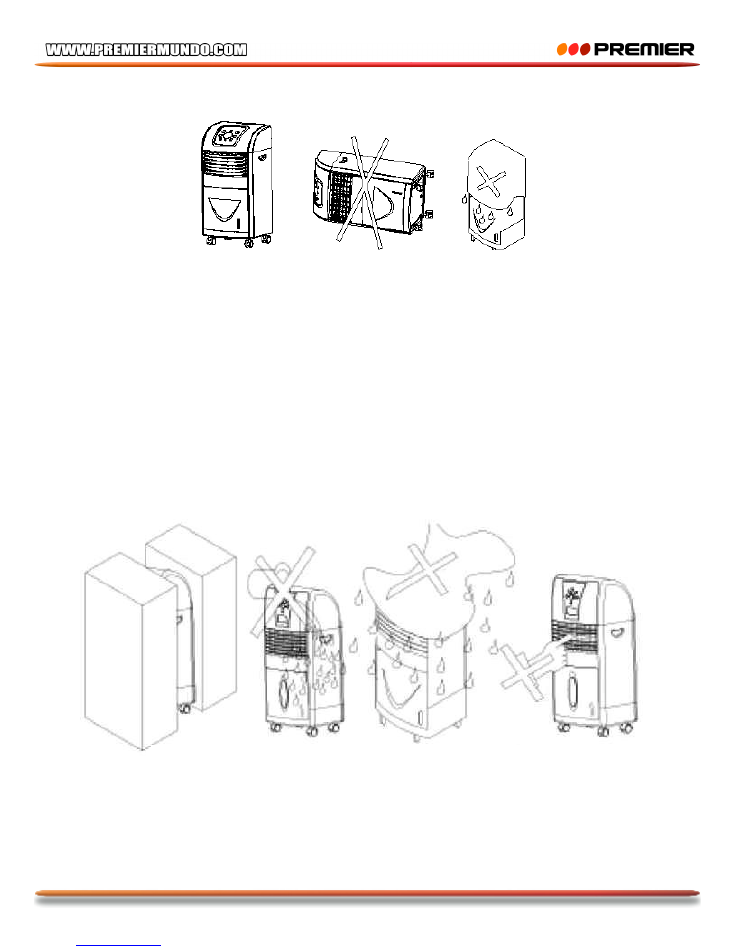
(Fig. 5)
(Fig. 6)
(Fig. 7)
1.
Utilice un suministro normal
de 220V/50Hz. Conecte a un tomacorriente con capacidad de corriente
nominal mínima de 10A.
2.
Después de llenar el tanque con agua, no incline la unidad y evite moverla (Ya que puede causar
que el agua se desborde de los lados del tanque y se presenten fugas). Si necesita mover la unidad
un poco, hágalo empujando de los lados suavemente. (Fig. 5)
3.
Nunca gire la unidad en sus lados. (Fig. 6).
4.
No coloque ningún objeto pesado en la parte superior de la unidad. La salida de aire nunca debe ser
obstruida. (Fig. 7).
5.
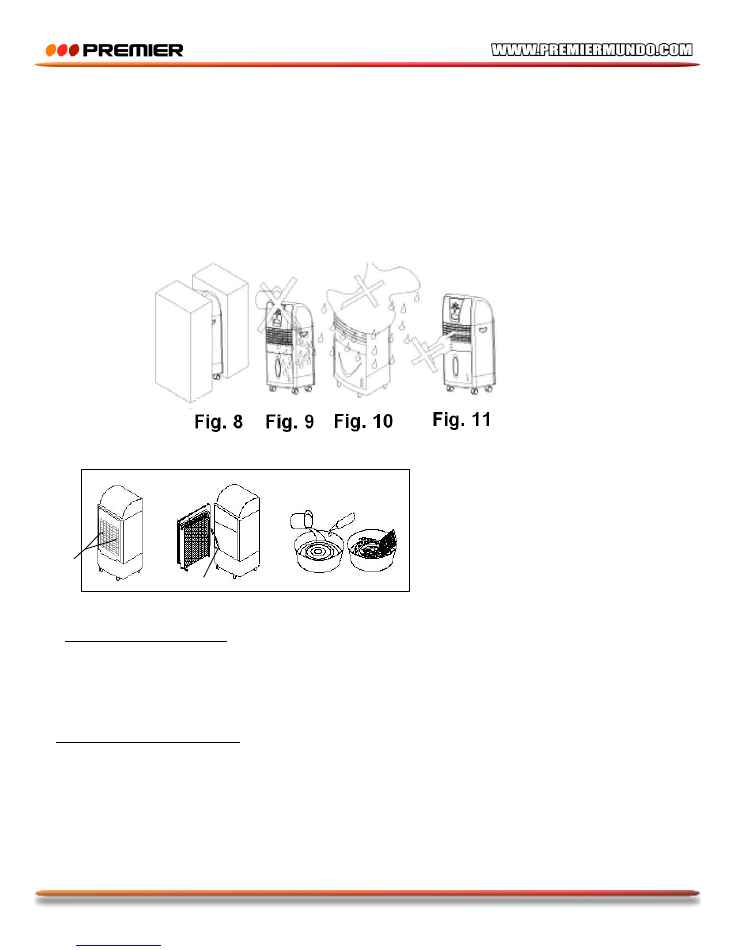
Mantenga un espacio mínimo de 6 pulgadas alrededor de la unidad. (Fig. 8)
6.
El rango de temperatura apto es de 68-104ºF. No ubique la unidad en un área con temperaturas
demasiado altas o demasiado bajas. Cuando la unidad es usada en un lugar con temperatura muy
alta, cambie el agua regularmente para evitar la acumulación de moho.
Fig. 8 Fig. 9
Fig. 10
Fig 11
P-4
MANTENIMIENTO
(Fig 2)
(Fig3)
(Fig 4)
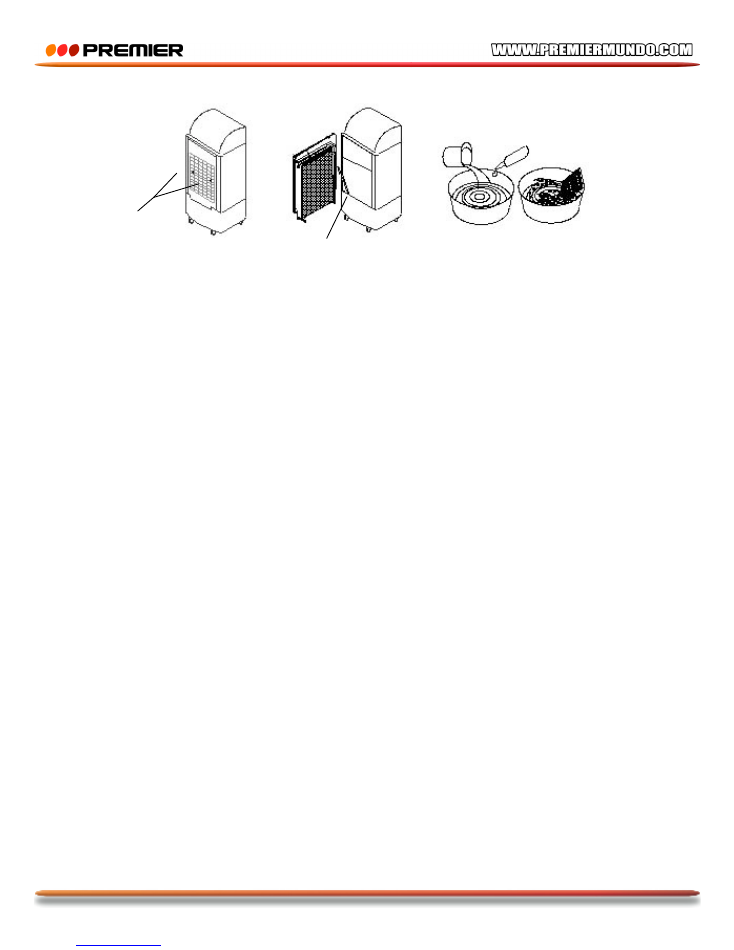
LIMPIEZA DEL FILTRO DE POLVO
1.
Desconecte la unidad del tomacorriente.
2.
Empuje hacia abajo las dos manijas del filtro y tire hacia el exterior. (Fig. 2)
3.
Limpie con agua tibia y detergente suave.
4.
Asegúrese que el filtro esté completamente seco antes de usar la unidad.
LIMPIEZA DE LA CORTINA DE AGUA
1.
Desconecte la unidad del tomacorriente.
2.
Retire los 3 tornillos que se encuentran en el marco posterior, uno en cada esquina superior y uno
en la parte inferior central. No retire el panel posterior todavía.
3.
El panel está conectado a la unidad por un tubo de agua, retire suavemente el extremo del tubo que
está conectado a la bomba de agua. (Fig. 3) Retire el panel posterior.
4.
Retire la cortina de agua quitando primero la barra inferior - empuje suavemente. A continuación,
retire de la varilla superior separando el velcro.
5.
Lave la cortina de agua con detergente suave y agua tibia y luego enjuague con agua limpia. (Fig. 4)
6.
Vuelva a colocar la cortina de agua, asegúrese que el tubo esté firmemente conectado a la bomba.
ALMACENAMIENTO
Si no va a utilizar la unidad durante un largo período de tiempo, vacíe el depósito de agua y lávelo.
Limpie la cortina y el filtro de agua.
Utilice la unidad en modo de ventilación normal durante unos 30 ~ 60 minutos en un día soleado. Esto
secara el interior y evitara el crecimiento de moho. Se recomienda empacar la unidad en su caja original
y guardarla en un lugar seco y fresco.
Manijas del
filtro
Tubo del
filtro
P-5
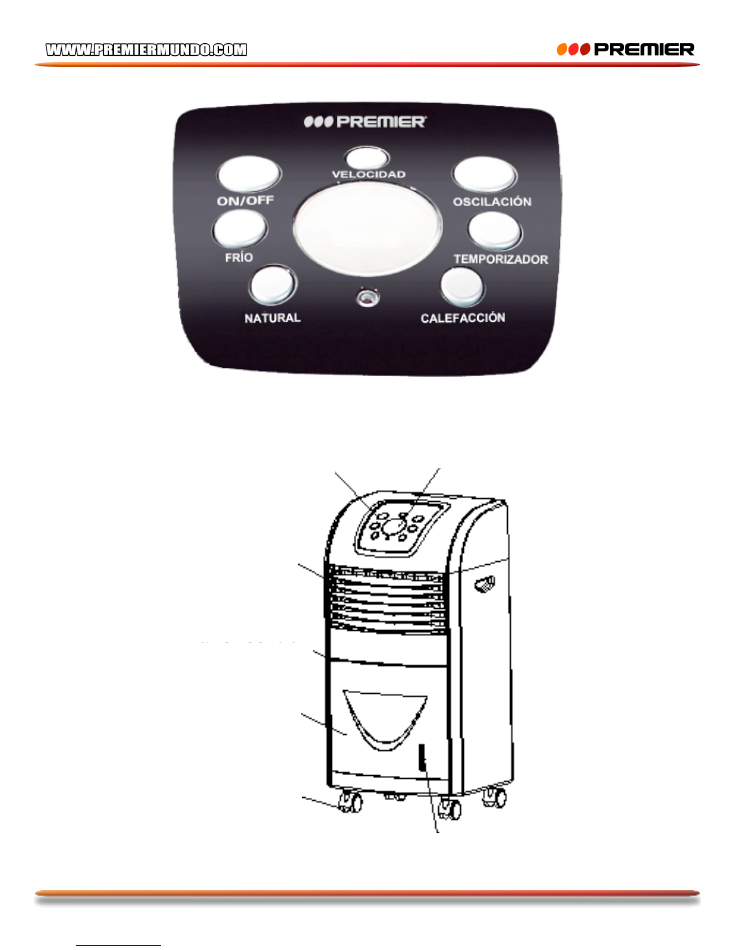
PANEL DE CONTROL
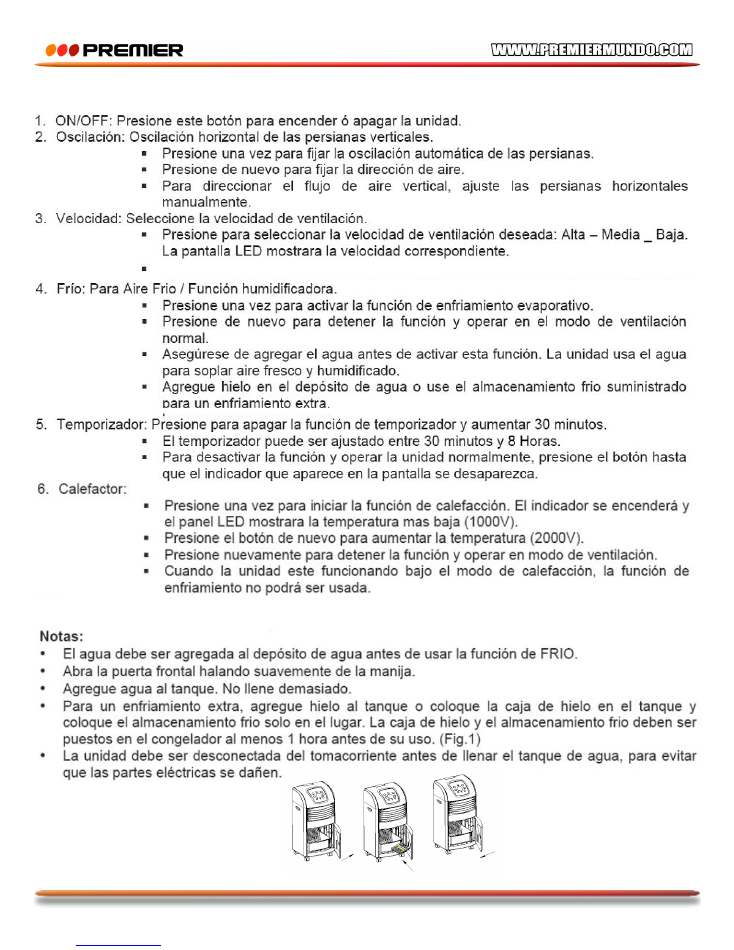
DESCRIPCIÓN DE LA UNIDAD
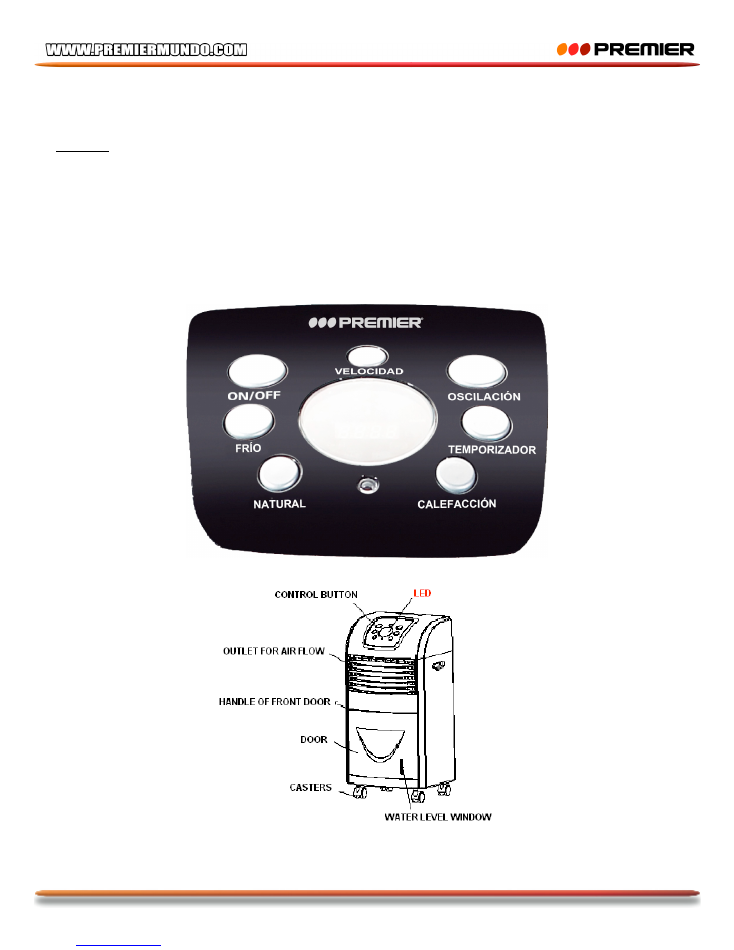
Botones de control
LED
Salida del flujo de aire
Manija de la puerta Frontal
Puerta
Ruedas
Ventana indicadora del nivel de agua
P-6
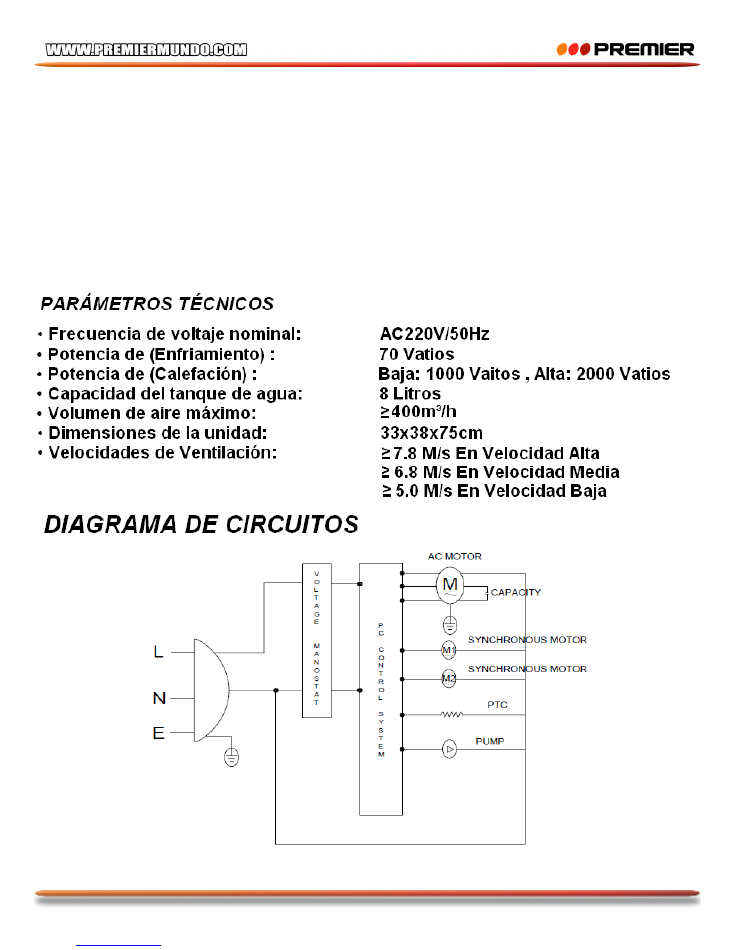
FUNCIONES
Cuando la calefacción este activa, la velocidad de ventilación no podrá ajustarse
•
Cuando la unidad este funcionando bajo el modo de calefacción, los modos de
enfriamiento, natural y ajuste de velocidad no podrán ser usados
P-7
LIMPIEZA
•
Apague y desenchufe la unidad antes de la limpieza y el mantenimiento.
•
Limpie la cubierta con un paño húmedo. Nunca rocíe agua directamente sobre la
cubierta o el panel de control / LED ni use productos químicos abrasivos.
•
Después de haber usado la unidad por un periodo de tiempo prolongado, el filtro y la
cortina de agua se obstruyen con polvo y suciedad, lo que afectará en gran medida el
rendimiento de la unidad. A veces, la formación de moho también puede ocurrir,
debido a la falta de cambios de agua. Se recomienda limpiar el filtro y la cortina de
agua una vez cada dos semanas.
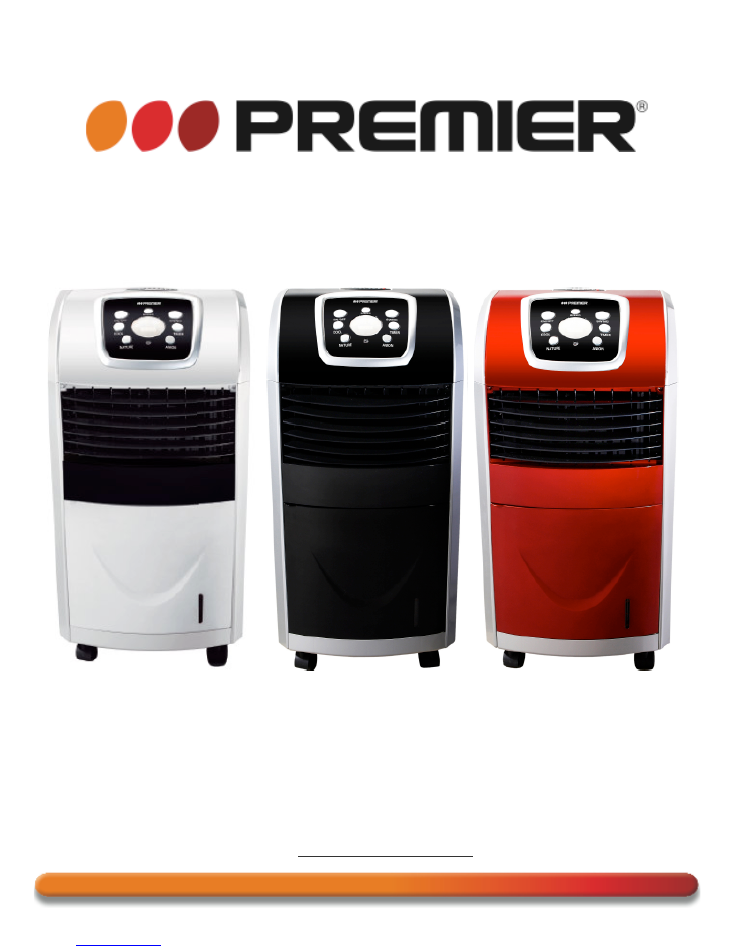
INSTRUCTION MANUAL
PORTABLE AIR COOLER / HEATER
DEAR CUSTOMER
In order to achieve the best performance of your product, please read this instruction manual carefully
before using, and keep it for future reference.
If you need extra support, please write to
info@premiermundo.com
CR-4928R
CR-4929R
P-1
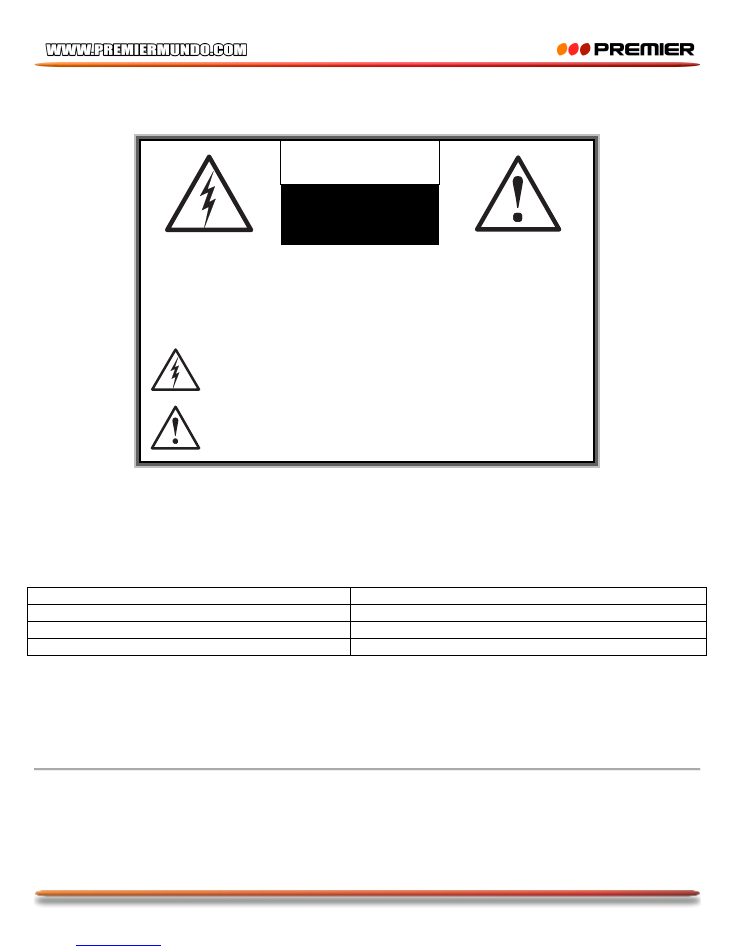
CAUTION
RISK OF ELECTRIC
SHOCK, DO NOT
OPEN
Caution: To reduce the risk of electric sho
ck do not open
this device, there are not serviceable parts for customers.
Please refer any maintenance or repair to qualified
personnel.
This sign means the existence of dangerous voltage at
the inside of the unit, which states a risk of electric shock.
This sign means that there are important instructions of
operation and handling in the manual that comes with this
device.
PREMIER CUSTOMER SERVICE
Venezuela:
0800 – ELECTRIC (353-2874)
Panama:
300-5185
Website
www.premiermundo.com
E-mail:
servicioalcliente@premiermundo.com
NOTE
This unit may be submitted to changes in specifications, characteristics and/or operation without prior
notice to the user, in order to continue improving and developing its technology.
P-2
Please read this manual carefully before using.
•
Avoid exposing unit to water or spraying water onto the control panel or
LED. (Fig. 9) (Fig. 10)
•
Do not use any corrosive cleaner or solvent. (Fig. 11)
•
If using unit as a humidifier during cold weather (below 32°F), be sure to empty and dry the water
tank after use to prevent water freezing. After emptying water from the drain, use a towel to wipe dry
remaining water.
•
Empty the water tank before moving the product.
•
Unplug power source when not in use.
•
Do not use the COOL function if unit is used in a damp and closed space.
•
Do not place fingers or insert foreign objects into the louver during operation.
•
Do not operate unit with a damage power cord or plug.If supply cord is damaged,it must be replaced
by the manufacturer or a similarly qualified technician or service agent.Do not attempt to repair as
there are no serviceable parts in your unit.
•
This appliance is not intended for use by persons(including children) with reduced physical,sensory
or mental capabilities or lack of experience and knowledge unless they have been given supervision
or instruction concerning the use of the appliance by a person responsible for their safety.Children
should be supervised ensure they do not play with the appliance.
•
When operating in COOL mode, pay attention to water level and add water when water level is less
than 1/3 full. Do not operate COOL mode on an empty tank, as this may cause water pump to
malfunction.
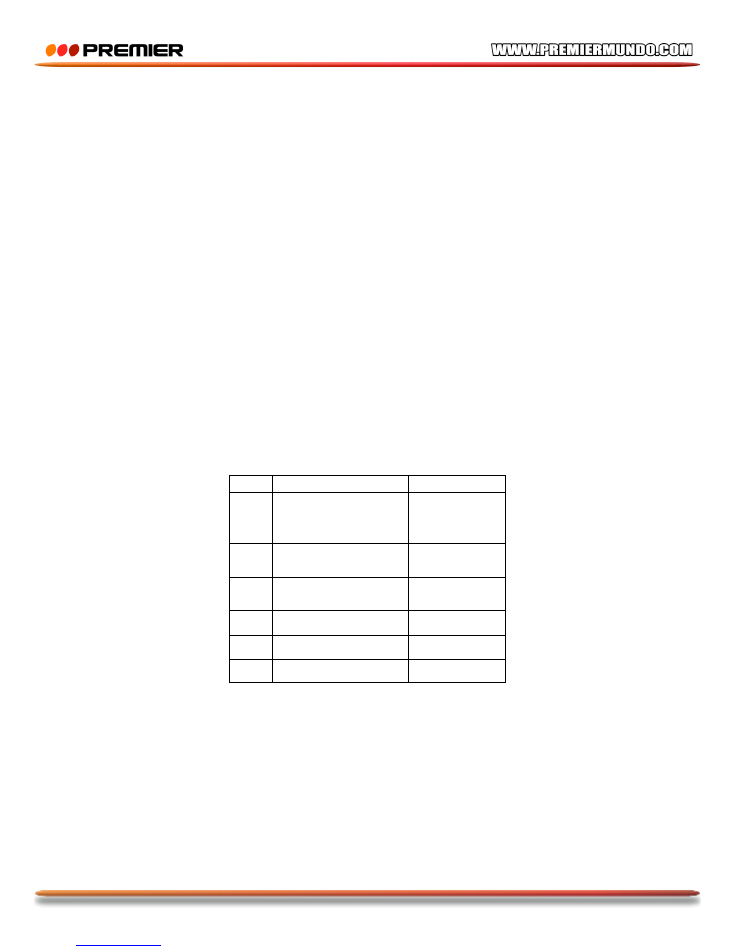
PACKING LIST
No.
NAME
QUANTITY
1
PORTABLE AIR
COOLER WITH
HEATER
1
2
Remote Controller
1
3
Instructions
Manual
1
4
Wheel
4
5
Ice Box
2
6
Spanner
1
PRODUCT INTRODUCTION
It is our latest design with digital control system. It has device for storing water and ice box. It can
lower or rise surrounding temperature, humidify the air through the principle of water evaporation
and melting ice. LED panel makes it luxurious and easy to use. Also equipped
with water pump and
environment honeycomb water curtain to remove odor and dust. This unit will provide you a
comfortable and healthy environment.
P-3
BRIEF INTRODUCTION OF FEATURES
•
Digital control system with LED display panels.
•
Remote control.
•
Functions include: cool fan, humidifier, air purifier, and heater
•
Energy-saving and effective, power of cooler is 70W.
•
0 to 8-hours timer control.
•
3 fan speeds: High – Medium – Low (for cooler)
•
Ice box and water tank for cooler air output.
•
Filter to remove harmful tiny substances, such as dust and pollen
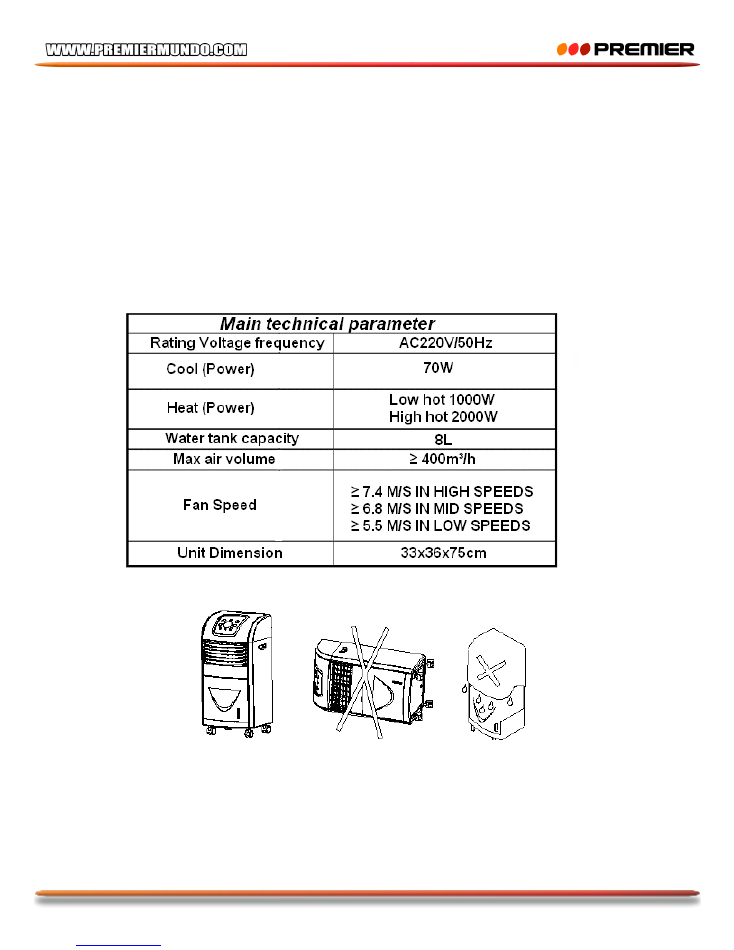
TECHNICAL PARAMETER
(Fig. 5) (Fig. 6)
(Fig. 7)
P-4
CAUTIONS
•
Use normal supply
of
AC220V / 50Hz.
Plug into dedicated socket with minimum rating current
of 10A.
•
After filling with water, do not tilt unit and avoid moving unit – which may cause water to overflow the
sides of the tank and leak. If unit needs to be moved a little, push on the side gently. (Fig. 5)
•
Never turn the unit on its sides. (Fig. 6)
•
Do not place any heavy objects on top of the product. The air outlet must not be obstructed. (Fig. 7)
•
Keep a minimum space of 6 inches around the unit. (Fig. 8)
•
Suitable ambient temperature range is 68~104°F. The body of this product should not be placed in
area with extremely high or low temperature. When ambient temperature is high, change water
frequently to prevent mildew and mold growth.
X
(Fig 2)
(Fig3)
(Fig 4)
Cleaning the Dust Filter
1. Disconnect the power supply.
2. Push down on the two handles of the filter and pull outwards. (Fig 2)
3. Clean under lake warm water and mild detergent.
4. Make sure filter is completely dry before operating unit.
Cleaning the Water Curtain
1. Disconnect the power supply.
2. Remove the 3 screws located on the back frame: one in each top corner and one at bottom
center. Do not remove back panel yet.
3. Panel is connected to the unit by a water tube, gently remove end of tube that is connected to the
water pump. (Fig. 3) Remove back panel.
4. Remove water curtain by first removing the bottom rod – push in gently. Then remove from top
rod by separating the Velcro attachment.
XX
Filter Handles
Water Tube
P-5
5. Wash water curtain in a mild detergent and warm water solution, then rinse in clean water. (Fig.
4)
6. Replace water curtain; make sure tube is firmly connected to the pump.
Storage
If you plan not to use the unit for a long period of time, drain the water tank and wipe clean. Clean
the filter and water curtain. Operate the unit in normal fan mode for approximately 30~60 minutes on
a sunny day. This will dry the interior and prevent mold from growing. It is recommended to pack the
unit in its original box and store in a dry, cool place.
CONTROL PANEL, LED DISPLAY AND CONSTRUCTION DIAGRAM
•
Control panel and functions (Same with remote controller)
•
•
Construction diagram.
CONTROL
PANEL

P-6
SELECTION OF FUNCTIONS
•
ON/OFF: Turns unit ON or OFF
•
Press once to turn ON. Following indicator lights will illuminate: POWER, and SPEED. Unit
operates in default High fan speed. LED panel will display rotating fan at High speed.
•
Press again to turn OFF.
•
Swing: Horizontal swing of vertical louvers.
•
Press once to engage auto swing of louvers. SWING indicator light will illuminate and LED
panel will display auto swing indicator.
•
Press again for fixed air direction.
•
To directing vertical airflow, adjust the horizontal louvers manually.
•
Speed: Selects fan speed.
•
Press to select desired fan speed: High – Medium – Low (for cooler), in turn. LED panel will
display the corresponding air speed.
•
When the heating function are operating, the wind speed cannot be adjustable.
•
Cool: For cool air / humidify function.
•
Press once to start the evaporative cooling function. COOL indicator light will illuminate and
LED panel displays the cool indicator.
•
Press again to stop function and operate in regular fan mode.
•
Make sure water is added before turning on this function. Unit cycles the water to blow cool,
humidified air.
•
Add ice to the water tank or use the supplied cold storage for added cooling.
•
Timer: Sets timer-off in increment of 30 mins.
1. Timer can be set between 30mins to 8 hours.
2. TIMER indicator will illuminate and LED panel will display the set time.
3. To remove timer and operate unit continuously, press button repeatedly until indicator light
and display goes off.
•
Heat:For heater function.
1. Press once to start heating function.Heat indicator light will illuminate and LED panel displays
the heat indicator of low hot 1000W.
2. Press again it operates in high hot 2000W.
3. Press third to stop function and operate in regular fan mode.
4. If the product operate under heat function, the cool , natural ,speed function can not be
used.
NOTE
: Water must be added to the water tank before using the COOL function.
•
Open the front door by the pulling gently on the handle.
•
Add water to the tank. Do not overfill.
•
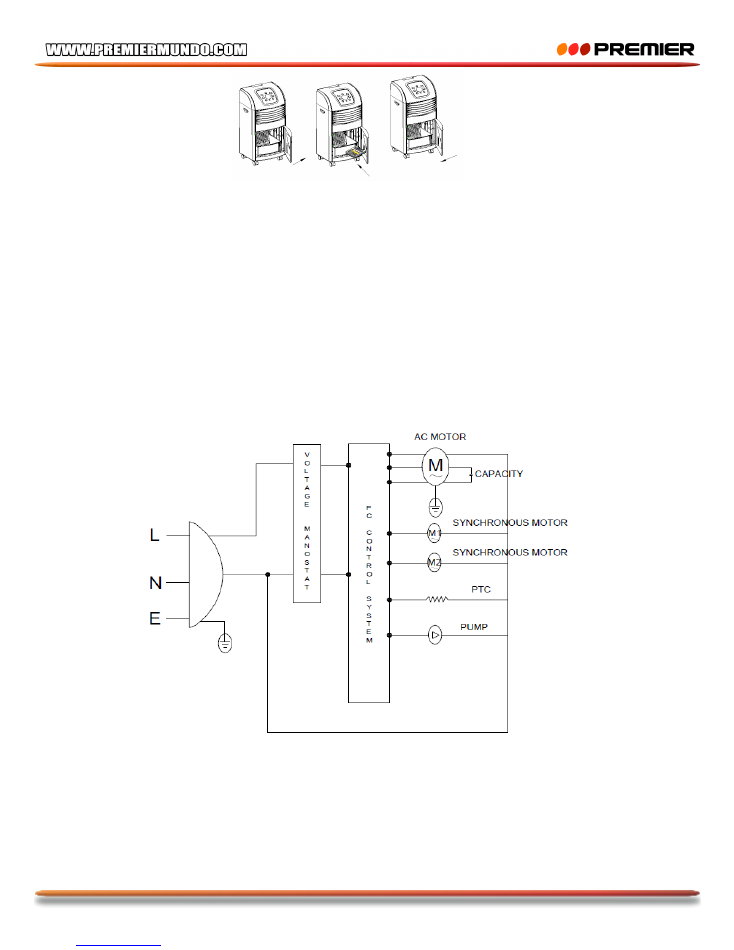
For added cooling,add ice to the tank or place the icebox in the tank and put cold storage along
the track.Icebox and cold-storage must be placed in the freezer for at least 1 hour before
use.(Fig.1)
•
Power supply should be disconnected before filling to prevent electrical parts from damage.
P-7
Fig 1
CLEAN AND MAINTENANCE
Always power OFF and unplug the unit before cleaning and maintenance.
•
Clean the housing with a damp cloth. Never spray water directly onto the housing or control
panel/LED or use harsh chemicals.
•
After long time operation, the Filter and Water Curtain becomes clogged with dust and dirt, which
will greatly affect the unit’s performance. Sometimes mold
•
and mildew may also occur, due to lack of water changes. It is recommended to clean the filter
and water curtain once every two weeks.
CIRCUIT DIAGRAM