Full Text Searchable PDF User Manual


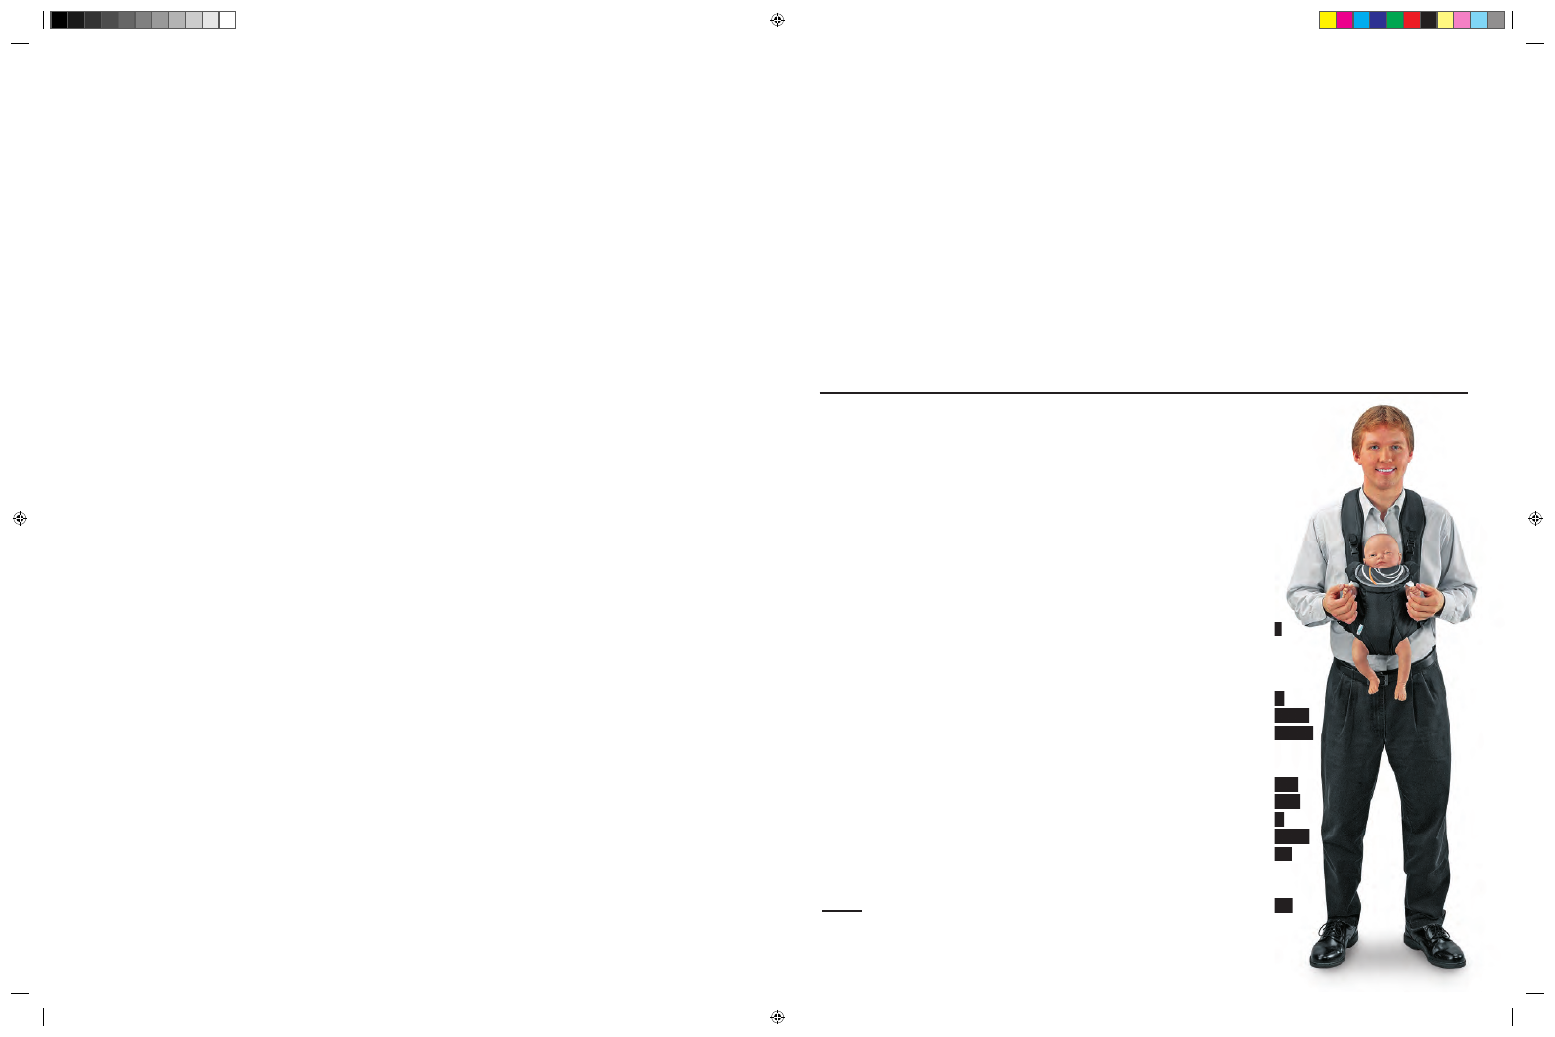
Parenting is Forever…
Having a baby and being a parent is a wonderful thing. We do not discourage
that. The issue is at what point in your life do you want to become a parent?
How would having a baby now affect your short and long term goals? How does
becoming a teen parent alter your opportunities for furthering your education
and fulfilling your career dreams? What about your social and emotional life?
Would the time commitment involved in caring for a child change your growth
and development as a person and affect your friendships? Do you want to be
connected to your current partner for the rest of your life? What does it cost to
care for a child during the first year? For 18 years? How would you support a
child? A parenting simulation raises all these questions and more.
No matter what the educational philosophy of your program (abstinence only
or educating teens to prepare for safe sex), the Nasco teen pregnancy simula-
tors will be of great assistance. These hands-on tools help teens experience the
frustration and appreciate the patience required when caring for an infant. What-
ever your budget, we offer a full range of simulators to help bring your program
to life.
Ready-or-Not Tot
®
Tending Log
Name _________________________________
Teacher _________________________________
Class _________________________________
Date __________________ Page _________
Time*
Time
between
Tending
What was I doing?
How was I feeling at the time?
2:30 pm
1st cry
Taking a math test.
I needed to concentrate on test.
6:30 pm
240 minutes
Just finished dinner.
I got out of dishes; it’s fun.
9:30 pm
180 minutes
Sleeping.
Frustrated. I need to sleep. Be quiet baby.
Enter your times and information below:
1st cry
*Each tending period lasts approximately 10 minutes and starts and stops with a cry. Record the time of the first cry only.
Other Comments (continue on back if more space is needed):
NP 068_97_Basic/RV1_14.indd 2
1/8/14 3:28 PM
Basic Ready-or-Not Tot
®
Used to Teach Many Parenting Concepts:
• How to quiet and comfort a real baby.
• How a baby should be held and diapered
• A baby’s needs can be costly.
• What it takes to be a good parent.
• Babies cry for many reasons.
• Babies require constant care and attention.
• A baby means lifestyle changes that can cause loneliness, isolation, and affect friendships and
family relations.
• Day care and babysitting are a normal part of parenting, but not always available or affordable.
INTRODUCTION
Parenting is work! It requires a great deal of time and energy. The
demands of caring for a baby keep a parent on duty 24 hours a
day, seven days a week. Though the responsibilities of parenting
are great, there are many rewards as well. The Ready-or-Not Tot
®
Manikin is the first interactive parenting manikin to simulate both the
negative and positive aspects of caring for a baby!
Basic Ready-or-Not Tot
®
teaches students how demanding babies can
be throughout the day and night. The manikin cries at random intervals,
requiring action from the student parent in order to quiet the manikin.
This “baby” is an excellent replacement for the “egg baby,” “flour sack
baby,” and the “plant baby,” since it requires action during the middle of
the night. Simpler to use than the full-featured manikins, Basic Ready-or-Not
Tot
®
provides an easy method to give students the opportunity to experience
the ongoing demands of parenting.
Basic Ready-or-Not Tot
®
is also a great way to teach proper baby handling
and care. The manikin is 20" long and has newborn features. Students can
practice diapering, dressing, and holding a baby. It is important that you
thoroughly understand this instruction book before presenting Ready-or-Not
Tot
®
to your students. We recommend that the instructor practice with the
manikin to become familiar with its operations.
NOTE: The Ready-or-Not Tot
®
is an educational tool and not a toy. It is
intended for use by children over 12 years of age.
1
INSTRUCTION MANUAL
NP 068_97_Basic/RV1_14.indd 3
1/8/14 3:28 PM
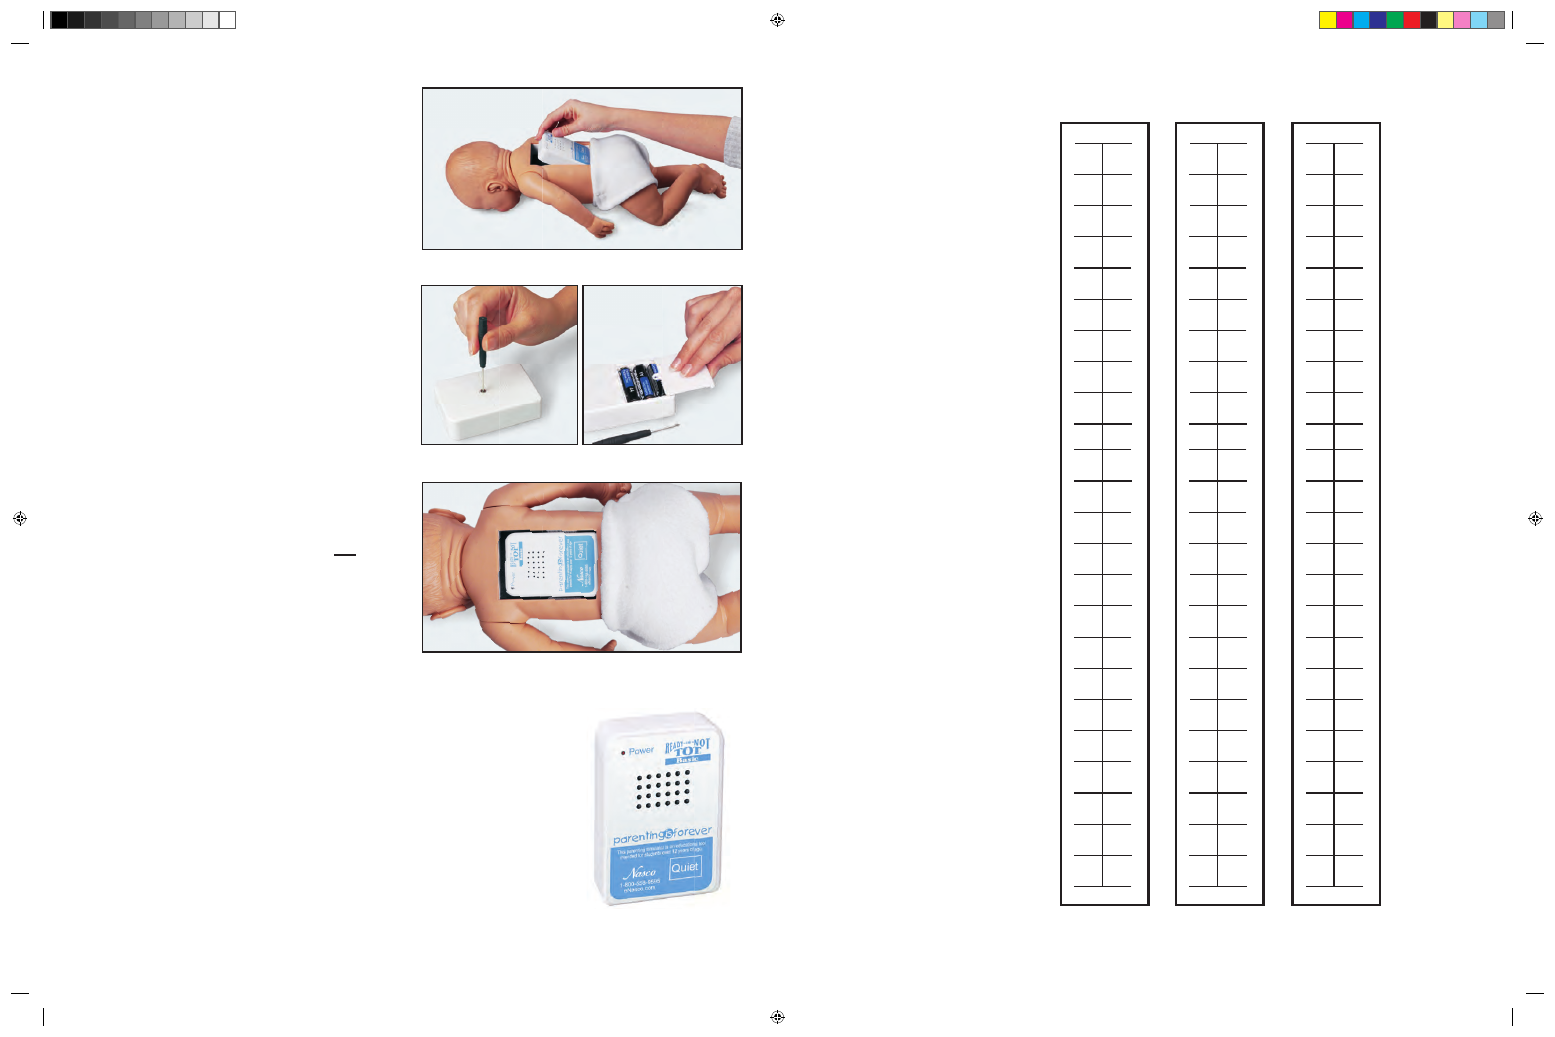
Figure 1
Figure 4
Figure 2
Figure 3
Figure 5
2
STUDENT RESPONSE SHEET
Ready
-or
-Not T
ot
®
requires tending and will cry at various intervals. When the manikin cries, pres
s
the “Quiet” button on the control box. The manikin will cry again in 10 minutes to simulate a short
“tending” or care time. P
ush the “Quiet” button again and the mankin will go to sleep.
To graph your time on the chart above, list the time that the manikin was turned on at the line marked
“Starting P
oint.” Then, chart the first cry in each tending cycle and write the time when the “Quiet”
button was pushed. Each line equals one hour
. Do not mark chart at the end of the tending cycle.
INSTRUCTIONS FOR RESPONDING TO BASIC READ
Y-OR-NOT TOT
®
Starting Point
Starting Point
Starting Point
Name _________________________
OPERATING
INSTRUCTIONS
Batteries
The control box is powered by three "AA" alkaline
batteries.
Be careful when replacing the batteries
to avoid damage to the control box. To insert the
batteries, remove the control box from the manikin
(Figure 1). With the control box removed, find the
battery compartment door located on the back of
the control box. Use a small screwdriver to remove
the back (Figure 2). Install batteries, making sure the
batteries are positioned correctly. Replace battery
door (Figure 3) and reinsert control box into the
manikin.
When inserting the control box into the
cavity in the back of the manikin, position the
box so it touches the bottom of the cavity
(Figure 4) — this will make it easier to remove the
box from the top when necessary. If the unit is not
going to be used for several days, the batteries
should be removed. Store the Ready-or-Not Tot
®
without the batteries inserted.
Turning the Manikin On
Once the batteries have been installed, the manikin
can be turned on. The on/off switch is hidden so
students cannot turn the manikin off.
Do not show
students the location of the on/off switch. The hidden
switch is designed to prevent students from shutting
down the unit instead of completing the project.
To turn the manikin on, press the spot on the box
marked “Nasco” and hold for two seconds (Figure 5).
The power light will blink red and the manikin will cry.
You will need to press the “quiet” button to stop the
crying. The manikin will cry again 10 minutes later
and you will need to press the “Quiet” button. To turn
off, simply press the “Nasco” spot and hold for two
to three seconds. When the power light is blinking,
the manikin is set and will cry for the first time in
each 10-minute tending period at approximately the
following times:
Cry 1:
70 minutes (first cry after manikin is turned on)
Cry 2:
230 minutes
Cry 3:
90 minutes
Cry 4:
140 minutes
The schedule then repeats at 230-minute, 90-minute, and 140-minute
intervals. There can be some flexibility in this schedule depending on when
the student responds to the cry. Remember, the first cry will happen before
you give the manikin to the student. The first time it cries for the student will
be 10 minutes from when you turn it on and it will only have that one cry in
the first tending period.
NP 068_97_Basic/RV1_14.indd 4
1/8/14 3:28 PM

3
6
Before Giving the Manikin to Student
Insert fresh or fully charged batteries in the control box.
NOTE: Even rechargeable batteries loose
their ability to hold a charge after awhile.
It is strongly recommended that high quality alkaline
batteries (or fully charged batteries, if using rechargeable batteries) are placed in the unit at
the beginning of every session. The battery life is dependent on how long the baby cries during
each session. This depends on the student’s attentiveness during the session. If a student puts
the baby in another room and doesn’t hear it cry for a period of time, the strength of the battery is
depleted, thus potentially ending the session.
Right before assigning the manikin to a student, turn the control box on and insert it in the body of
the manikin (see page 2 for complete instructions on how to turn the manikin on). Give the manikin
to the student and remind them to press the “Quiet” button when it cries and needs tending.
Special Suggestion: When using the manikin within the school day setting, be sure to inform other
faculty members about the Ready-or-Not Tot
®
before assigning it to students. Other faculty members
will be more cooperative if they are aware of the reasons for this educational activity, as well as the
manikin’s operations. These faculty members can be an important ally to the success of this activity!
Tending to the Manikin
When the manikin begins to cry, the student should press the “Quiet” button. The manikin will
immediately stop crying. After a 10-minute tending period, the manikin will start crying again. Pressing
the “Quiet” button will again stop the crying and put the manikin back to sleep. The next cry will occur
per the approximate scheduled times listed on page 2.
Cleaning the Manikin
Ready-or-Not Tot
®
is made of vinyl, which can be absorbent. It should not be set on printed materials
of any kind (newspapers, magazines, etc.), as the inks can permanently stain the manikin.
To keep the manikin as clean as possible, we recommend that it remain dressed at all times.
Newborn-size baby clothes and diapers will fit the manikin. Nasco does offer appropriate clothing
and specialized diapers for Ready-or-Not Tot
®
in the Family & Consumer Sciences catalog and on
their website at eNasco.com/fcs.
To clean most smudges, wash with a damp, soapy washcloth and rinse. DO NOT IMMERSE THE
MANIKIN IN WATER! When cleaning the manikin, be careful not to expose the control box to water.
Always remove the control box from the manikin before cleaning. For stubborn stains, Nasco
Cleaner (LF09919H) is recommended.
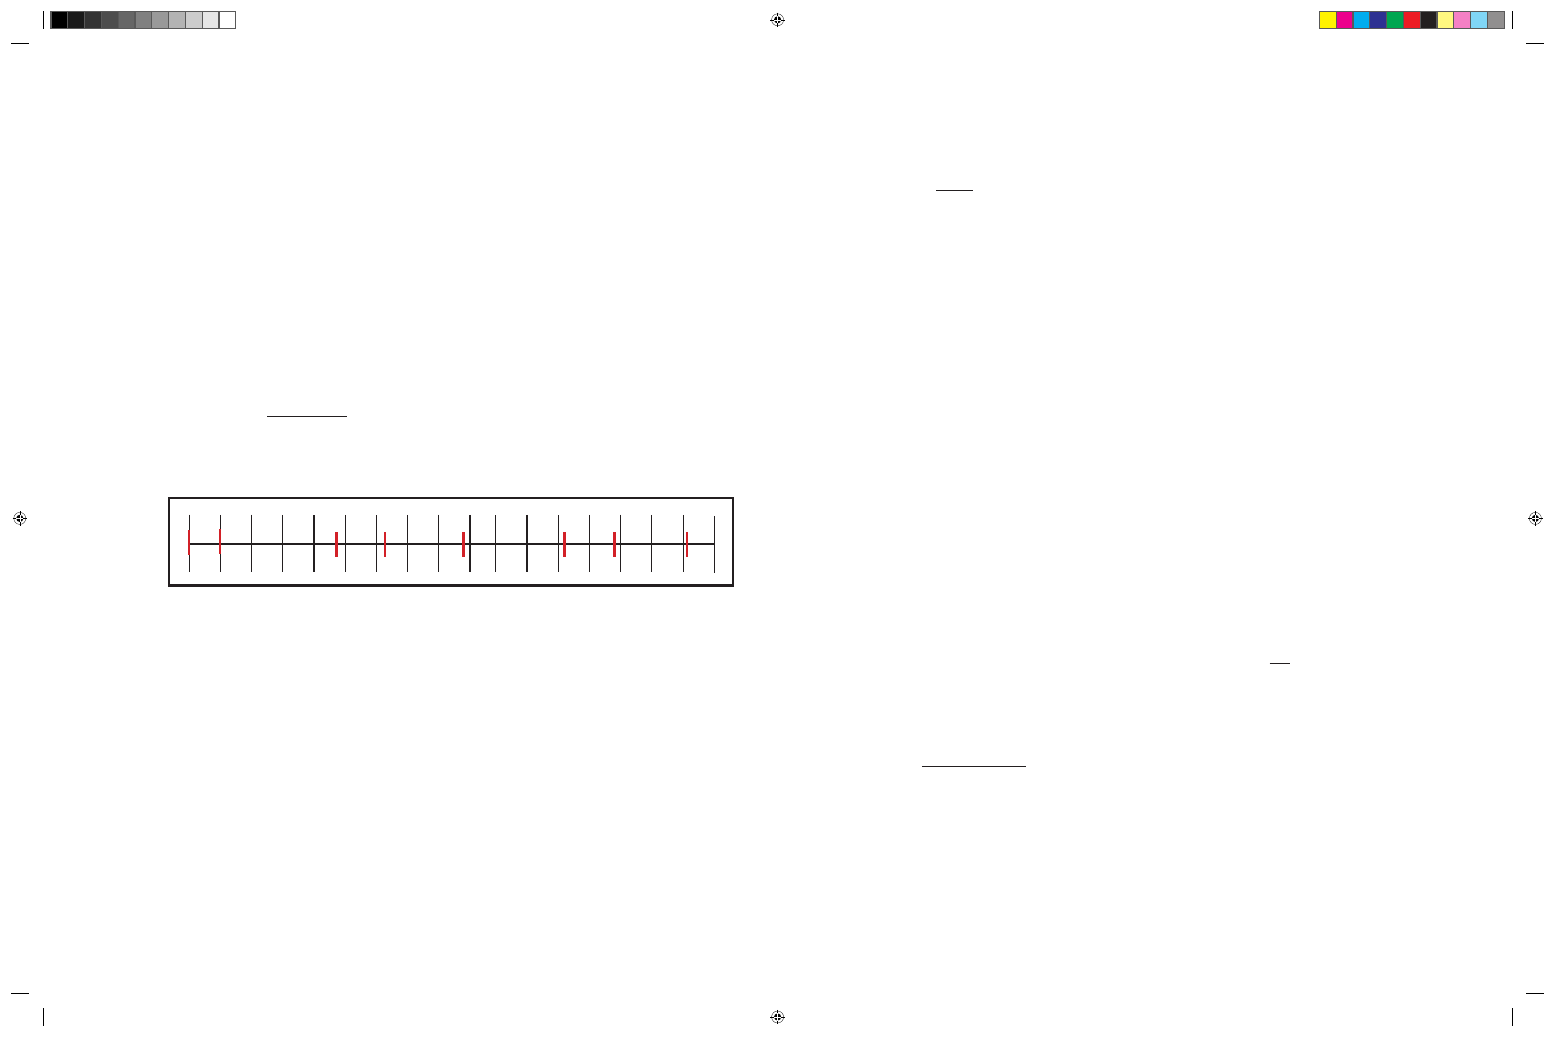
EXAMPLE: Student Response Sheet
Encourage students to indicate full hours on chart and record minutes between tending periods.
Intervals continue to repeat at approximately 225, 90, and 140 minutes. In the example below,
red
indicates student entries.
Starting P
oint
Turn manikin on
at 9:50 am. First
cry for student will
be at 10:00 am.
Record hours at
top and minutes
at bottom.
10
11
12
1
2
3
4
5
6
7 8
9
10
11 12
1
2
3
|- 60 -|------------ 230 -----------|--- 90 ----|------- 140 ------|--------- 230 ----------|--- 90 ----|------ 140 ------|
NP 068_97_Basic/RV1_14.indd 5
1/8/14 3:28 PM
Ready-Or-Not-Tot Basic • WA32125 • enasco.com/fcs
4
Ready-or-Not Tot
®
Parental Consent Form
Dear Parent(s)/Guardian(s):
In order to provide students with a realistic idea of the demands of parenting, your child,
____________________________, will be participating in a parenting simulation project as
part of our _____________________________ class. This project involves caring for our
lifelike, electronic, parenting manikin for a period of ______ day(s). The manikin cries
periodically throughout the day and night. Your child will be responsible for providing
proper care as if this were a real baby. The manikin should be with them at all times, except
in emergency situations, when a reliable babysitter can be utilized.
In order for this to be a positive learning experience for your child, we ask your support in
helping to monitor student participation while they are at home. Your insistence that they
alone care for their manikin will help to impress upon them the tremendous demands that a
baby places on a parent’s time, energy, and social life.
The Ready-or-Not Tot
®
is an educational tool and not a toy. It is intended for use by children
over 12 years of age.
We are fortunate to have been able to purchase these interactive parenting manikins. With
proper care, they should last many years. Your child will be responsible for any damage
that occurs as a result of abusive handling or for the loss of the manikin.
Thank you for your support during this valuable parenting simulation project. Please sign
the permission slip below and have your child return it to their teacher by
____/____/____. Please contact ___________________________ by phone (____-____-______)
or e-mail (____________________) if you have any questions or concerns.
✂
- - - - - - - - - - - - - - - - - - - - - - -
Ready-or-Not Tot
®
Permission Slip
I give my child, ______________________________, permission to participate in the
interactive parenting simulation using the Ready-or-Not Tot
®
. I understand that my
child is financially responsible for any damage due to abusive handling or for the
loss of the educational simulator.
__________________________________________ ____________________
Parent/Guardian Signature
Date
__________________________________________
Please Print Name Above
Warranty Information
Ready-or-Not Tot
®
comes with a 12-month limited
warranty. This product is warranted to be free from
any defect in materials and/or workmanship for
a period of 12 months from the date of original
purchase. This limited warranty covers the ability
of this product to function according to generally
accepted training requirements in effect at the time
of original purchase. This product will be repaired
or replaced free of charge if it fails in normal use
during the term of this limited warranty. This limited
warranty does not include accessories, stains,
cosmetic appearance, or normal replacement
of disposable items. This limited warranty does
not insure the physical appearance of your
product, and is void due to unauthorized design
modifications, improper usage, accident, or abuse.
To receive warranty service on your manikin,
contact your Ready-or-Not Tot
®
distributor for
additional information and return authorization.
NP 068_97_Basic/RV1_14.indd 6
1/8/14 3:28 PM
Ready-Or-Not-Tot Basic • WA32125 • enasco.com/fcs
3
6
Before Giving the Manikin to Student
Insert fresh or fully charged batteries in the control box.
NOTE: Even rechargeable batteries loose
their ability to hold a charge after awhile.
It is strongly recommended that high quality alkaline
batteries (or fully charged batteries, if using rechargeable batteries) are placed in the unit at
the beginning of every session. The battery life is dependent on how long the baby cries during
each session. This depends on the student’s attentiveness during the session. If a student puts
the baby in another room and doesn’t hear it cry for a period of time, the strength of the battery is
depleted, thus potentially ending the session.
Right before assigning the manikin to a student, turn the control box on and insert it in the body of
the manikin (see page 2 for complete instructions on how to turn the manikin on). Give the manikin
to the student and remind them to press the “Quiet” button when it cries and needs tending.
Special Suggestion: When using the manikin within the school day setting, be sure to inform other
faculty members about the Ready-or-Not Tot
®
before assigning it to students. Other faculty members
will be more cooperative if they are aware of the reasons for this educational activity, as well as the
manikin’s operations. These faculty members can be an important ally to the success of this activity!
Tending to the Manikin
When the manikin begins to cry, the student should press the “Quiet” button. The manikin will
immediately stop crying. After a 10-minute tending period, the manikin will start crying again. Pressing
the “Quiet” button will again stop the crying and put the manikin back to sleep. The next cry will occur
per the approximate scheduled times listed on page 2.
Cleaning the Manikin
Ready-or-Not Tot
®
is made of vinyl, which can be absorbent. It should not be set on printed materials
of any kind (newspapers, magazines, etc.), as the inks can permanently stain the manikin.
To keep the manikin as clean as possible, we recommend that it remain dressed at all times.
Newborn-size baby clothes and diapers will fit the manikin. Nasco does offer appropriate clothing
and specialized diapers for Ready-or-Not Tot
®
in the Family & Consumer Sciences catalog and on
their website at eNasco.com/fcs.
To clean most smudges, wash with a damp, soapy washcloth and rinse. DO NOT IMMERSE THE
MANIKIN IN WATER! When cleaning the manikin, be careful not to expose the control box to water.
Always remove the control box from the manikin before cleaning. For stubborn stains, Nasco
Cleaner (LF09919H) is recommended.
EXAMPLE: Student Response Sheet
Encourage students to indicate full hours on chart and record minutes between tending periods.
Intervals continue to repeat at approximately 225, 90, and 140 minutes. In the example below,
red
indicates student entries.
Starting P
oint
Turn manikin on
at 9:50 am. First
cry for student will
be at 10:00 am.
Record hours at
top and minutes
at bottom.
10
11
12
1
2
3
4
5
6
7 8
9
10
11 12
1
2
3
|- 60 -|------------ 230 -----------|--- 90 ----|------- 140 ------|--------- 230 ----------|--- 90 ----|------ 140 ------|
NP 068_97_Basic/RV1_14.indd 5
1/8/14 3:28 PM

Figure 1
Figure 4
Figure 2
Figure 3
Figure 5
2
STUDENT RESPONSE SHEET
Ready
-or
-Not T
ot
®
requires tending and will cry at various intervals. When the manikin cries, pres
s
the “Quiet” button on the control box. The manikin will cry again in 10 minutes to simulate a short
“tending” or care time. P
ush the “Quiet” button again and the mankin will go to sleep.
To graph your time on the chart above, list the time that the manikin was turned on at the line marked
“Starting P
oint.” Then, chart the first cry in each tending cycle and write the time when the “Quiet”
button was pushed. Each line equals one hour
. Do not mark chart at the end of the tending cycle.
INSTRUCTIONS FOR RESPONDING TO BASIC READ
Y-OR-NOT TOT
®
Starting Point
Starting Point
Starting Point
Name _________________________
OPERATING
INSTRUCTIONS
Batteries
The control box is powered by three "AA" alkaline
batteries.
Be careful when replacing the batteries
to avoid damage to the control box. To insert the
batteries, remove the control box from the manikin
(Figure 1). With the control box removed, find the
battery compartment door located on the back of
the control box. Use a small screwdriver to remove
the back (Figure 2). Install batteries, making sure the
batteries are positioned correctly. Replace battery
door (Figure 3) and reinsert control box into the
manikin.
When inserting the control box into the
cavity in the back of the manikin, position the
box so it touches the bottom of the cavity
(Figure 4) — this will make it easier to remove the
box from the top when necessary. If the unit is not
going to be used for several days, the batteries
should be removed. Store the Ready-or-Not Tot
®
without the batteries inserted.
Turning the Manikin On
Once the batteries have been installed, the manikin
can be turned on. The on/off switch is hidden so
students cannot turn the manikin off.
Do not show
students the location of the on/off switch. The hidden
switch is designed to prevent students from shutting
down the unit instead of completing the project.
To turn the manikin on, press the spot on the box
marked “Nasco” and hold for two seconds (Figure 5).
The power light will blink red and the manikin will cry.
You will need to press the “quiet” button to stop the
crying. The manikin will cry again 10 minutes later
and you will need to press the “Quiet” button. To turn
off, simply press the “Nasco” spot and hold for two
to three seconds. When the power light is blinking,
the manikin is set and will cry for the first time in
each 10-minute tending period at approximately the
following times:
Cry 1:
70 minutes (first cry after manikin is turned on)
Cry 2:
230 minutes
Cry 3:
90 minutes
Cry 4:
140 minutes
The schedule then repeats at 230-minute, 90-minute, and 140-minute
intervals. There can be some flexibility in this schedule depending on when
the student responds to the cry. Remember, the first cry will happen before
you give the manikin to the student. The first time it cries for the student will
be 10 minutes from when you turn it on and it will only have that one cry in
the first tending period.
NP 068_97_Basic/RV1_14.indd 4
1/8/14 3:28 PM

Parenting is Forever…
Having a baby and being a parent is a wonderful thing. We do not discourage
that. The issue is at what point in your life do you want to become a parent?
How would having a baby now affect your short and long term goals? How does
becoming a teen parent alter your opportunities for furthering your education
and fulfilling your career dreams? What about your social and emotional life?
Would the time commitment involved in caring for a child change your growth
and development as a person and affect your friendships? Do you want to be
connected to your current partner for the rest of your life? What does it cost to
care for a child during the first year? For 18 years? How would you support a
child? A parenting simulation raises all these questions and more.
No matter what the educational philosophy of your program (abstinence only
or educating teens to prepare for safe sex), the Nasco teen pregnancy simula-
tors will be of great assistance. These hands-on tools help teens experience the
frustration and appreciate the patience required when caring for an infant. What-
ever your budget, we offer a full range of simulators to help bring your program
to life.
Ready-or-Not Tot
®
Tending Log
Name _________________________________
Teacher _________________________________
Class _________________________________
Date __________________ Page _________
Time*
Time
between
Tending
What was I doing?
How was I feeling at the time?
2:30 pm
1st cry
Taking a math test.
I needed to concentrate on test.
6:30 pm
240 minutes
Just finished dinner.
I got out of dishes; it’s fun.
9:30 pm
180 minutes
Sleeping.
Frustrated. I need to sleep. Be quiet baby.
Enter your times and information below:
1st cry
*Each tending period lasts approximately 10 minutes and starts and stops with a cry. Record the time of the first cry only.
Other Comments (continue on back if more space is needed):
NP 068_97_Basic/RV1_14.indd 2
1/8/14 3:28 PM