Full Text Searchable PDF User Manual
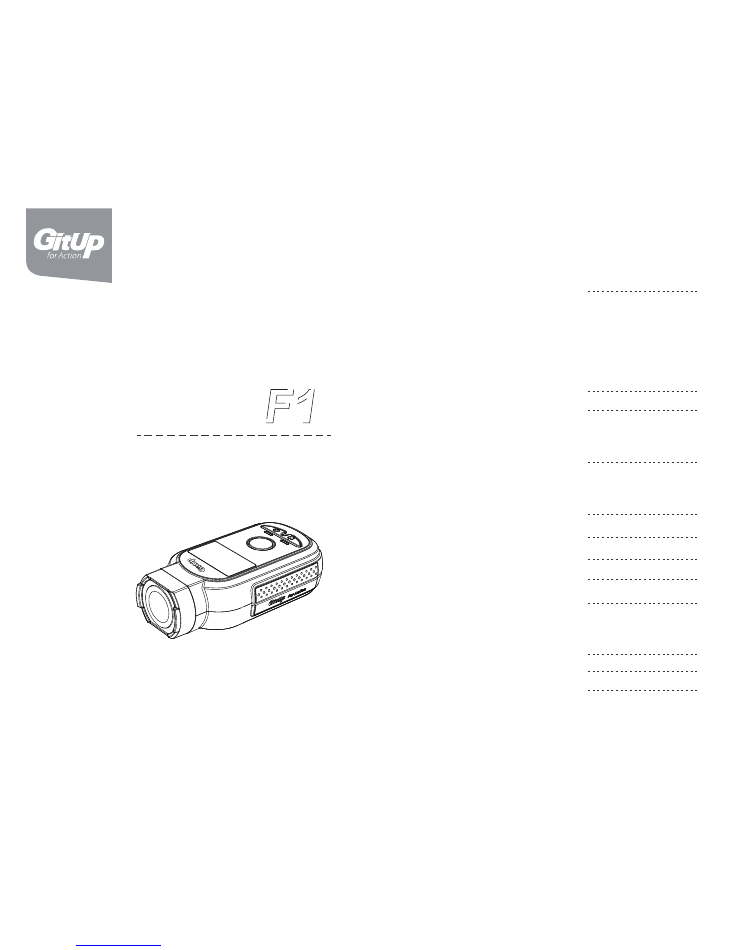
F1
User Manual
GitUp Ltd
Action Camera
Getting Started
Table of Contents
Camera Modes
Video Mode
Photo Mode
Setup Mode
Connecting to GitUp App
Transferring Files to a Computer
Playback on TV
Battery
Package Included
Optional Accessories
Customer Support
The Basics
Preparation
Powering On/Off
Camera Status Screen
Capturing Video
Video Settings
Charging the battery
Battery Storage and Handling
Capturing Photo
Photo Settings
1
4
5
9
12
14
14
15
16
17
17
18
1. Take the camera out of it’s package.
2. Insert a microSD card
(
microSD card is sold separately
)
with the
label facing the battery.
Note: To remove the card, press it into the slot with your fingernail and
it will pop out. The microSD card must have a Class-10 or UHS-I rating.
For 4K recording, we highly recommend UHS-3 rating card, better to
choose SanDisk, Transcend, Samsung brand card, the capacity is up to
128GB.
3. Charge the battery by connecting the camera to a computer or
other USB charging adapter using the included USB cable. Both LED
will be red during charging and turn blue when charging complete.
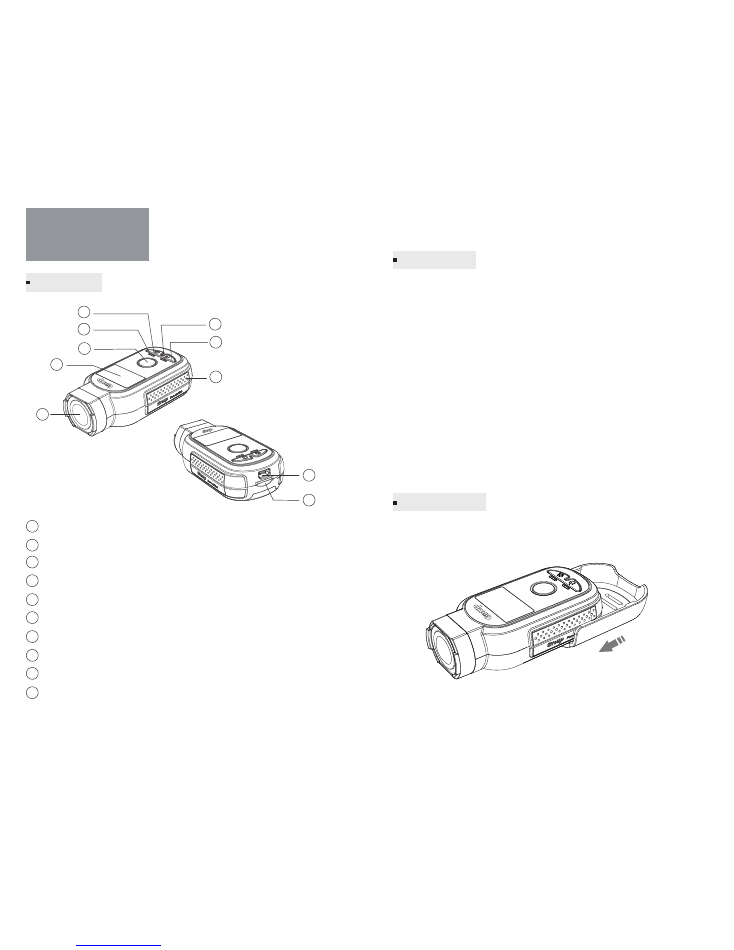
The mount is specialized for bike and motorcycle sports, also it
protects the camera. Follow the picture below to install the mount.
Getting Started
The Basics
Preparation
Using the Mount
4
2
5
6
3
8
1
10
9
7
4
2
5
6
3
8
1
10
9
7
Charger light ⁄ Mode light
Charger light ⁄ Wi-Fi Status Light
Power / Mode Button
Menu Button
Shutter / Select Button
OLED Screen
Lens
Cooling Hole
Micro USB Port (supports composite A / V cable)
MicroSD Card Slot (microSD Card not included)
-
1
-
-
2
-
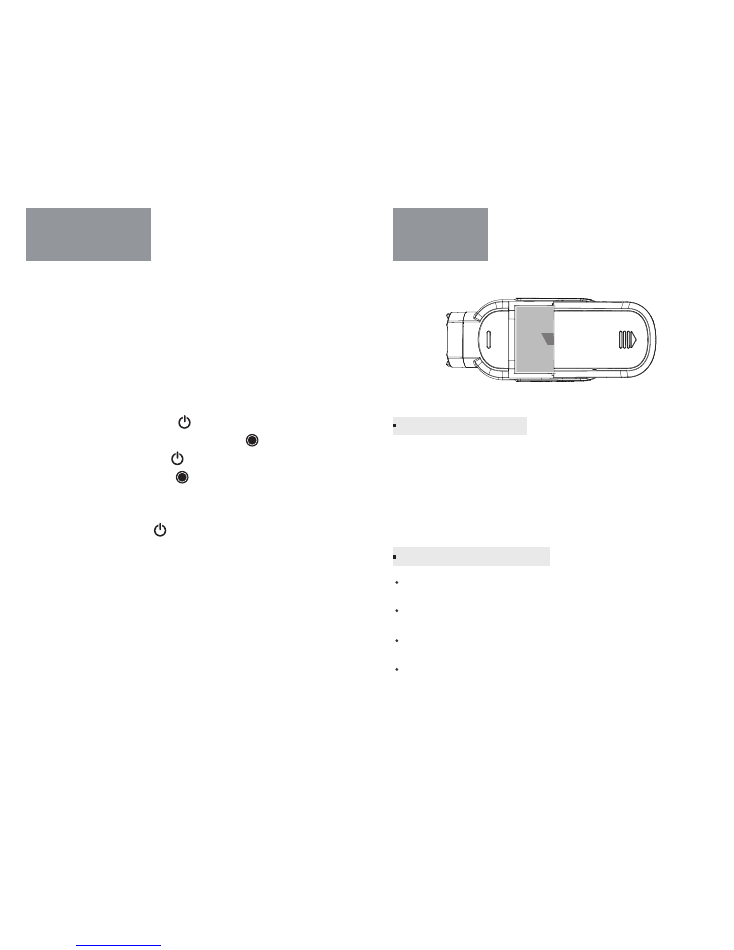
To Power On:
Press and hold the Power/Mode button [
] for four
seconds.
To Power Off:
Press and hold the Power/Mode button [ ] for three
seconds.
PRO TIP:
When the camera is off and Quik Rec is enabled, you can turn
the camera on and immediately begin capturing video or Time Lapse
photos just by pressing the Shutter/Select button [ ]. Press once for
video, press and hold for Time Lapse photos. Press again to stop
recording and power off the camera. For details, see Quik Rec in Setup
Mode.
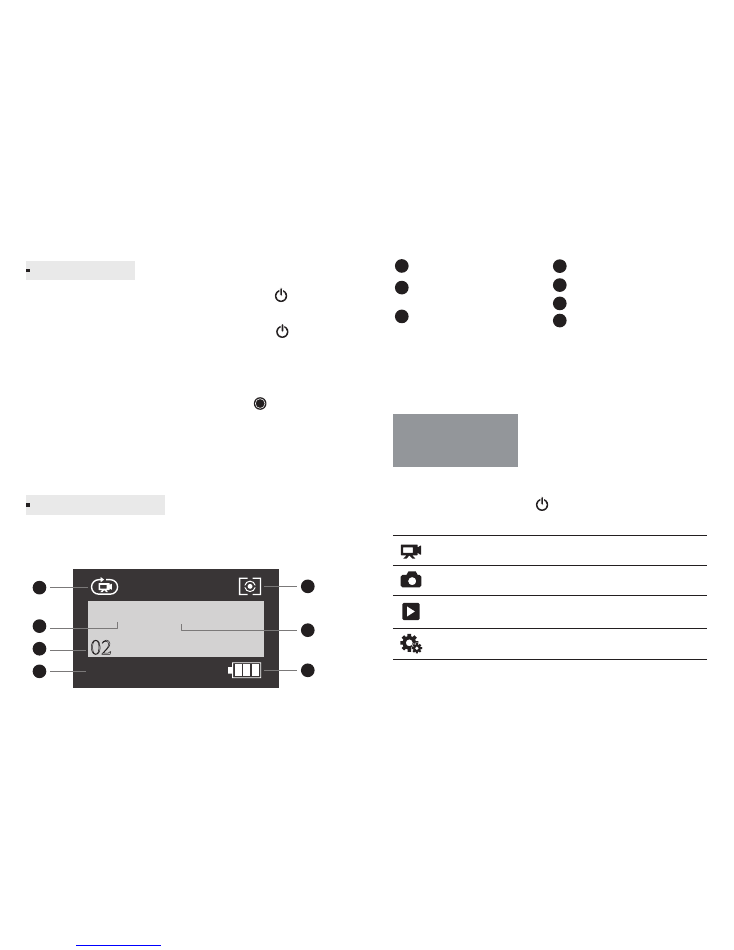
F1 features a status screen that displays the following information
about modes and settings:
Camera Modes
Resolution/fps
(frames per second)
Number of Files Captured
Note:
The icons that appear on the camera status screen vary by
mode.
Left recording time
Meter
Loop Recording Interval
Battery Life
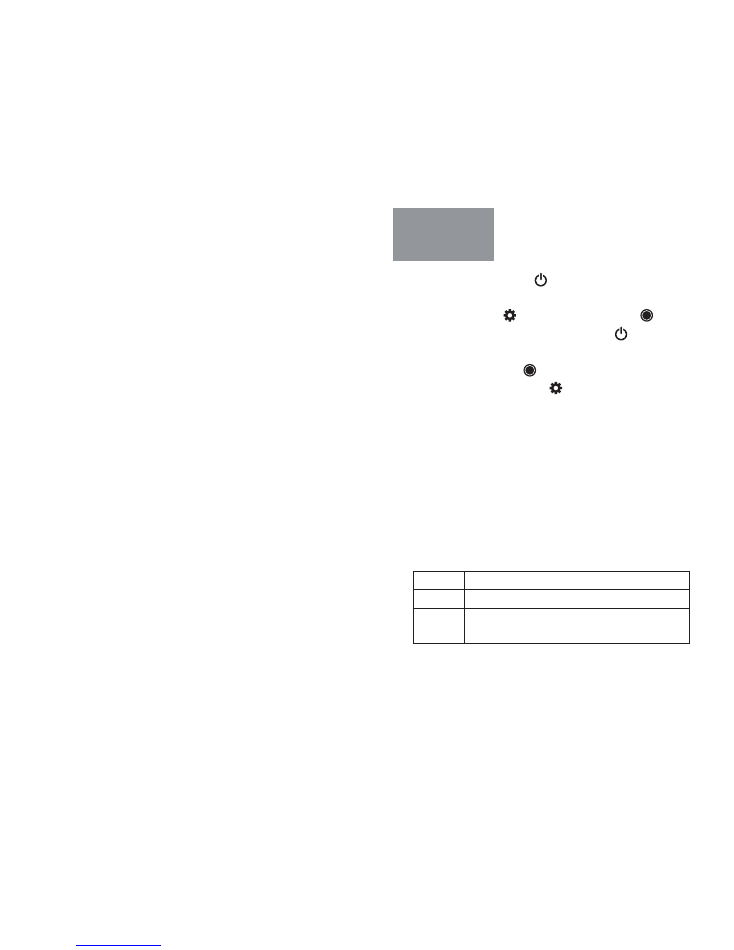
The F1 features several camera modes. To cycle through the modes,
press the Power/Mode button [ ] repeatedly.
Camera Modes
Powering On/Off
Camera Status Screen
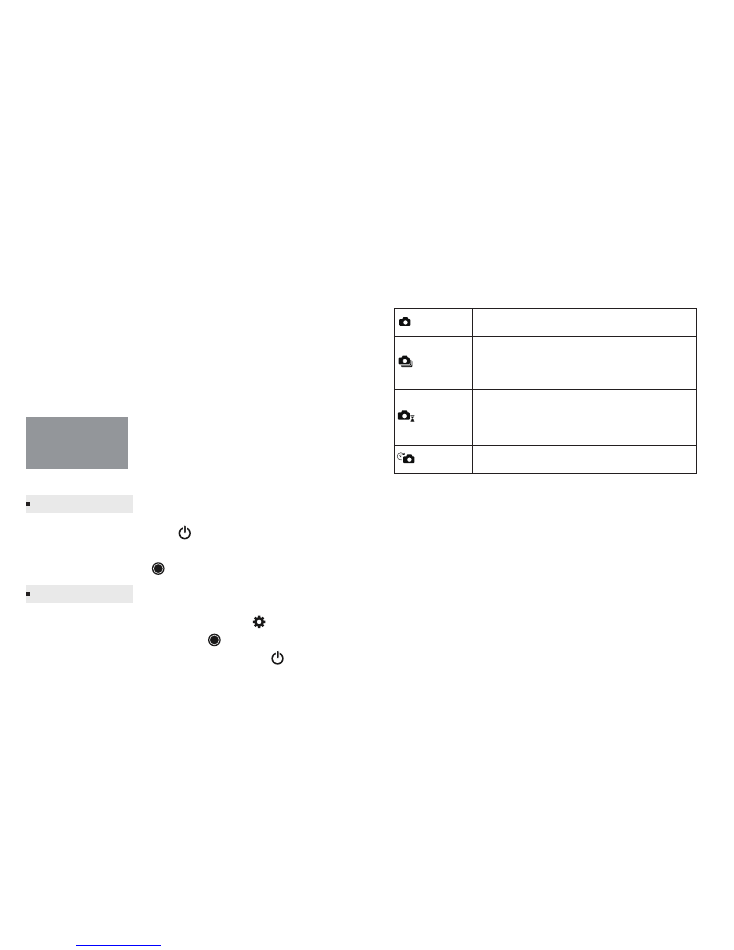
Record video or time lapse video.
Capture a single photo or a series of photos.
Playback videos and photos. (Playback mode
appears only if the camera is connected to a TV).
Adjust general camera settings.
Video
Photo
Playback
SetUp
4K 30
1min
02
1h:04
1
2
3
4
6
5
7
1
2
3
4
6
5
7
-
3
-
-
4
-
1. Press the Power/Mode button [ ] repeatedly until get to Video
mode.
2. Press the shutter button [ ] to start/stop recording.
When in the video mode, press the Menu button [ ] to enter video
setting. Press the Shutter/Select button [ ] to cycle through the
options within a setting. Use the Power/Mode button [ ] to cycle
through the settings.
Mode:
Video mode contains four capture modes: Looping, Normal,
Time Lapse, Slow motion and Vid+Photo. Each Video mode has its
own settings menu.
Note:
The video mode icon will appear in the upper left on your
camera status screen.
Res (Resolution):
Set the resolution of the video, resolution refers to
the number of horizontal lines in the video. The F1 includes the video
resolutions listed below:
Video Mode
Capturing Video
Video Settings
Normal
Captures video.
Creates video from frames
captured at specific intervals.
Creates Slow Motion video, only available
in 1080P@100fps, 1080P@120fps and 720P
@ 200fps, 720p@240fps mode.
Simultaneously captures both video and
photos.
Lets you continuously record and save
only the best moments, which helps to
conserve space on your microSD card.
Time Lapse
SLOMO
(Slow Motion)
Vid+Photo
Looping
-
5
-
-
6
-

Interval:
The Interval setting applies to Time Lapse Video, Video +
Photo and Looping.
Time Lapse Video: The intervals determines the amount of time that
passes between each captured frame.
Video + Photo: Simultaneously captures both video and photos. You
can set the camera to capture a photo at selected intervals while you
record. The intervals determines the time that passes between 2
photos captured during recording.
Looping: Lets you continuously record and save only the best
moments, which helps to conserve space on your microSD card. The
intervals determines the time length of each video segment. When the
microSD card is full, the previous video will be overwritten.
Video Resolution
4K
2160P
1440P
1080P
720P
FPS NTSC / PAL
30, 25
30, 25
60, 50, 30, 25
120, 100, 60,
50, 30, 25
240, 200
Screen Resolution
3840 x 2160, 16:9
2880 x 2160 4:3
1920 x 1440, 4:3
1920 x 1080, 16:9
1280 x 720, 16:9
Mode
Time Lapse
Vid+Photo
Looping
Available Interval
1s, 2s, 5s, 10s, 30s, 60s
5s, 10s, 30s, 60s
1 Min, 3Min, 5Min, Max
Rate (Only available in SLOMO):
Slow-motion effects are created by
recording hundreds of frames per second and then playing the same
frames back at a slower rate.
Quality:
Normal, Fine, Super Fine for different bitrate video
Stamp:
Add a date stamp to your video.
Zoom:
It zooms in on the center of the shot, good for capturing
content at a distance, change the zoom value according to the distance
between the camera and object.
Meter:
The metering mode refers to the way in which the camera
determines the exposure. Various metering modes (Average, Spot, and
Center) are provided for a variety of lighting conditions.
WB (White Balance):
White balance adjusts the overall color tone of
videos. The camera can automatically adjust the white balance, or you
can manually adjust the white balance.
Color:
Color allows you to adjust the color profile of your video footage.
Sharpness:
Sharpness controls the sharpness of your video footage.
You can use High option for an ultra-sharp look, the Medium option for
moderate sharpness, or the Low option for a softer look.
EV (Exposure value):
Exposure value affects the level of brightness of
your video. Adjusting this setting can improve image quality when
shooting in environments with contrasting lighting conditions.
compression.
-
7
-
-
8
-
Rate (only available in Bust mode):
Set the number of photos taken
every second, the available options are 3, 5, and 8 photos every
second.
Timer (only available in Timer mode):
Set the time of the timer, the
options are 3s, 5s, 10s and 15s.
Interval (only available in Time Lapse mode):
Time Lapse Photo lets
your camera take photos at set time intervals, creating a video with
stitched photos.
EIS (Electronic Image Stabilization):
EIS helps the footage stay clear
and stable in situations where the camera is subject to knocks and
bumps. The options for this setting are On and Off (Default).
Note: Only available in 1080P@ 60fps, 1080P@ 50fps, 1080P@ 30fps,
1080P@25fps.
Audio:
Turn On/Off the audio.
Calib(Calibration):
It applies software correction to the lens distortion
before it saves the footage file to the memory card.
1. Press the Power/Mode button [ ] repeatedly until you get to
photo mode.
2. Press the shutter button [ ] to take a photo.
Mode:
Photo mode contains four capture modes: Normal, Bust, Timer,
Time Lapse capture.
Note:
The Photo mode icon will appear in the upper left on your
camera status screen.
Photo Mode
Capturing Photo
Photo settings
Normal
Captures a single photo.
Captures a series of photos at specific intervals.
Enables you to take multiple images over a set
number of seconds. Perfect for capturing the
definitive moment in fast-action sports.
Press the Shutter/Select button, camera begins
count down andcapture a picture within setting
time.
Burst
Timer
Time Lapse
When in the photo mode, press the Menu button [ ] to enter photo
setting. Press the Shutter/Select button [ ] to cycle through the
options within a setting. Use the Power/Mode button [ ] to cycle
through the settings.
-
9
-
-
10
-
Quick Rec:
With Quick Recording, you can quickly turn your camera on
and begin capturing video or Time Lapse photos.
Wi-Fi:
Turns On / Off Wi-Fi.
Wi-Fi:
Set Wi-Fi working frequency. F1 spports 802.11a/b/g/n
2.4G/5GHz, which significantly improved anti-interference technology.
Bluetooth:
Turns On / Off bluetooth.
System:
Video format setting is mainly for watching the video on
TV/HDTV to control the video frame rate of the recording.
NTSC
Watch the video on the area of North America.
Watch the video on the PAL/HDTV (apply to the
most of TV except the area of North America).
PAL
Setting
Description
Res (Resolution):
The maximum photo resolution is 8MP.
Shutter (Shutter Speed):
Shutter speed lets you determine the
amount of time that the shutter is open. The default option is Auto
(Not support in burst mode).
Stamp:
Add a date stamp to your photo.
Zoom:
It zooms in on the center of the shot, good for capturing
content at a distance, change the zoom value according to the
distance between the camera and object.
Meter:
The metering mode refers to the way in which the camera
determines the exposure. Various metering modes are provided to
allow the user to select the most appropriate one for use in a variety of
lighting conditions.
WB (White Balance):
White balance adjusts the overall color tone of
photos. The camera can automatically adjust the white balance, or you
can manually adjust the white balance.
Color:
Color allows you to adjust the color profile of your photos.
ISO:
ISO Limit adjusts the camera’s sensitivity in low-light
environments, and creates a balance between brightness and resulting
image noise.
Sharpness:
Sharpness controls the sharpness of your photos. You can
use High option for an ultra-sharp look, the Medium option for
moderate sharpness, or the Low option for a softer look.
EV:
Exposure value (EV) affects the level of brightness of your photo.
Adjusting this setting can improve image quality when shooting in
environments with contrasting lighting conditions.
Calib(Calibration):
It applies software correction to the lens distortion
before it saves the image file to the memory card.
Press the Power/Mode Button [ ] repeatedly until the Setup screen
appears.
Press the Menu Button [ ] or Shutter/Select Button [ ] to enter
the Settings Menu. Use the Power/Mode Button [ ] to cycle
through the settings. To select an option, leave the option highlighted,
press Shutter/Select Button [ ] to open the setting menu. To exit
setting mode, press Menu Button [ ].
Setup Mode
-
11
-
-
12
-

The GitUp App lets you control your camera remotely using a
smartphone or tablet. Features include full camera control, live preview,
playback and sharing of content.
To connect your F1 to the GitUp App:
1. Download the GitUp App to your smartphone / tablet from the
Apple App Store or Google Play.
2. Follow the on-screen instructions to connect your camera to the App.
Note:
the Wi-Fi SSID is GitUp_F1_XXXXXX and the default password for
your camera is 1234567890.
To play back contents on your computer, copy the files to your
computer first.
Note:
Connect the camera to your computer using the USB cable. You
can also transfer files to a computer using a card reader (sold separately).
Connect the card reader to your computer and insert the microSD card
into the reader. You can then transfer files to your computer or delete
selected files on your card.
Def Mode(Default Mode):
You can select the default capture mode
that appears when the camera powers on. The options are Video and
Photo mode.
OSD:
The OSD (on-screen display) setting determine whether to display
camera settings when displaying on other screens. The options for this
setting are On (default) and Off.
LED:
Set the status of the LED. The options are On and Off.
Flip:
If you mount your camera upside down, you might have to rotate
the files during editing. This setting eliminates the need to flip your
video or photos after recording. The options for this setting are On and
Off (Default).
Beeps:
Turn On / Off the beeps.
Auto Off:
Your camera can be configured to automatically power off
after a specific period of time in which no videos or photos are captured
and no buttons are pressed, you can also configure the camera to never
automatically power off.
Time Setup:
Setup the camera date and time manually.
Date:
Select the date format.
Model Stamp:
Display the camera model on your video. The options for
this setting are On(default) and Off.
Ext Pwr:(External Power):
Set the camera to go to the charging
battery, power on or recording mode while the external charger
connected.
Frequency:
Set the camera’s frequency to match the electrical
frequency of your environment to reduce flicker.
Format:
Format the SD card.
Default Setting:
Reset camera to factory defaults.
Firmware Version:
Display the current camera firmware version.
Connecting to the
GitUp App
Transferring Files
to a Computer
-
13
-
-
14
-
Avoid exposing your camera and battery to very cold or very hot
temperatures.
Avoid dramatic changes in temperature or humidity when
using the camera
Do not dry the camera or battery with an external heat source such
as a microwave oven or hair dryer when camera get wet.
Do not store your battery with metal objects, such as coins, keys
or necklaces
Playing back videos and photos on your TV
/
HDTV requires a A/V out
cable
(sold separately).
To Play Back Content on a TV:
1. Plug the camera into a TV
/
HDTV with a A/V out cable,
composite
cable or combo cable.
2. Select the input on your TV that corresponds to the port into which
you plugged the cable.
3. Power on the camera.
4. Press the Power/Mode button [ ] to cycle to Playback.
mode, and then press the Shutter/Select button [ ] to enter it.
5. Use the Power/Mode button [ ] to navigate file.
6. Use the Shutter/Select button [ ] to select file.
7. Use the menu button to open the file setting. The options for this
setting are Video play on/all, Delete file, Return.
8. Use Power/Mode button [ ] to navigate backward and forward to
see more media files on your memory card.
Battery
Charging the battery
Playback on TV
Charging the battery by connecting the camera to a computer or
other USB charging adapter using the included USB cable. The camera
status light turns on during charging.
Note:
Using wall chargers marked: output 5V 1A. If you don’t know the
voltage and current of your charger, use the included USB cable to
charge the camera from your computer or a power bank.
Battery Storage and Handling
-
15
-
-
16
-
Package Included
Optional Accessories
Customer Support
FPV Cable
Battery
Mount
Action Camera F1
USB Data/Charging Cable
External Microphone
-
17
-
-
18
-