Full Text Searchable PDF User Manual
The
User Manual

INTRODUCTION
.
Thanks for purchasing your new ViDi! Are you ready for the adventures that await you?
From this moment onward your life will be filled with a lot more action.
Your ViDi action camera shoots in full HD 1080p with up to 12 megapixel image
resolution. It comes ready to rock n’ roll with a charged battery, pre-installed SD card,
and an extension pole for when things get crazy. Your ViDi has it all, but it’s small
enough that it won’t cramp your style. Take it everywhere to capture all the important
moments of your daily (and sometimes not so daily) life. Be sure to read this entire
manual carefully before using your ViDi, and keep the manual for future reference. Or
you can just take it out of the box, go outside, and figure it out along the way. Your call.
For additional questions, check out
www.vidicameras.com/faq
.

ANNOUNCEMENTS
.
Please read the announcements carefully before using your ViDi.
●
Avoid exposing your ViDi to direct sunlight or pointing its lens directly at the
sun. Doing so may damage the image sensor of the video camera.
●
Don’t allow any liquid or sand to come in contact with your ViDi camera
(unless it’s sealed in its waterproof case). Liquid, sand, salt, or dust may
cause damage the camera. In other words, keep it clean and dry.
●
Keep your ViDi in a cool, dry and well-ventilated place.
●
Use your ViDi regularly to extend the battery life.
●
If the lens on your ViDi gets dirty, use a soft, clean, and dry cloth (preferably
a microfiber lens cleaning cloth) to gently clean the lens. Excessive cleaning or
cloth that is dirty or rough may scratch the surface of the camera or its lens.
●
Do not touch the surface of the lens with your fingers.
●
When using your own SD card, be sure to backup the existing data on the SD
card before using it with your ViDi. After backing up your data, insert the SD
card and allow the camera to format the SD card for use.
●
Do not use near any heat sources such as radiators, heat registers, stoves, or
other apparatus (including amplifiers) that produce heat.

●
No open flame sources, such as candles, should be placed on or near your ViDi
camera.
●
Data from the SD card may be lost or damaged under the following
circumstances:
1.
Using the SD card for anything else besides storing data.
2.
The SD card is bent, dropped, hit or smashed in any way.
3.
It is exposure to high temperatures, moisture, or direct sunlight.
4.
Electrostatic or electromagnetic field exists around the SD card.
5.
Ejecting the SD card improperly or prematurely.
6.
Improper contact with the metal surface of the memory card with fingers
or other metal materials.
7.
The service life of the memory card expires (please replace the memory
card regularly).
●
Refer all servicing to qualified service personnel. Servicing is required when
the ViDi has been damaged in any way (i.e. liquid spilling on the camera,
exposure to rain or moisture, or if you drop the camera). For service call ViDi
Customer Service for assistance (801)653-0740.

PRODUCT INTRODUCTION
.
●
The high-performance chip in your ViDi provides high definition video, low
light illumination, and compressed video files.
●
Video supports true HD (1920 X 1080), HD (1280 x 720), WVGA, and VGA
(640 x 480) modes.
●
Still picture resolution up to 12 Megapixels.
●
Supports high-speed USB 2.0.
●
Maximum memory card capacity is 64GB.
●
Dash cam mode allows you to continuously record footage, auto split the
video into 3, 5, or 10 minute segments, and automatically delete the oldest
video file once storage capacity has been reached.

SYSTEM REQUIREMENTS
.
Operating System:
iOS, Microsoft Windows 2000, XP, Vista, 7, 10.
CPU:
Intel Pentium III with more than 800MHz OR a CPU with equivalent performance.
Internal Memory:
Larger than 512MB.
Sound Card and Display Card:
The sound card and display card supports DirectX8 or
higher version.
Hard Disk:
More than 500MB of free space
USB Interface:
High-speed USB 2.0 interface

INTRODUCTION TO APPEARANCE & KEYPAD
.
Usage
1. Charge the Built-In Lithium Battery
Connect your ViDi to your computer or USB plug. The charging indicator light will turn
on. Once you disconnect the camera the light will turn off. Your ViDi will fully charge
after 2-4 hours.
2. Use of Memory Card
2.1 Find the memory card slot and insert the microSD card prongs down & metal facing
forward, according to the concave picture. Push the microSD card into the card slot
until it is completely inserted and you hear a click.
2.2 To take out the microSD card, gently press the end of the memory card inward until
it clicks. It will pop up enough for you to be able to take it the rest of the way out.
Note: No built-in memory is available in this video camera. Make sure to
insert memory card before using. If you do not have a memory card, the
camera will not be able to record video or photos.
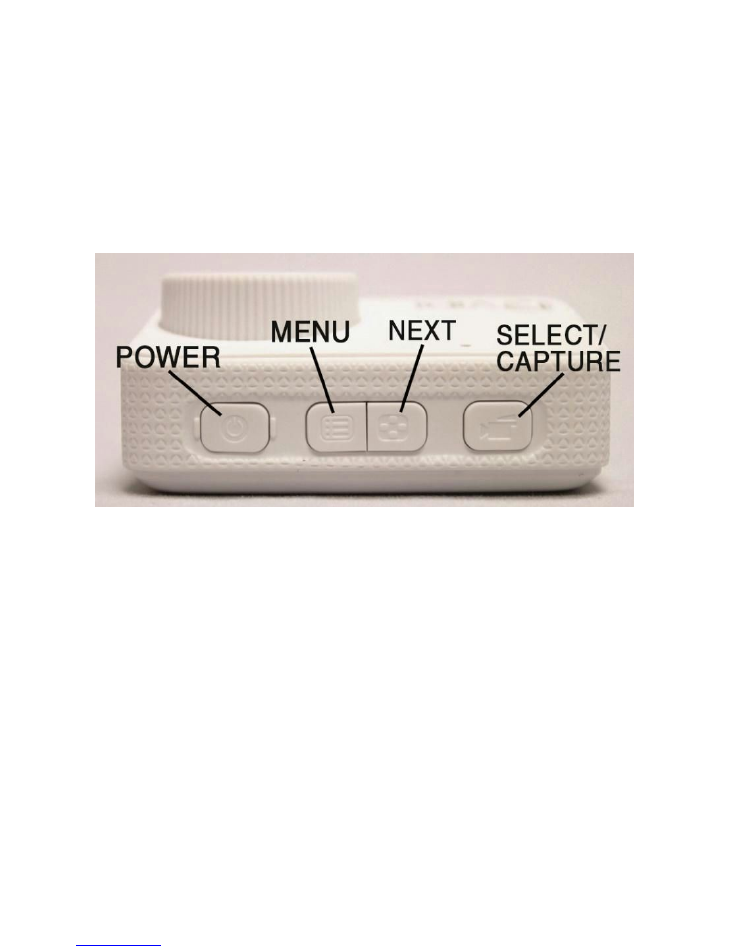
3. Startup/Shutdown
3.1
Startup
: Press and hold the POWER Key for 3 second. The screen is displayed and
the camera enters the startup state.
3.2
Shutdown
: Press and Hold the POWER Key for 3 seconds. The camera will begin to
shut down.
Automatic shutdown
: when the idle time of the video camera reaches the time for
automatic shutdown, it will be shut down automatically to save power. The default
time of this camera for automatic shutdown is 2 minutes.
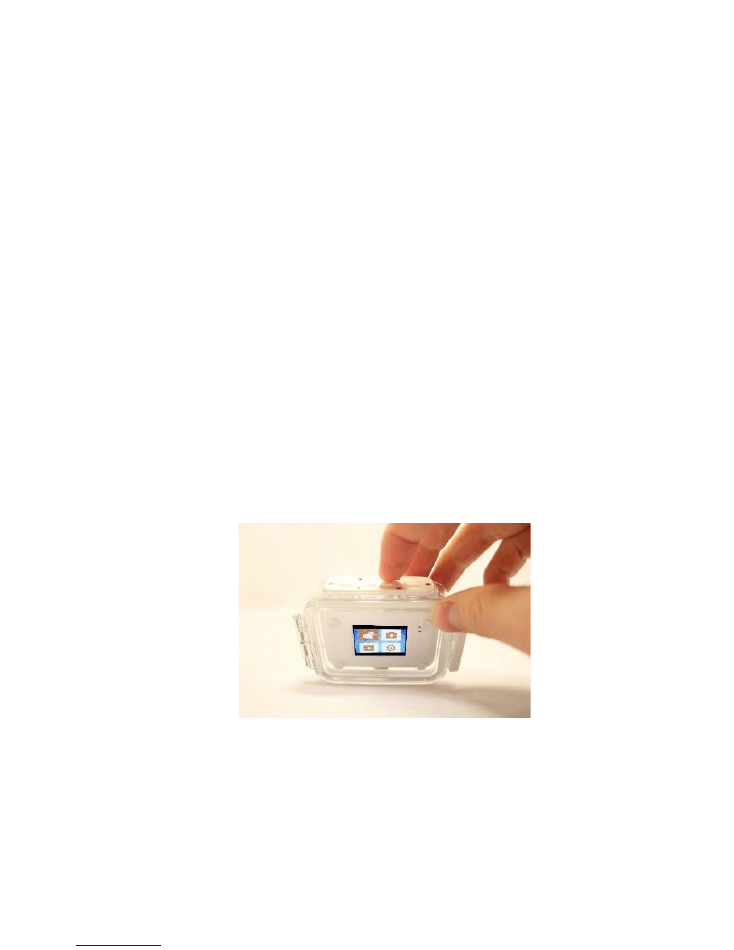
3.3
Shutdown in case of power shortage
: when the power of the battery is
insufficient, the LCD display screen will display the icon. When the icon begins to
flash, the video camera will be shut down automatically.
4. Switching Between Function Modes
Two main recording modes are available for this video camera (i.e. video recording
mode & picture taking mode). Switching between the two modes is easily done in a
few steps.
1.
Startup Your ViDi.
2.
Press the MENU button and the menu will appear.
3.
Press the NEXT button to highlight the proper mode or setting.
4.
Press the SELECT button to select the highlighted mode or setting.
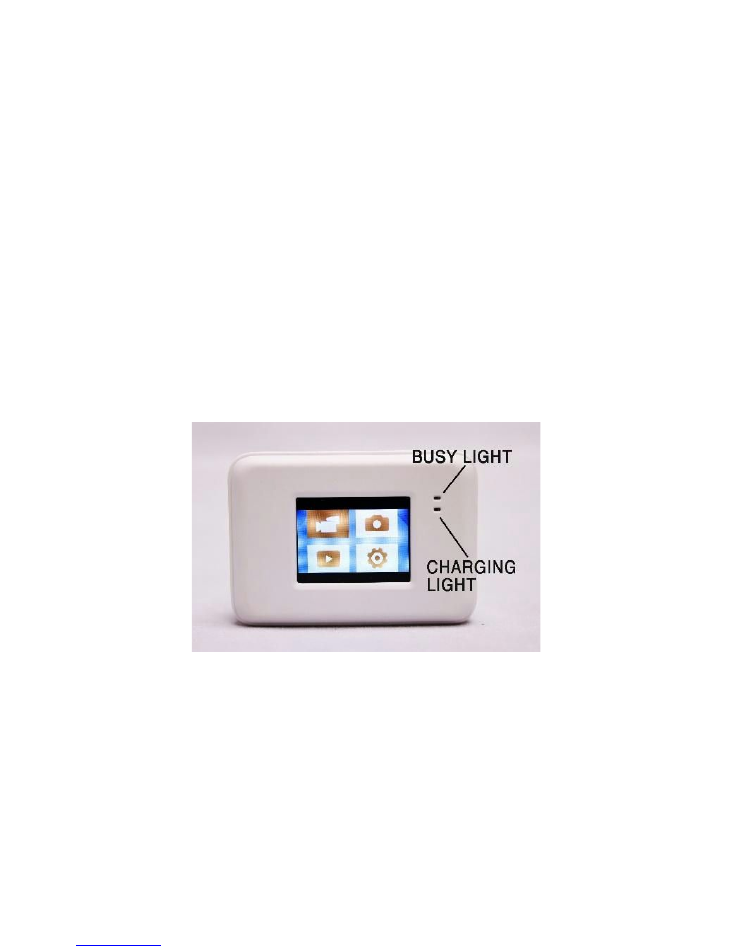
5. Indicator Light
On light:
The busy light will flash three times when you startup your ViDi and twice
when you shut down your ViDi.
Busy light:
●
Video mode: The busy light will flash while in use.
●
Picture mode: The busy light will flash three times after a picture is taken.
Charging light:
The lower green light indicates that the camera is charging.
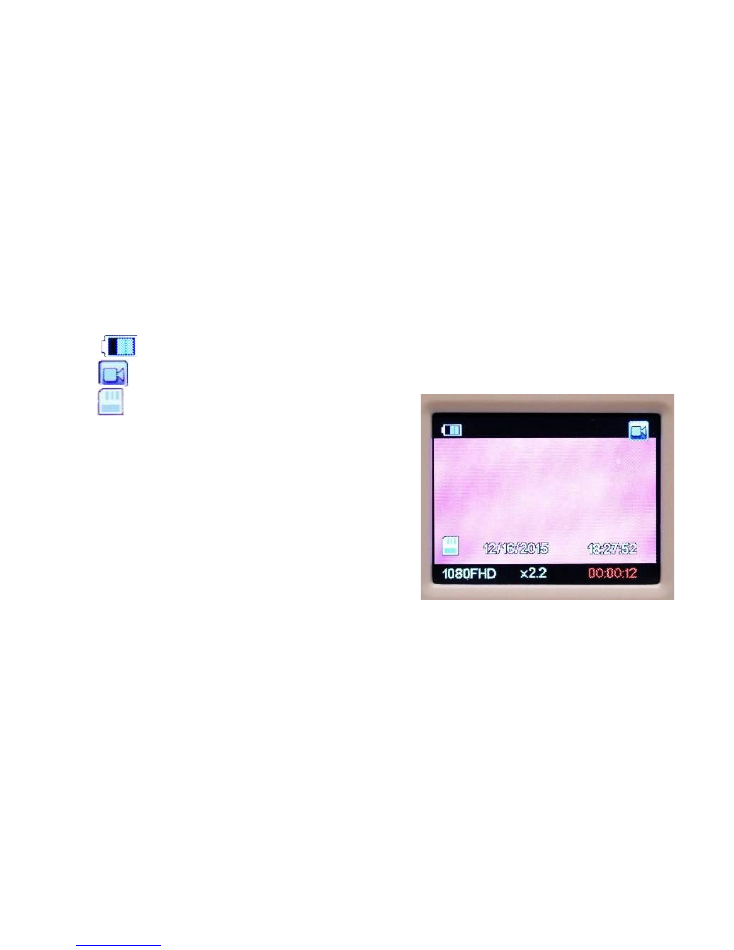
6. Video Recording Mode
While in video mode, press the CAPTURE button once to start recording. Press the
CAPTURE button once again to stop recording. The camera will also stop recording
automatically when the memory card is full or when the power is insufficient.
1
: Current power level of the battery
2 : Mode icon indicating the camera is in record mode
3 : Memory card is inserted
4
12/16/2015
: Current date
5
18:27:52
: Available recording space
remaining on your SD card
6
1080FHD:
Indicates recording resolution
7
x2.2:
Current digital zoom
8
00:00:12:
Length of your current video
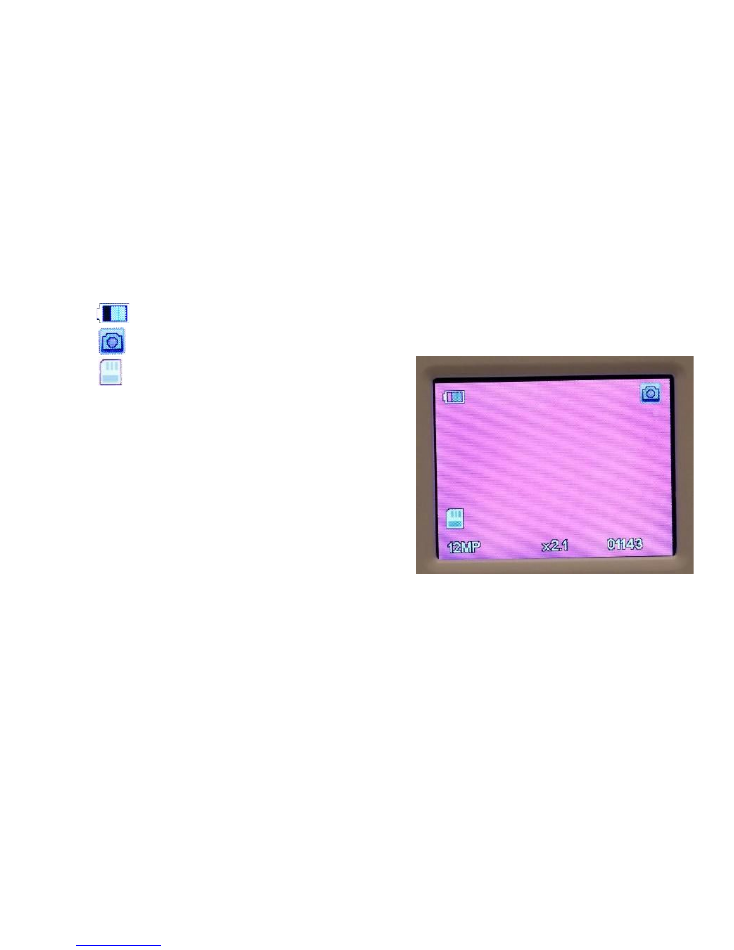
7. Photo Mode:
While in picture mode, press the CAPTURE button once to take a picture.
1 : Current power level of the battery
2 : Indicates the camera is in picture mode
3 : Indicates the memory is inserted
4
12MP:
Current photo resolution
5
x2.1:
Current digital zoom
6
01143:
Number of photos left before the
memory card is full

8. Playback Mode:
8.1 Startup your ViDi, press the MENU button, then select the playback icon
in
the lower left corner of the menu screen and press the SELECT button to enter
playback mode. Videos will automatically begin playing. To move to the next video,
press the NEXT button. To return to a previous video, long press the MENU button
and select “Previous”.
8.2 File deletion:
While viewing the file in question, press the MENU button to activate the submenu and
select the “Delete Current” or “Delete All”. Your ViDi will ask you to confirm the deletion.
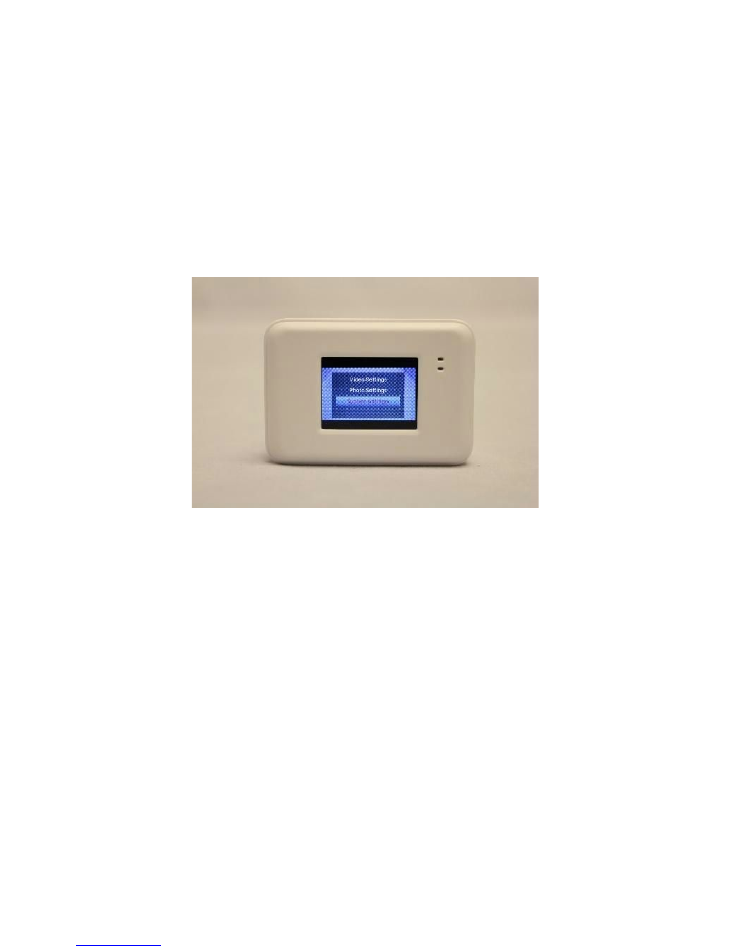
9. Settings Menu:
9.1 Video Settings
The Video Settings Menu will allow you to make adjustments to how your videos will be
recorded and saved. This is where you will adjust resolution, set to dash cam mode, set a
time-lapse recording, turn on and off HDR, and to adjust exposure, the recording of
audio, and manage the date and time stamp for your videos.

9.2 Photo Settings
The Photo Settings Menu will allow you to make adjustments to how your still photos will
be recorded and saved. This is where you will set a delay timer, adjust the resolution,
adjust burst mode, image sharpness, white balance, color, ISO, exposure, anti-shaking,
and quick review.
9.3 System Settings
The System Settings Menu is for general camera settings. This menu allows you to access
date and time adjustment, change the auto power-off setting, adjust the system’s
language, screen saver settings, adjust the frequency from 50-60hz, turn on the date
stamp for the camera, reformat the camera, return the camera to default settings, and
view the camera version.

INTERFACE WITH THE PERSONAL COMPUTER
.
Startup your ViDi, then connect the USB cable to the camera and to the computer. The
computer should recognize the device as a removable disk.
An icon of a removable disk will appear on the window of “My Computer” or “This PC”.
Photos/videos you have taken are saved in folder CARDV.

TECHNICAL PARAMETERS
.
Image sensor:
2 million pixels (CMOS)
Function mode:
Record mode, Picture mode, Playback mode
Camera lens:
140 degrees ultra wide angle
Digital zooming:
4 times
Shutter:
Electronic shutter
LCD display screen:
1.5-inch screen
Image resolution:
12 megapixels
Video resolution:
1080P HD (30 frames per second)
White balance:
Automatic
Exposure:
Automatic
File formats:
Image – JPEG, Video – MP4
Storage medium:
TF card (Supporting up to 64GB), (without built-in flash memory)
USB interface:
High-speed USB 2.0 interface
Power Supply:
Built-in 3.7V rechargeable lithium
Dimension (length × width × height):
67*40*30mm
Weight:
Approximately 57 grams

PRODUCT SAFETY
.
When used in the directed manner, this unit has been designed and manufactured to
ensure your personal safety. However, improper use can result in potential electrical
shock or fire hazards. Please read all safety and operating instructions carefully before
installation and use, and retain these instructions for future reference.
CAUTION: To prevent the risk of electric shock, do not remove cover or disassemble.
There are no user-serviceable parts inside. Refer servicing to qualified service personnel.
CAUTION: To prevent electric shock do not use polarized plugs with an extension cord,
receptacle or other outlet, unless the blades can be fully inserted to prevent blade
exposure.
WARNING: To reduce the risk of fire or electric shock, do not expose this appliance to
rain or moisture.
WARNING: Do not drop, disassemble, open, crush, bend, deform, puncture, shred,
microwave, incinerate or paint the camera. Do not insert foreign objects into the battery
opening on the camera. Do not use the camera or the battery if it has been
damaged—for example, if cracked, punctured or harmed by water. Disassembling or
puncturing the battery can cause an explosion or fire.

WARNING: Always secure the camera in its housing when using the camera in or around
water. Do not get the camera or the battery wet.
WARNING: If using your camera with a ViDi mount or strap intended for use with a
helmet, always select a helmet that meets the applicable safety standard. Choose the
right helmet for your particular sport or activity and make sure it is the right fit and size
for you. Inspect your helmet to ensure it is in good condition and follow the helmet
manufacturer’s instructions on safe helmet use. Any helmet that has sustained a major
impact should be replaced. No helmet can protect against injury in every accident.
For any other questions, please reach out to
support@vidicameras.com
.
Show us how you ViDi