Full Text Searchable PDF User Manual
Start
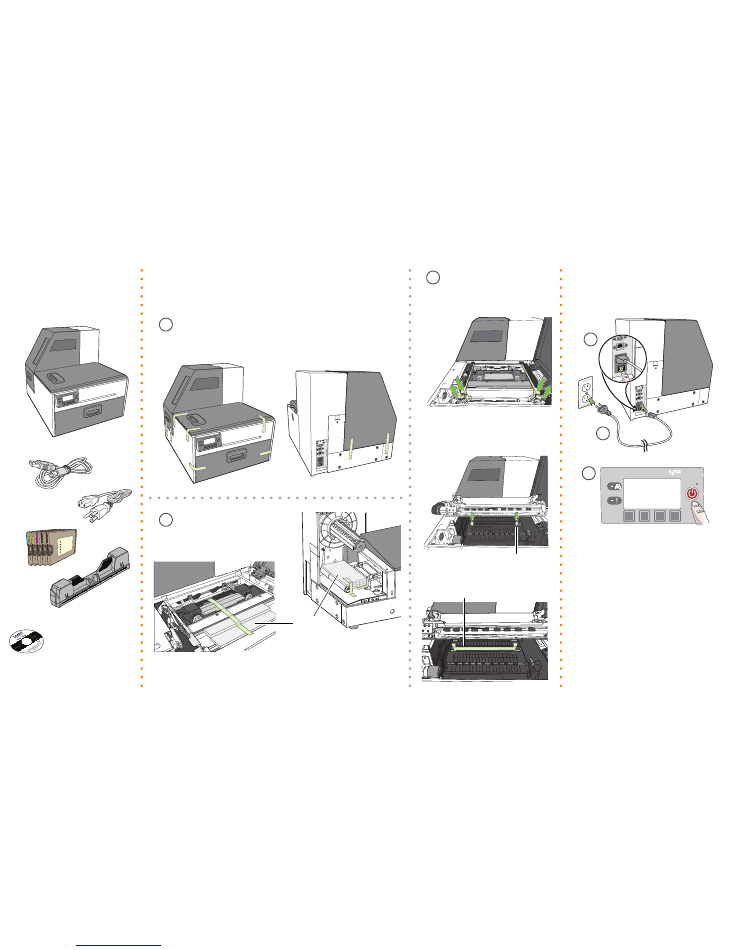
1
Remove tape and packing materials
Remove tapes
foam
Remove tapes and foam
Remove cardboard
2
Connect power
squeeze latches to open clamshell
pull tabs
cardboard
b
c
a
b
c
a
NOTE:
Please ask your
reseller for the printer
driver software.
Y
C
K
M
K
Y
K
M
K
C
M
K
K
C
M
K
K
C
Y
Y
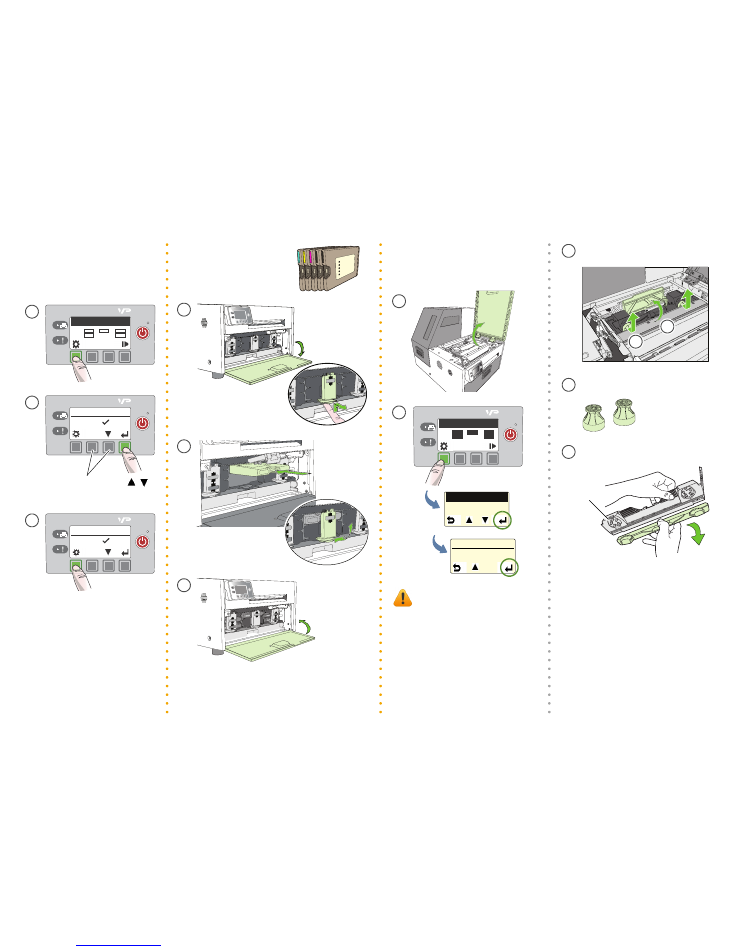
3
Install ink cartridges
4
Install printhead
C
K2
M
K1
Y
Missing Printhead
CONFIGURATION
3. PRINTHEAD
PRINTHEAD
2. REPLACE
Open printhead latch fully
Remove caps
M
K
K
C
Y
M
K
K
C
Y
NOTE:
Keep the orange cover. You will
need it to cap the printhead if it is
removed from the printer.
Remove printhead from packaging
C
K2
M
K1
Y
Missing Printhead
Choose display language
LANGUAGE
1. English
For other languages, press
,
LANGUAGE
1. English
Wait for printhead latch to be
released.
(Select)
(Config)
ink couplings
(Return)
a
b
c
a
b
c
a
b
c
d
e
d
c
After connecting power for the first
time, press Config to set the display
language for the control panel.
electrical contacts
nozzles
Check that ink is flowing through the
tubes on both sides of the printhead.
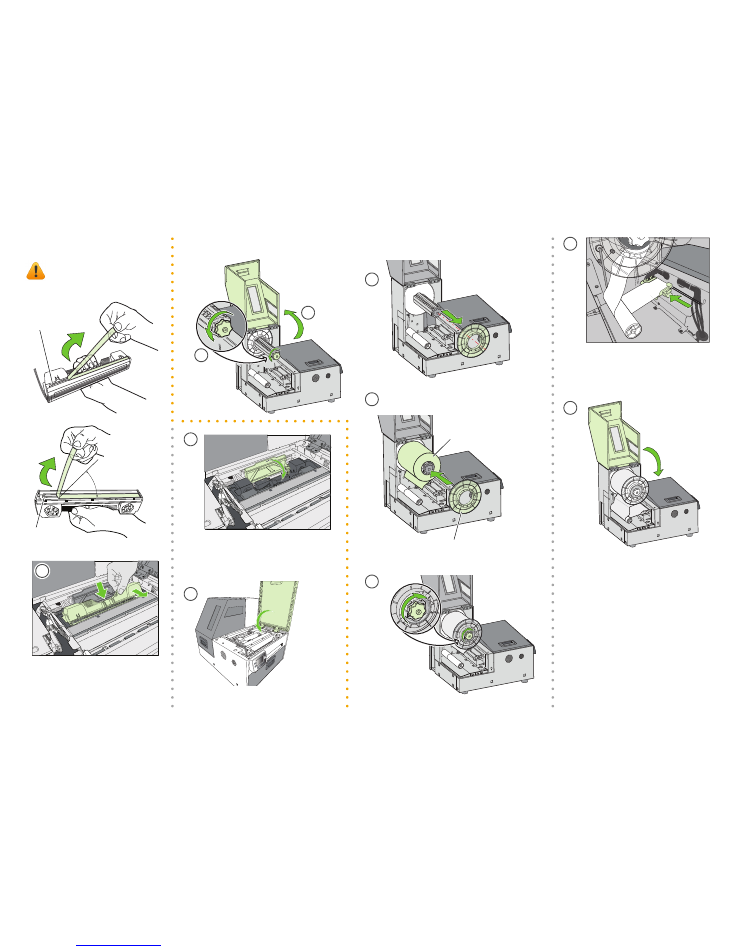
Tighten knob fully
Insert media till it stops.
Wait for printer to load media.
Push media roll against
inner guide.
Flat side against media roll
Do not touch the ink couplings,
electrical contacts, or nozzles.
No less than 45°
5
Load media
f
c
g
h
a
b
d
e
f
g
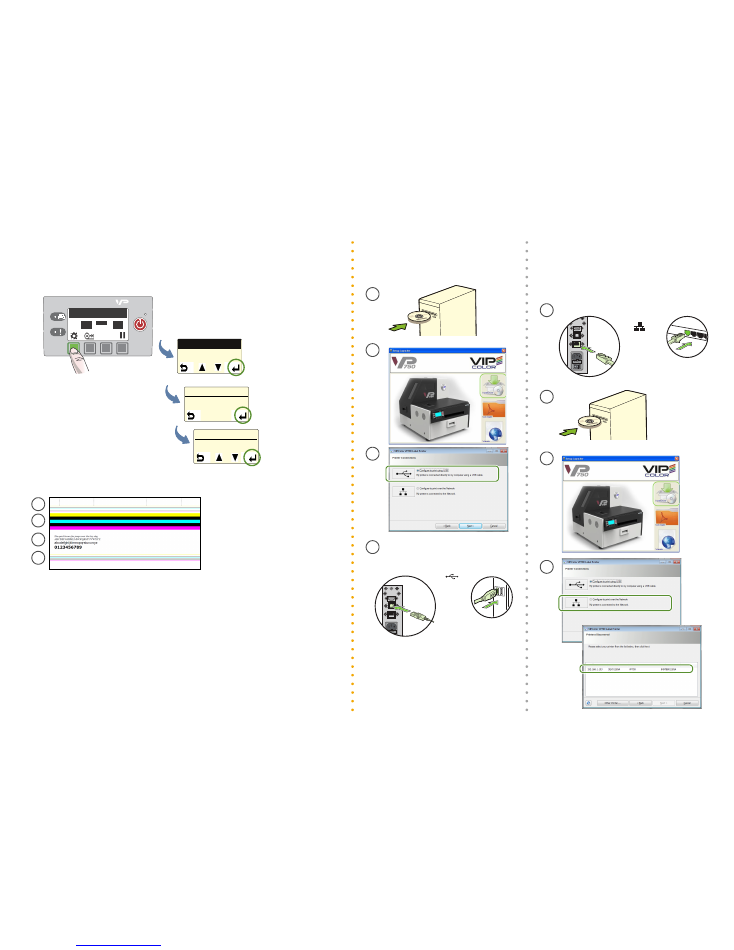
To connect printer to computer
To connect printer to network
VP7xx
Computer
USB
VP7xx
Network
Network
7
Install printer driver
Connect USB cable when prompted
C
K2
M
K1
Y
Printer Online
CONFIGURATION
2. MAINTENANCE
MAINTENANCE
1. PRINT TEST PAGE
PRINT TEST PAGE
2. PQ PLOT
(Config)
(Select)
Load 4” x 4” or larger labels (with inter‐label gap or continuous). If using
continuous stock, set Media Layout to Continuous in the EWS Diagnostics page.
6
Print test label
Sample PQ plot
d
c
b
a
d
c
b
a
Verify the following on the PQ plot:
• Lines are printed in the order yellow, black, cyan, black and magenta.
• Lines are clearly defined with no white dots or streaks.
• Vertical dashed lines are straight.
• Bars are printed in the order yellow, black, cyan, black and magenta.
• Bars are clearly defined with no white dots or streaks.
• No color mixing in the bars.
• Text is sharp, crisp, and legible.
• Lines are printed in the order yellow, black, cyan, black and magenta.
• Lines are clearly defined with no white dots or streaks.
1
2
3
4
DHCP is enabled by default. If it is not available,
see “Additional Networking Information”.
1
2
3
4