Full Text Searchable PDF User Manual

-1-
Contents
Caution ...................................................................................... 2
Safety Information ...................................................................... 3
Antenna connection
.................................................................... 5
ON-OFF Power .......................................................................... 5
Multimedia Terminal Connection .................................................. 6
Front View ................................................................................. 8
....................................................................9
The Remote Control
Menu Operation ........................................................................ 11
.......................................................................
Media Operation
14
Specifications ........................................................................... 16
Simple Troubleshooting ............................................................. 17

-2-
Caution
The
flash with
the
arrowhead symbol,
inside
an equilateral triangle is intended to alert
lightning
the user of the presence of un-insulated Јdangerous voltage within the product
’
s enclosure
that may be of sufficient magnitude to constitute a risk of
shock to the
user
.
electric
The exclamation
mark
inside
an equilateral triangle is
to alert the user of the presence
intended
of important operating and maintenance (servicing) instructions.
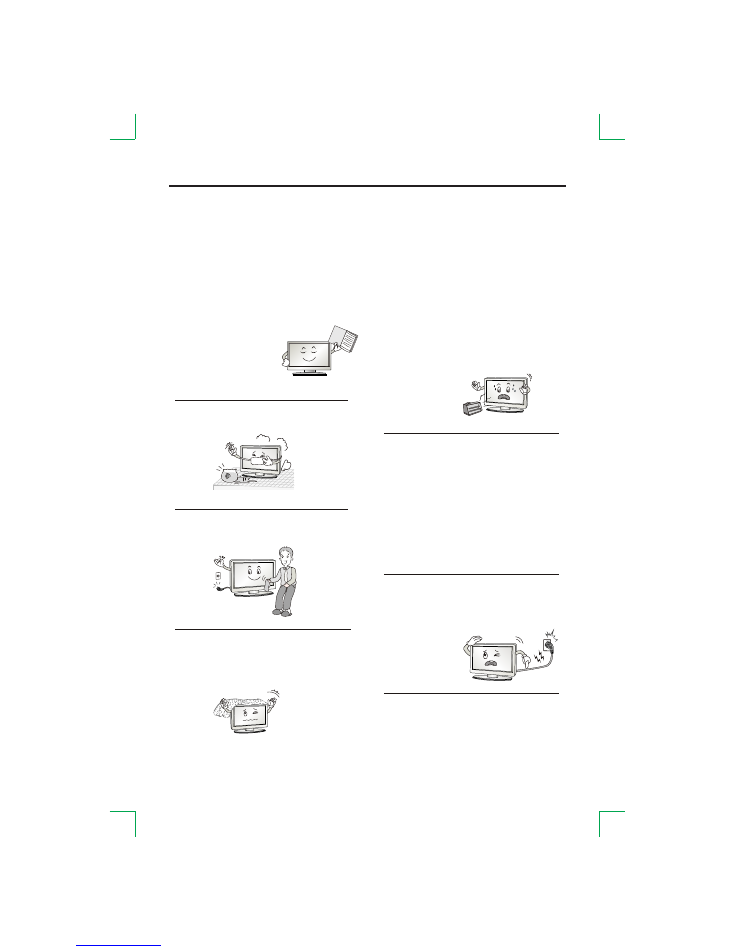
Safety Information
To ensure reliable and safe operation of this equipment, please read all the
instructions in this user guide, especially the safety information below.
Electrical safety
The TV set should only be connected to a
on the label
mains power supply as stated
on the
back
of the product.To prevent overload, don't share the same mains supply socket with
too many items.
Do not place any connecting wires where they may be stepped on or tripped over.
When removing the plug from the wall socket, make sure to pull the plug and not the wires.
During a thunderstorm or while leaving the TV for long periods, disconnect the aerial
(if outdoor) and mains from the power supply.
Do not allow water or moisture to enter the TV or mains adaptor. Do NOT use in wet or moist
areas such as bathrooms, steamy kitchens or near swimming pools.
Pull the plug out immediately, and seek professional help if:
●
The mains plug or cable is damaged
●
Liquid is spilt onto the set, or if it is accidentally exposed to water or moisture
●
Anything accidentally penetrates the ventilation slots
●
The set doesn't function properly.
●
Do not remove the safety covers. There are no user serviceable parts inside.
You may invalidate the warranty. Only qualified personnel can service this apparatus.
●
Remove exhausted batteries from the remote control handset to avoid battery leakage
or when not using it for a long period.
Physical safety
●
Do not block ventilation slots in the back cover. You may place the TV in a cabinet,
but
least 5cm (2'') clearance all around.
ensure that there is at
●
Do not tap or shake the TV screen. You may damage the internal circuits. Take good care of
the remote control,
do not drop it.
●
To clean the TV use a soft dry cloth. Do NOT use solvents or petrol based fluids.
For stubborn stains, you may use a damp soft cloth with diluted detergent.
A warning that an apparatus with CLASS I construction shall be connected to a MAINS socket
outlet with a protective earthing connection.
Where the MAINS plug or an appliance coupler is used as the disconnect device,
the disconnect device shall remain readily operable.
-3-
Safety Information
WARNING :
To reduce the risk of fire or electric shock, do not expose this apparatus to rain or moisture.
The a
pparatus
not be exposed to dripping or splashing
liquids
and no objects filled with liquids,
should
such as vases,
be placed on the apparatus.
should
IMPORTANT SAFETY INSTRUCTIONS
Ow
ne
's
r M
anua
l
1. Read these instructions.
2. Keep these instructions.
3.
all warnings.
Note
4. Follow all instructions.
5. Do not use this apparatus near water.
6. Clean only with a dry cloth.
7. Do not block any of the ventilation openings.
Install in accordance with the manufacturers
instructions.
8. Do not install near any heat source such as
radiators, heat registers, stoves, or other
apparatus (including amplifiers) that produce
heat.
9. Do not defeat the safety purpose of the
polarized or grounding type plug. A polarized
plug has two blades with one wider than other.
A grounding type plug has two blades and a
third grounding prong. The wide blade or the
third prong is provided for your safety. When
the provided plug does not fit into your outlet,
consult an electrician for replacement of
the obsolete outlet.
10. Protect the power cord from being walked
on or pinched particularly at plugs.
11. Only use the accessories specified by the
manufacturer.

-4-
12.
O
nly
use
a
cart, stand, tripod, bracket,
or
a
table specified by the manufacturer
or
which is
sold with the apparatus.
13. Unplug this apparatus during lightning
storms or when
it is
unused for a long time.
14. Refer all servicing to qualified service
personnel. Servicing is required when
the apparatus has been damaged in
any way.
Note
- If the TV is cold, there may be a small flicker when you turn it on.
- Avoid touching the LCD screen or holding your finger(s) against it.
CAUTION connecting the Power Cord
Do not overload wall outlets. Overloaded wall outlets could damage the TV and could result in electric
shock or fire.
examine the cord of your appliance
.
I
f its appearance indicates damage or
Frequently
deterioration, unplug it. Stop using it until you have it replaced with a cord authorized by your dealer.
Protect the power cord from physical or mechanical abuse, such as being twisted, kinked or pinched.
Safety Information
On Disposal
- The fluorescent lamp used in this product contains a small amount of
mercury.
- Disposal of this product must be carried out in accordance of the regulations of your local authority.
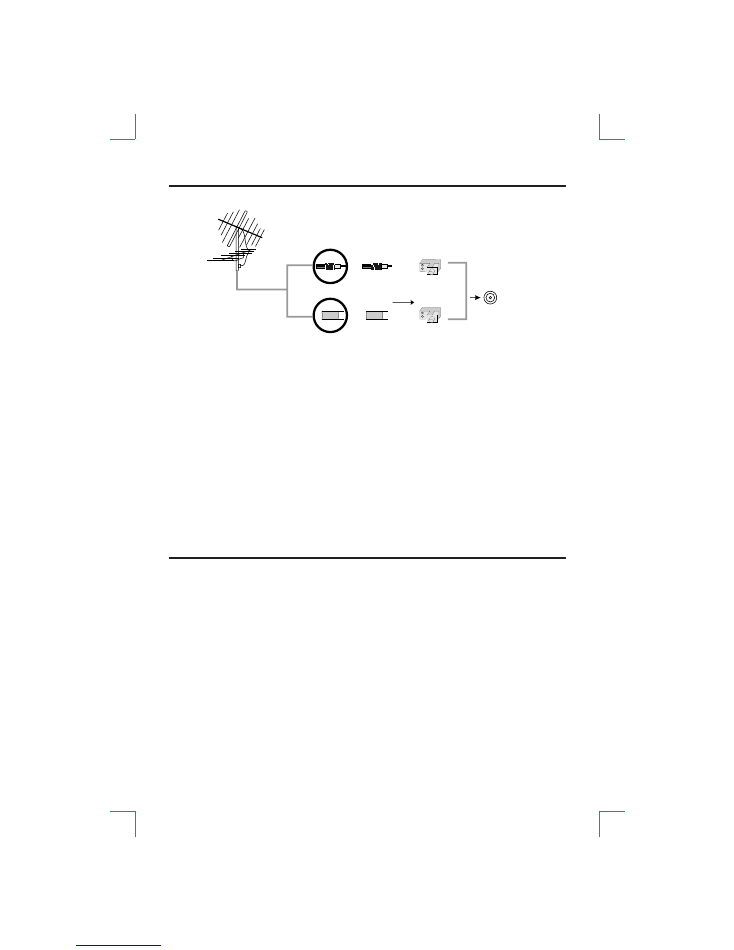
Antenna connection
VHF TV ANTENNA
UHF TV ANTENNA
75 OHM COAXIAL CABLE
300 OHM FLAT CABLE
To
TV
ANTENNA
JACK
300 OHM
75 OHM ADAPTOR
75 OHM DIN
-5-
ON-OFF Power
Connect the AC adapter to the household power outlet.
Press the main power switch on the set board. The indicator will switch on.
Thereafter press the [STANDBY] button to open or switch the receiver off.
NOTE:
Switch
the receiver
off
and unplug the AC adapter from the
power outlet when not using it for a long period of time.
Connect the 75 OHM coaxial cable from the antenna to the antenna socket on the rear
panel, as shown above.
NOTES:
For better reception, especially in outlying areas or where ghost
effect
or interference occur,
an external roof-mounted antenna is recommended.
For UHF TV reception, use the specified UHF antenna. Consult
a
local AV technician.
When using 300 OHM flat cable, a 300 OHM-75 OHM adapter should be used for a
proper connection to the antenna jack (The adaptor is not supplied).
-6-
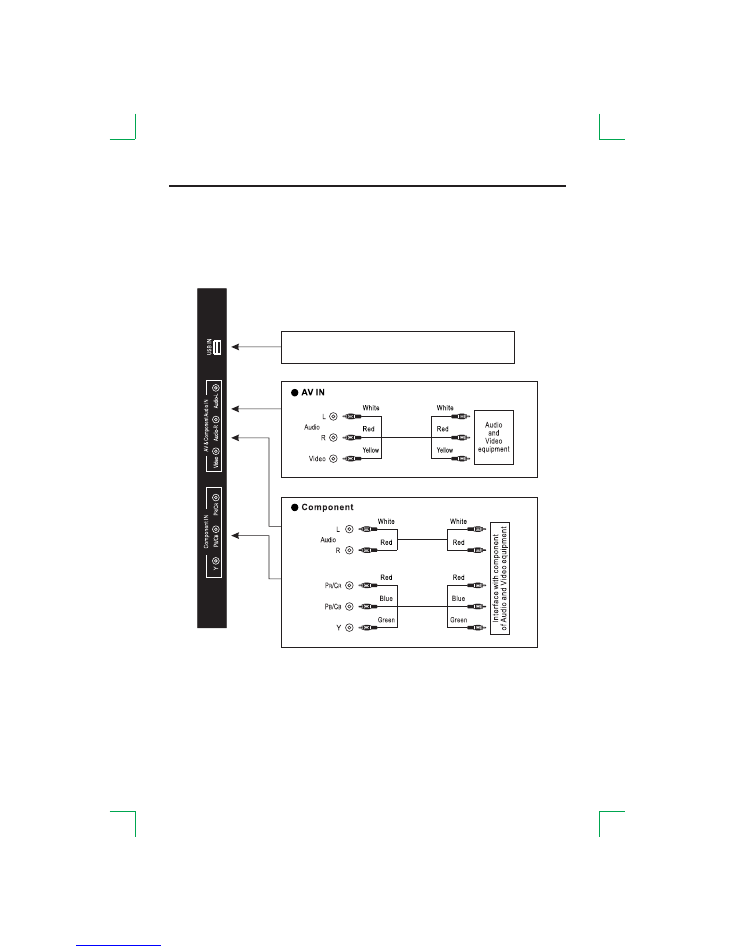
Multimedia Terminal Connection
Please switch off the power
when connecting
the TV to an
external device.
The TV can play different multimedia sources by connecting different terminals with
multimedia devices such as DVD Player
s
, P
C’s, etc.
and selecting
a
corresponding input
source.
USB storage devices can be inserted into the USB terminal.
Select USB under source selection to view the multimedia files.

Multimedia Terminal Connection
-7-
Insert the HDMI Audio
and Video equipment
Use headphones to listen to the current
show scenes on the audio signal.
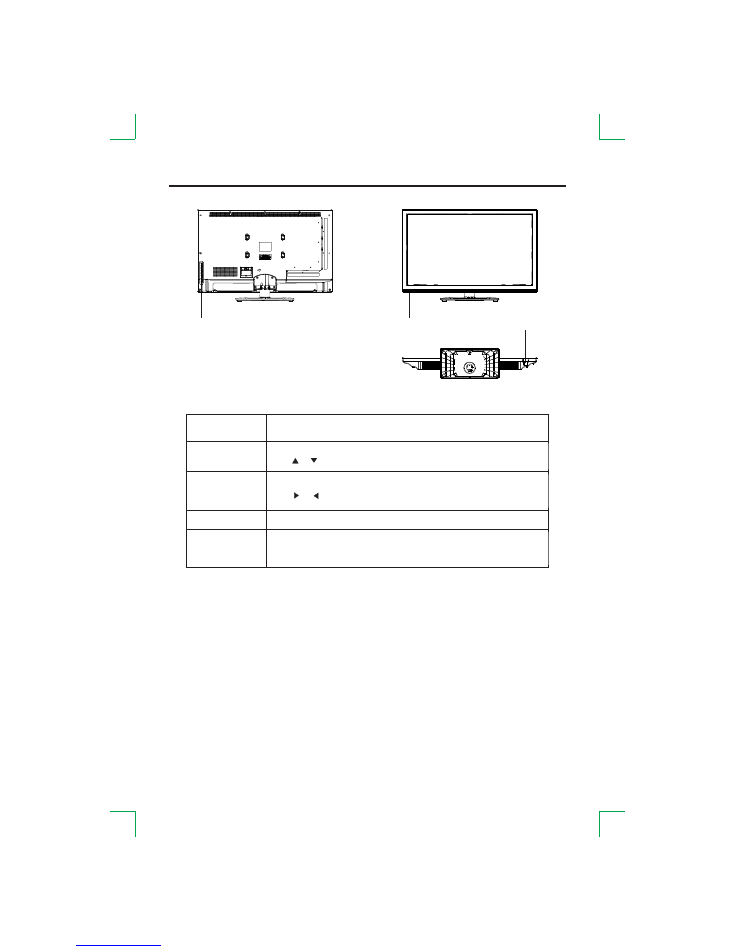
Front View
-8-
①
②
③
①
Remote control receiving window
i
ndicator.
Switch
the power on or off.
②
③
The functions of the buttons are described bellow:
Switch
on and off
;
C
arry out the function of standby and
switch
-on.
Show
menu
or exit menu.
STAND BY
VOL+/-
CH+/-
Channel
up
/
down
;
Use
buttons on the remote control to change the channels
[ ]/[ ]
.
Volume increase/decrease;
Use
buttons on the remote control to adjust volume
[ ]/[ ]
.
Press this button to d
isplay the input source list;
continue pressing this
button
to select
the
source you want. Press the
button to selec
t
[VOL+]
the desired source.
MENU
SOURCE
NOTE
:
Different models may have different button positioning,
but
all
according to what was been described above
functions stay the same
.
-9-
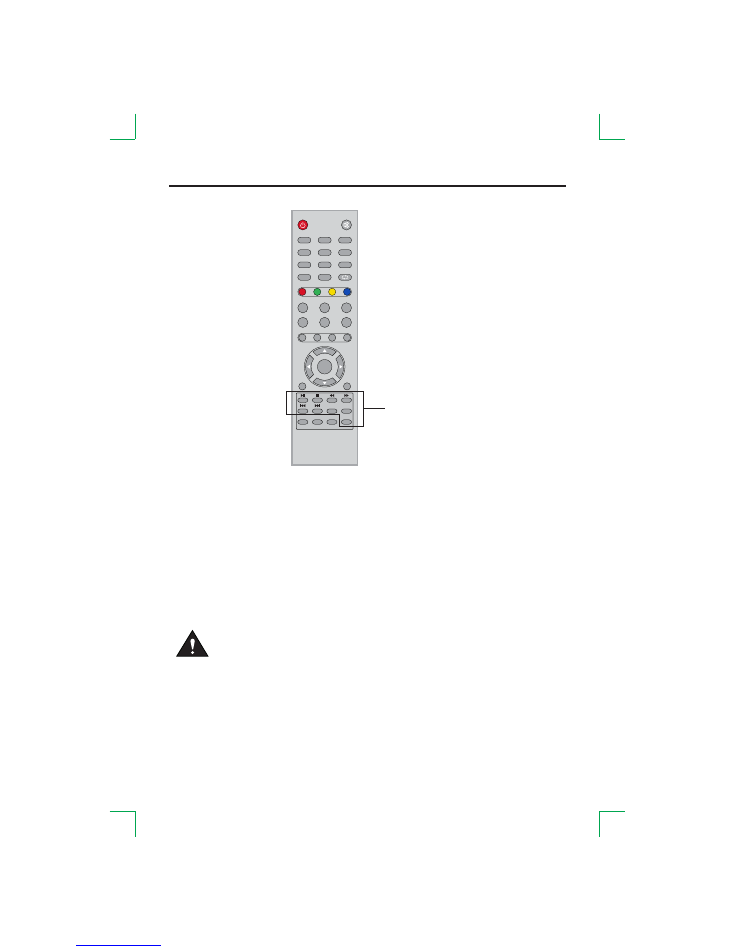
The Remote Control
CAUTION :
Danger of explosion if battery is incorrectly replaced.
●
If the remote control is not going to be used for a long
period of
time, remove the
batteries to avoid damage caused by battery leakage
or
corrosion.
●
Do not mix old and new batteries
or
ALKALINE
on
standard
(CARBON-ZINC) or rechargeable (NICKEL-CADMIUM) batteries.
●
Always remove batteries as soon as they become weak.
●
Weak batteries can leak and severely damage the remote control.
●
Do not dispose
of
batteries in a fire. Batteries may explode or leak. Batteries
not be exposed to excessive heat such as sunshine, fire or the like.
should
●
Open the battery door
and i
nsert 2 "AAA" batteries.
●
Point the remote control at the remote sensor located on the unit.
●
When there is a strong ambient light source, the performance of the infrared remote sensor
m
ay be degraded, causing unreliable operation.
●
The recommended effective distance for remote operation is about 16 feet (5 meters).
●
When the batteries become weak and the operating distance of the remote control is
greatly reduced
,
you will need to replace the batteries.
U
s
ing the remote control
Media Operation
STANDBY
SOURCE
MENU
EXIT/ROOT
ASPECT
CH-
CH+
VOL-
VOL+
FAV
FAV-
FAV+
GOTO
REPEAT
A-B
ENTER
DISPLAY
FREEZE
PMODE
SMODE
SLEEP
1
2
3
4
5
6
7
8
9
0
MUTE
-10-
The Remote Control
●
Introduction to the remote control function
Button
C
arry out the function of standby and
switch
-on.
Set to m
ute or
return to previous sound level
.
S
elect the
TV
channel
you want to view by using the number buttons
.
Function
STAND BY
MUTE
ASPECT
SLEEP
FREEZE
DISPLAY
PMODE
SMODE
CH+/-
VOL+/-
SOURCE
FAV
FAV+/-
0-9
Channel
Edit
when setting up your TV
.
RED/GREEN/
YELLOW/BLUE
EXIT/ROOT
MENU
ENTER
Up/Down/Left/Right.
Enter button(
used to select
)
Show
MENU
or exit
.
MENU
Exit
the
MENU or return to
the
root
of
the multimedia
source
.
Controls the automatic
turn off time
.
Static or
picture (This function is action only in part of the signal source).
restoration
Return to
the
previous channel after channels
have been changed
.
Display info of the current channel.
Select the aspect ratio of the screen.
Cycle through available video picture modes.
Cycle through different sound settings.
Channel
up
/down.
Increase/decrease the
volume level
.
Change
favourite c
hannel
up or down
.
Display the input source list
.
P
ress
[ ]
button
or the [SOURCE]
the
button to select the input source you want
.
P
ress the
button
[ENTER]
or the [ ]
button to
select
the
desired
source.
Display or cancel
the
favorite list . When you set up a favorite
channel,
press this button to d
isplay the favorite list. Press the [ ] buttons to
select the
. P
ress the
button to play.
channel
[ENTER]
-11-
Menu Operation
●
Auto Tuning
[ENTER]
the [ ]
Press the
button
button to start
A
uto
S
earch.
or
button
.
[MENU]
[EXIT] button
If you want to stop searching, press the
or the
ress
to confirm or
cancel.
the [ ] button
the [ ] button to
P
Menu
Current CH
1
Color System
SECAM
Sound System
BG
Fine-Tune
49.75MHZ
AFC
On
Search
ATV Manual Tuning
Auto Tuning
ATV Manual Tuning
Programme Edit
CHANNEL
Move
Menu
Enter
Exit
Enter
●
Enter Menu
[MENU]: Display menu.
[ ]: Select menu.
[ENTER] or [ ]: Enter menu.
Menu Operation
●
[ ]: Select
.
[ ]: Adjust
or enter the sub menu.
[ENTER]:
Enter the sub menu or confirm.
● Exit Menu
Press the [MENU] button to return to the previous menu or exit
the current menu;
or press the [EXIT] button to exit menu.
This menu
only
functions in TV mode.
CHANNEL
●
ATV Manual Tuning
●
Current CH
: Set the channel number.
●
Color System
: Select the color system.
●
Sound System
: Select the sound system.
●
Fine-Tune
: Adjust the frequency of the channel finely.
●
AFC
: Automatic fine tuning.
●
Search
: Press the [ ] button to sea
r
ch.
-12-
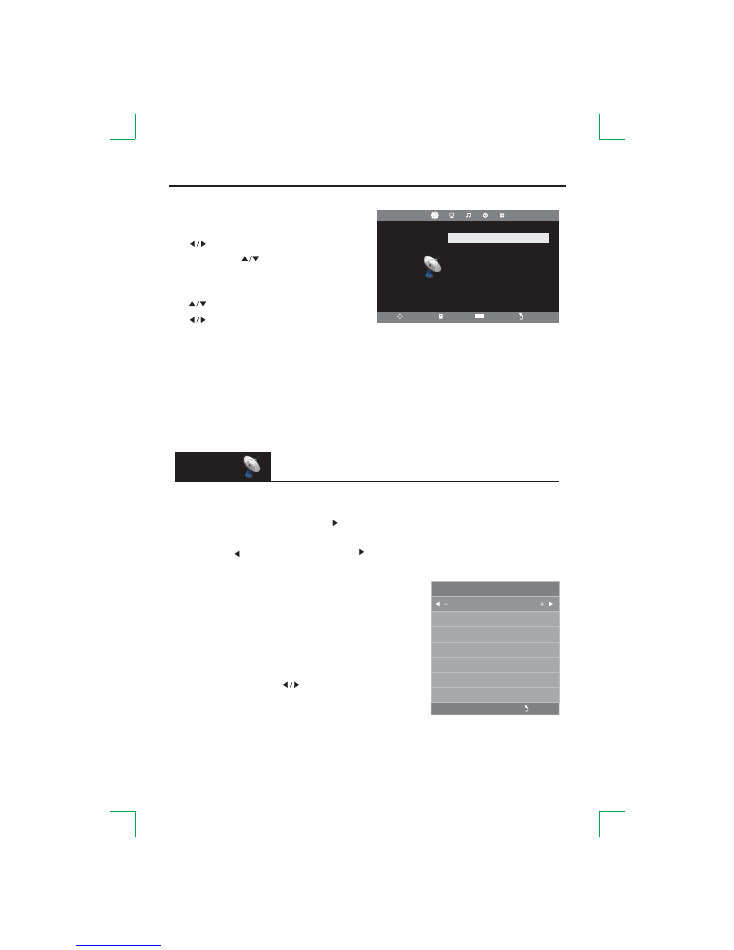
●
Programme Edit
[RED]:
Delete
the current channel.
●
[GREEN]:
Rename
.
●
Press the [ ] button to select the character.
Press the [ ] button to select the figure.
Press the [ENTER] button to confirm.
[
Move
.
●
YELLOW]:
Press the [ ] button to select the position.
Press the [
]
button to confirm.
YELLOW
[BLUE
S
●
]:
kip
the select
ed
channel.
Your TV set will skip the channel automatically
when using the [CH+/- ]
to view the channels.
button
Fav
●
Add or Delete the channel to your favorite list.
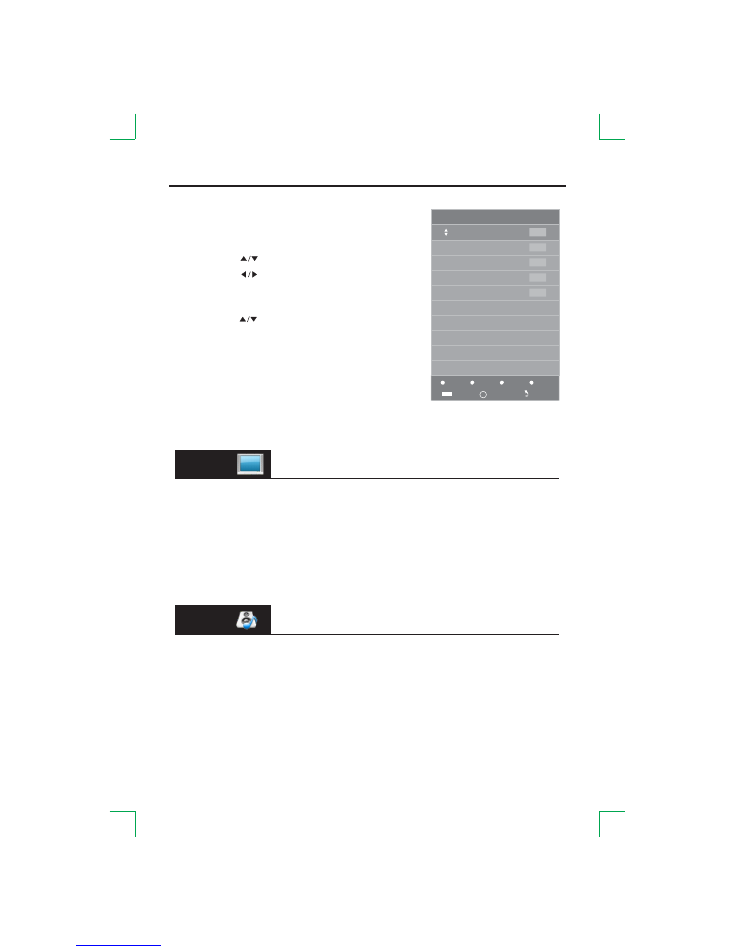
Menu Operation
Menu
1
2
3
4
5
ATV
ATV
ATV
ATV
ATV
Delete
Rename
Move
Skip
Programme Edit
Enter
Fav
FAV
ENTER
Options available for adjustment may be different in different
signal sources, but functions of the same option
will be the same
.
PICTURE
●
Picture Mode
:
Select the picture mode that you feel
comfortable with.
(NTSC only)
●
Contrast/Brightness/Color/Tint
/Sharpness
:
Th
e
se settings can
only
be adjusted when the
Picture Mode
is set to
User
.
●
Color Temperature
: Select the color temperature that you feel
comfortable with.
Noise Reduction
: You can clear up the input signal by setting the item.
●
SOUND
●
Sound Mode
: Select the sound mode that you feel
comfortable with.
●
Treble/Bass
: Th
e
se settings can
only
be adjusted when the
Sound Mode
is set to
User
.
●
Balance
: Adjust the level of sound coming from the left and right speakers.
●
Auto Volume
: When
Auto Volume is
On
, it will level out
sudden changes in the volume
when it occurs during commercial breaks or channel changes.
-13-
Menu Operation
●
OSD Language
: Set the OSD display language.
Aspect Ratio
:
●
S
et the Aspect Ratio
of the screen.
●
when there is no input signal to either blue or black
Blue Screen
: Set the background color
.
Key Lock
:
When set
On
, the control panel function key is locked.
●
to
●
[ENTER]
button
the [ ]
Reset
: Recall the default setting.
or
Press the
button to enter,
and then
press
to confirm or
cancel.
the [ ] button
the [ ] button to
Note:
When yo
u
play text in TEXT media, you
can adjust
Region Language/
Encoding Standard
.
Connect
the
PC
t
to computer, and select
PC
source.
erminal
TIME
●
Sleep Timer
: Select the time in minutes that you want the TV to shut off
automatically. Cancel
it
by setting it to Off.
Auto Sleep
: Select the time in hours that you want the TV to remain on after your
●
last operation. Cancel by setting it to Off.
OSD Timer
:
●
Set the OSD display time.
OPTION
SCREEN
●
Auto Adjust
: Automatically adjust.
●
Horizontal Pos.
: Shift the screen left or right.
●
Vertical Pos.
: Shift the screen up or down.
●
Clock
: Adjust the scaling of image in horizontal.
●
Phase
: Adjust the internal signal phase.

-14-
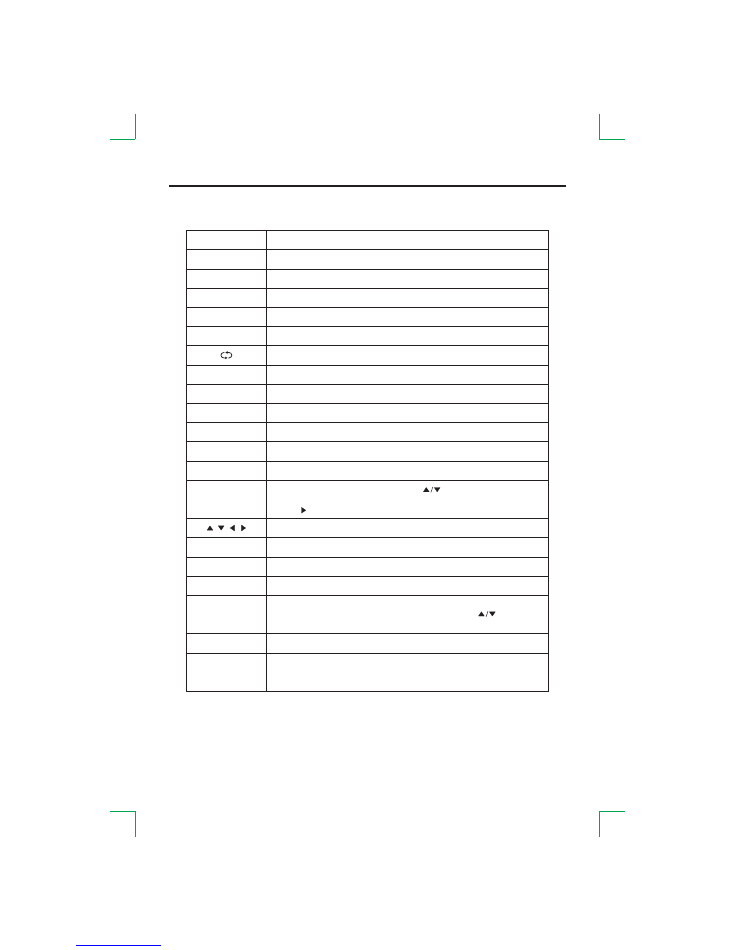
Media Operation
The USB storage devices
be inserted into the terminal
.
should
Select the media source and view the multimedia.
If you want to exit the
other sources.
multimedia you can choose
●
Delete
●
Press the
button
s
to select
the
file that you want to delete.
[ ]/[ ]
●
Press the
button to enter.
[RED]
●
Press the
[ ] button
the [ ] button to
to confirm or
cancel.
●
MENU Operation
[ ]: S
elect
m
edia or select file.
elect file.
[ ]: S
C
.
[ENTER]:
onfirm or play
[
Return to root.
ROOT]:
The icon of the menu [
Return to root.
]:
The icon of the menu [
Return to previous.
]:
●
MENU Operation During Play
elect menu when playing a file.
[DISPLAY]: S
elect.
[ ]: S
C
.
[ENTER]:
onfirm
uit the entire menu.
[ROOT]: Q
-15-
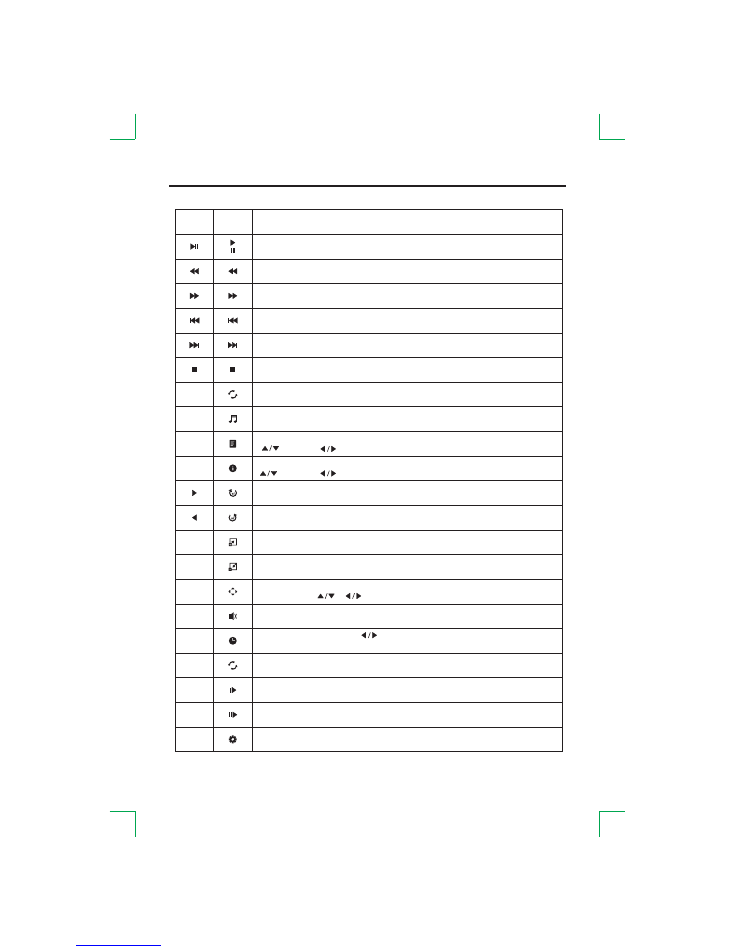
Media Operation
Play or stop the background music.
(
Music file and playing file in one folder.)
Rotate clockwise.
Rotate counterclockwise.
Select
to enlarge picture
size
.
Select the repeat mode.
Stop and back to the folder interface.
Play or pause.
Play previous.
Play next.
Play back faster
/
Play
the previous page in the TEXT
Media.
Play forward faster
/
Play
the next page in the TEXT
Media.
Select
to reduce picture
size
.
Play the movie step by step.
Play slower.
Mute or cancel.
Menu
Display or cancel the information of the current file. n the MOVIE
I
Media,
press
[ ]
select [ ]
a
select
close
ress the [ENTER] button to exit.
to
/
to
/
to
. P
djust
Show
playlist
.
[ ]: select [ ]: switch [ENTER]: confirm.
/
/
S
elect
A-B to play repeat
ed
ly.Press once to set
to
A, and press again to set
to
B, then press a third time to cancel.
AB
Zoom out the picture first. Highlight the icon and press the [ENTER] button,
then press the [ ]/[ ] button to move the picture.
Select playing time.
0-9]
Press
[ ]
to
select; [
to adjust. Press the [ENTER]
button
to
select playing time.
Function
Select
aspect ratio
.
Button
GOTO
REPEAT
A-B
ASPECT

-16-
Specifications
Note:
Design and specifications are subject to change without notice.
Supply Voltage
Standby Power Consumption
Power Consumption
Video System
Sound System
Max Storage Channels
≤
0.50W
see the ration label
see the ration label
PAL
、
SECAM
B/G
、
D/K
、
I
199CH
Max Output Power (Audio)
Input Impedance
2
×
6W (8
Ω
)
75
Ω
-17-
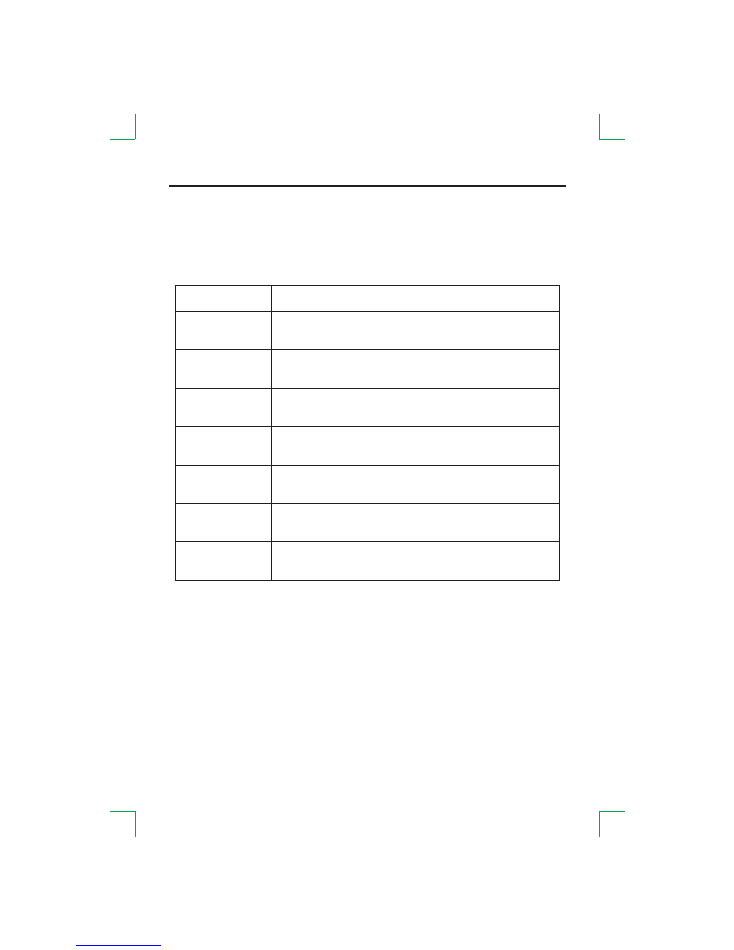
If the display fails or the performance dramatically changes, check the display in
accordance with the following instructions. Remember to check the peripherals to
pinpoint the source of the failure. If the display still fails to perform as expected,
contact the dealer for assistance.
No Power
No Sound
Remote
No Response
Symptom
DEALING METHOD
TV
s
et
needs to
be cleaned
Some Interf
erence
In
The VGA Mode
Abnormal Color
The Screen Flash
es
In VGA Mode
Check the power connection.Pull the plug out, wait for 60 seconds,
then reconnect the power and turn on the set.
Increase the volume. Check if the set is on the mute state or not.
Check the voice setting condition. Check the voice mode setting
condition.
Check the effect of the batteries. If
necessary
, replace the
batteries or clean the remote control sensor window. The distance
between the set and the remote control should be less than 6 meters.
The parameter is too big.Please use saf
et
y mode when restarting the PC
and set the parameter of the monitor according to the instructions.
M
odify
the
parameter of the monitor according to the
instruction manual.
Check the antenna connection.
Please pull the plug out when cleaning the LCD screen. Using soft,
clean cloth to wipe it off. If needed to clean further, please use dry cloth,
do not use naphtha or other thinners liquids.
Simple Troubleshooting