Full Text Searchable PDF User Manual

Quick Instruction of WiFi Connection
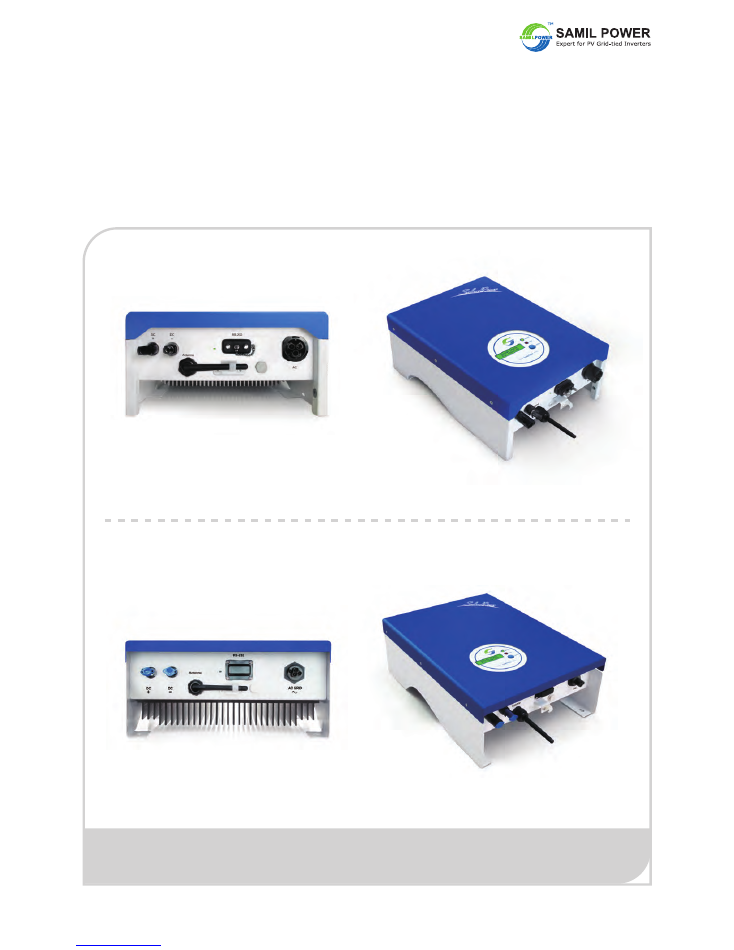
Part 1 Appearance of SolarRiver inverter with WiFi
Note: Before unpacking, the antenna is fixed by plastic clips. When finished the installation of inverter,
pull the antenna from the plastic clips lightly and make it vertical for getting better signal.
SAMIL POWER CO., LTD.
Add: No.6, Xuefengshan Road, Suqian High-tech Industrial Development Zone,
Jiangsu Province, P.R.China. 223800
Tel : +86 (0) 527 88754666
Fax: +86 (0) 527 84453877
E-mail: service@samilpower.com
Initial status
Work status
Initial status
Work status
SolarRiver 1100TL/1600TL
SolarRiver 2300TL/3000TL
01

Continue
Part 2 The procedure of WiFi setting
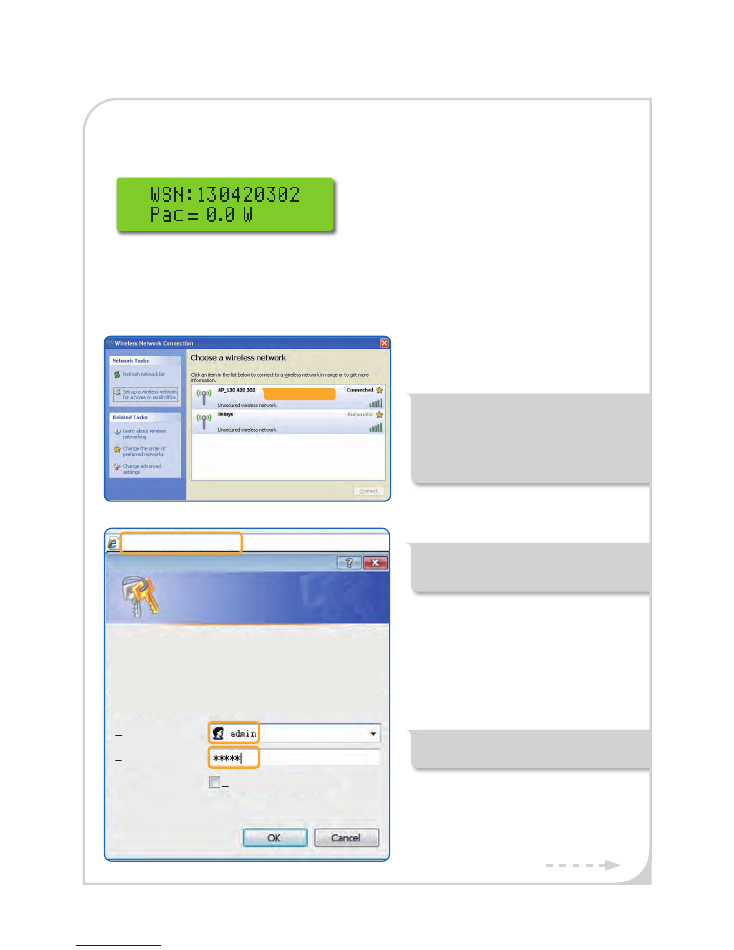
Step 1: Write down the WiFi SSID of inverter.
When the inverter is running, press the function button until the WSN is displaying on the screen.
Record the numbers on the display. The WiFi
SSID of inverter is AP_XXX XXX XXX which is
used later for connecting with PC or smart phone.
Step 2: Configure and set parameter of WiFi module.
(Prepare a laptop with WiFi and make sure the WiFi function is enable. Then follow the steps below to
finish the WiFi connection.)
a) Open the wireless network connection.
b) Refresh the network list and choose
the WiFi SSID: AP_130 420 302.
c) Input the default password
“WIFI 123456” in the popup window.
d) Connect it.
d) Input the website:
http://10. 10. 100. 254 into the address
bar.
e) Enter the user name: admin.
f ) Enter the password: admin, click OK.
02
The server 10. 10. 100. 254 at USER LOGIN requires a
username and password.
Warning: This server is requesting that your username and
password be sent in an insecure manner (basic authentication
without a secure connection).
User name:
Password:
Remember my password
http://10. 10. 100. 254/
Connect to 10. 10. 100. 254
AP_130 420 302

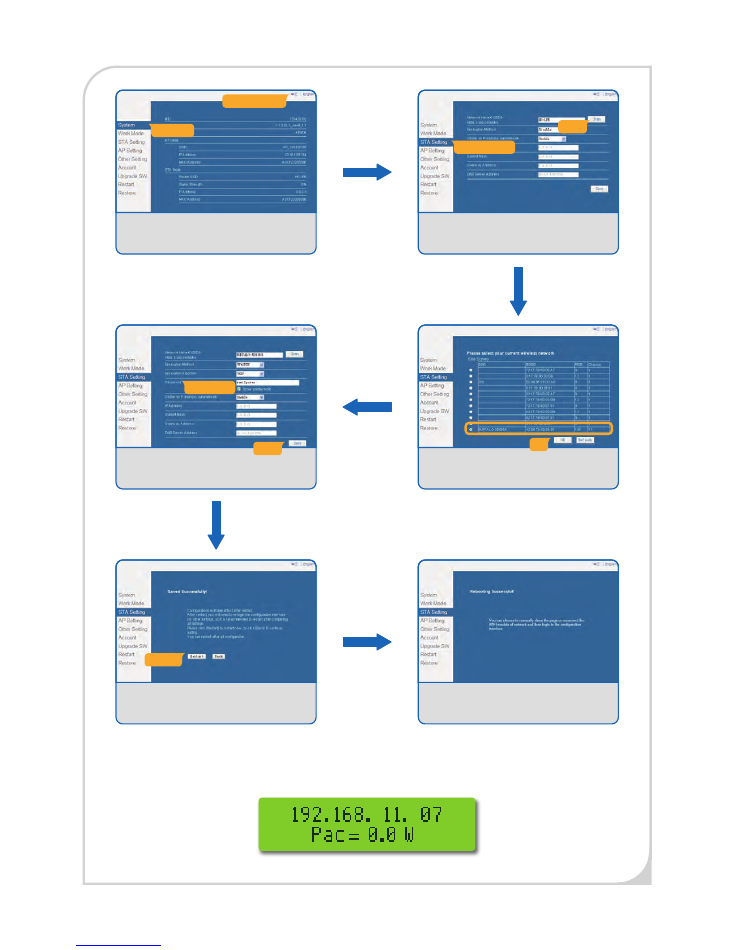
Wait about 30 seconds after successful setting, the inverter will show its IP address and the green LED at
the bottom of the inverter will light at the same time:
1) Finish.
1) Click on the “Restart” button.
Restart
1) Select the language.
2) Go to the STA setting page.
System
中文
l English
1) Click on the “Scan” button.
Scan
STA Setting
1) Select the correct WiFi SSID.
2) Click on the “OK” button.
OK
1) Input the password.
2) Click on the “Save” button.
Save
Password
03

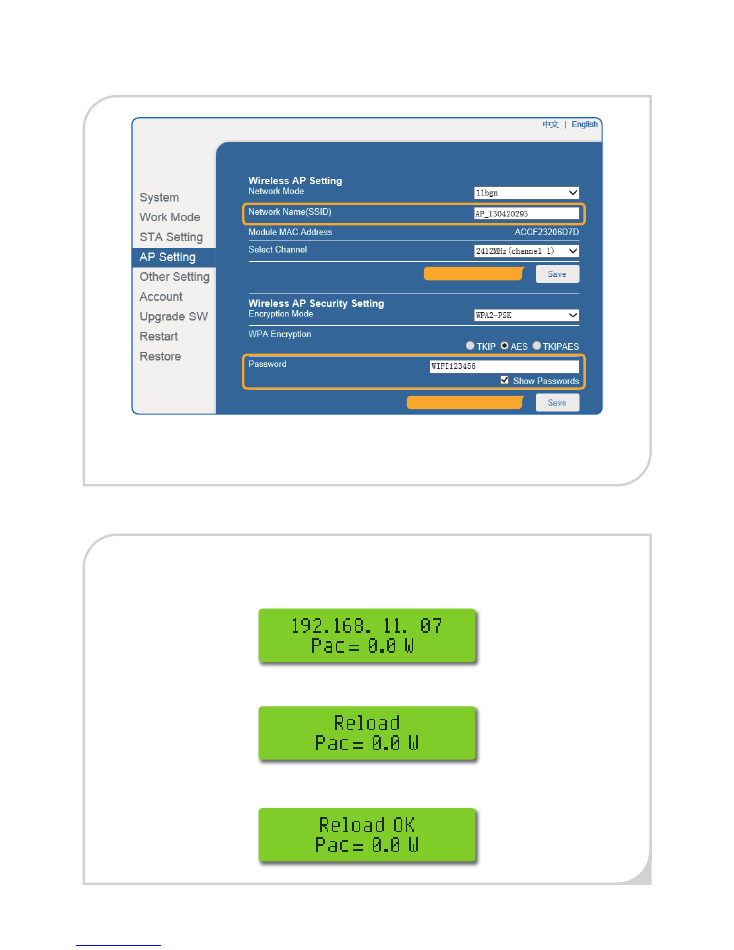
Part 4 Reload the default WiFi setting
If you want to cancel the WIFI setting which you have made and start a new connection, finish the
following steps and return to Part 2:
Step 1: Press the function button to the IP address page.
Step 2: In the IP address page, hold pressing the function button and release it until displaying “Reload”.
Step 3: Press the function button again. The display shows “Reload OK”. Then the inverter’s WiFi address
has been reset successfully.
04
Part 3 How to change the WiFi SSID or password of the inverter
1) Visit the website:10.10.100.254 and login. (Refer to part 2)
2) Go to the AP Setting page.
3) Change the SSID or Password.
4) Click on the “Save” button.
Save the password setting
Save the SSID setting