Full Text Searchable PDF User Manual
340-4, DANGSAN-DONG 6KA, YOUNGDEUNGPO-KU, SEOUL, KOREA
TEL : +82-2-2679-4131~8 FAX : +82-2-2679-4114
http://www.plus.co.kr e-mail : plus
@
plus.co.kr
Copyright
â“’
2007 PLUS All Rights Reserved Printed in KOREA(Ver 1.2)

1. FOREWORD
……………………………………………
4P
2. FEATURES
………………………………………………
4P
3. SPECIFICATION
…………………………………………
5P
4. APPEARANCE
…………………………………………
6P
5. OPERATION PANEL
……………………………………
8P
6. OPERATION
……………………………………………
11P
7. ERROR CODE
…………………………………………
20P
8. TROUBLESHOOTING
…………………………………
23P
9. SELF CLEANING
………………………………………
25P
C O N T E N T S
NOTE :
This equipment has been tested and found to comply with the limits for a Class A digital
device, pursuant to part 15 of the FCC Rules. These limits are designed to provide reasonable
protection against harmful interference when the equipment is operated in a commercial
environment. This equipment generates, uses, and can radiate radio frequency energy and, if not
installed and used in accordance with the instruction manual, may cause harmful interference to
radio communications. Operation of this equipment in a residential area is likely to cause
harmful interference in which case the user will be required to correct the interference at his
own expense.
4
5
Thank you for selecting a Plus Bank Note Counting Machine. This manual has been
compiled to provide complete instructions for operating the machine.
Before starting, please read the instructions thoroughly to familiarize yourself with all of
the machine functions.
1.
FOREWORD
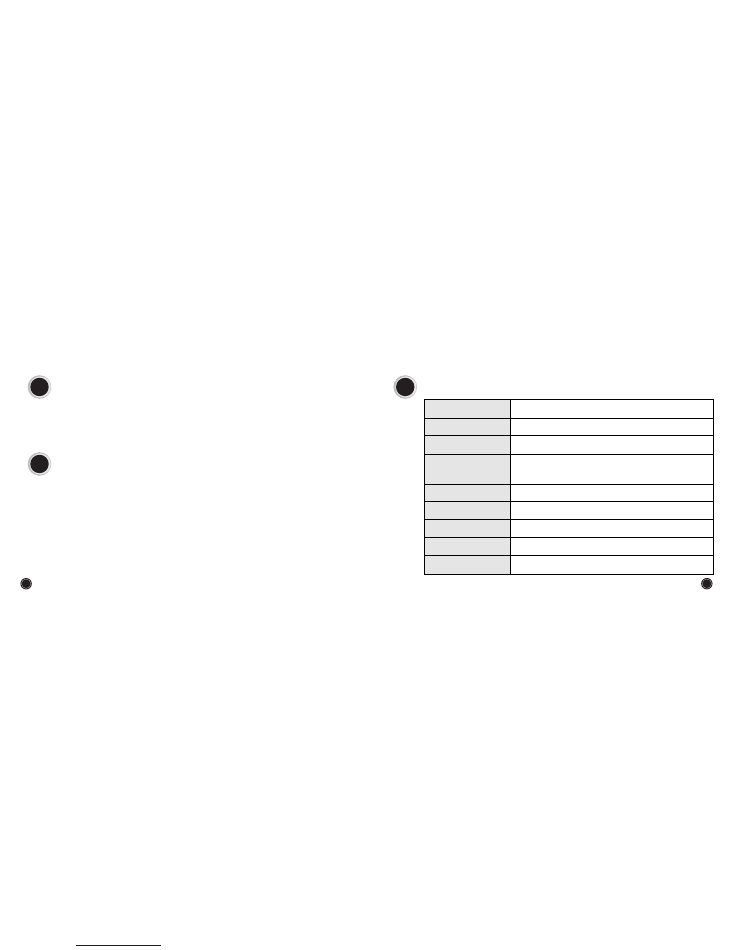
3.
SPECIFICATIONS
Patented fan built-in dust removal system.
Operator-variable presetting from 1 to 999. Batch setting is programmable
through the 10 digit numeric keypad.
Enhanced self diagnostics.
Stops and sounds alarm for the possible errors
(
double, short, chain, half
…
.
)
Optional Ultra-Violet or dual UV and Magnetic counterfeit Detection.
Optional size check detection & Customer Display.
Dust collector for efficient dust removal.
2.
FEATURES
Three selectable speeds : 800, 1000, 1200 notes/min
(
STANDARD
)
1000, 1200, 1500 notes/min
(
OPTION
)
280mm
(
W
)
Ă—
206mm
(
H
)
Ă—
236mm
(
D
)
Approx. 5.3 kg
50mm
Ă—
100mm~100mm
Ă—
181mm, Thickness: 0.06mm~0.12mm
Roller friction type
300sheets(Optional:500sheets)
Free Voltage
(
AC 86V ~ 264V, 50/60Hz
)
200sheets
40W
Counting speed
Dimensions
Weight
Size of countable note
Feed system
Hopper capacity
Stacker capacity
Power source
Power consumption
6
7
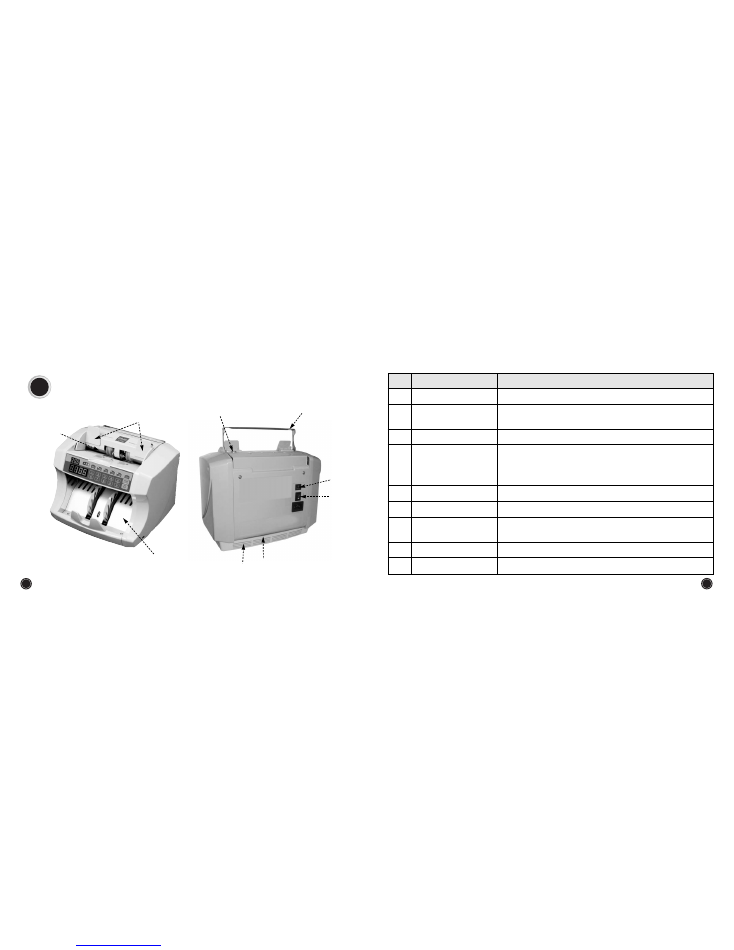
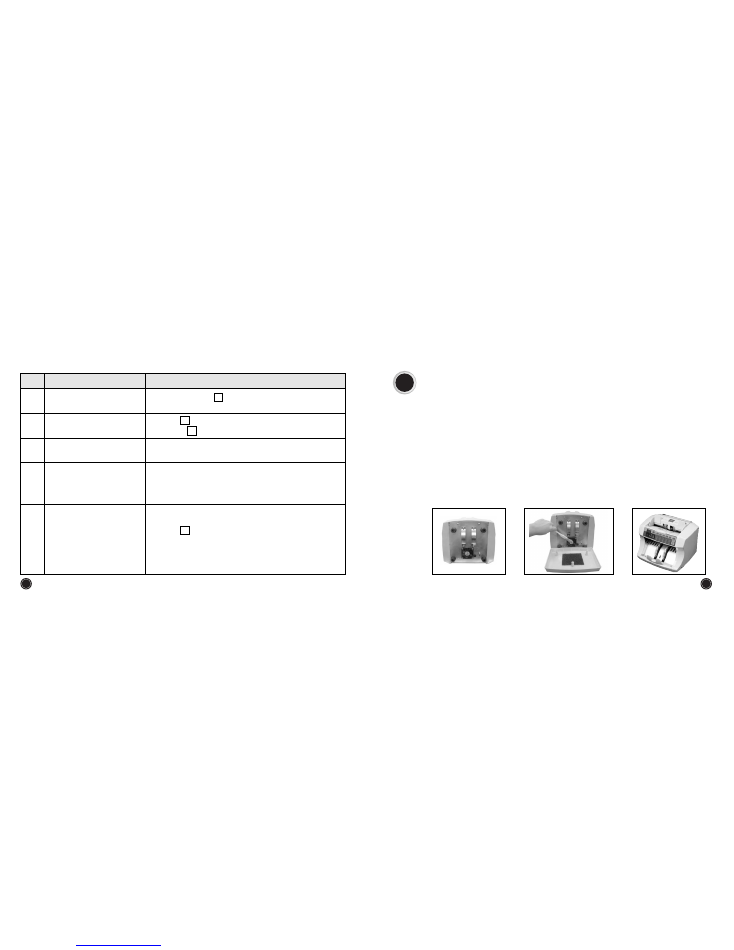
4.
APPEARANCE
FUNCTION
NAME
No
Notes to be counted are placed in the Hopper.
HOPPER
Easily adjust the hopper plates to the different width size of banknotes
Used for carrying the machine.
Used for the proper adjustment of gab between paper feeding
rollers for smooth counting of various notes to have different paper
thickness.
To clear the possible errors
(
half, chain, double
…
)
SELF CENTERING
HOPPER PLATES
HANDLE
PAPER THICKNESS
ADJUSTMENT SCREW
Counted notes are stacked in this stacker.
Built-in dust removal system.
Main power on / off switch.
Connector for optional remote display.
User can easily remove the dust to be stacked on this dust collector.
STACKER
FAN
POWER SWITCH
REMOTE DISPLAY PULG
DUST COLLECTOR
8
9
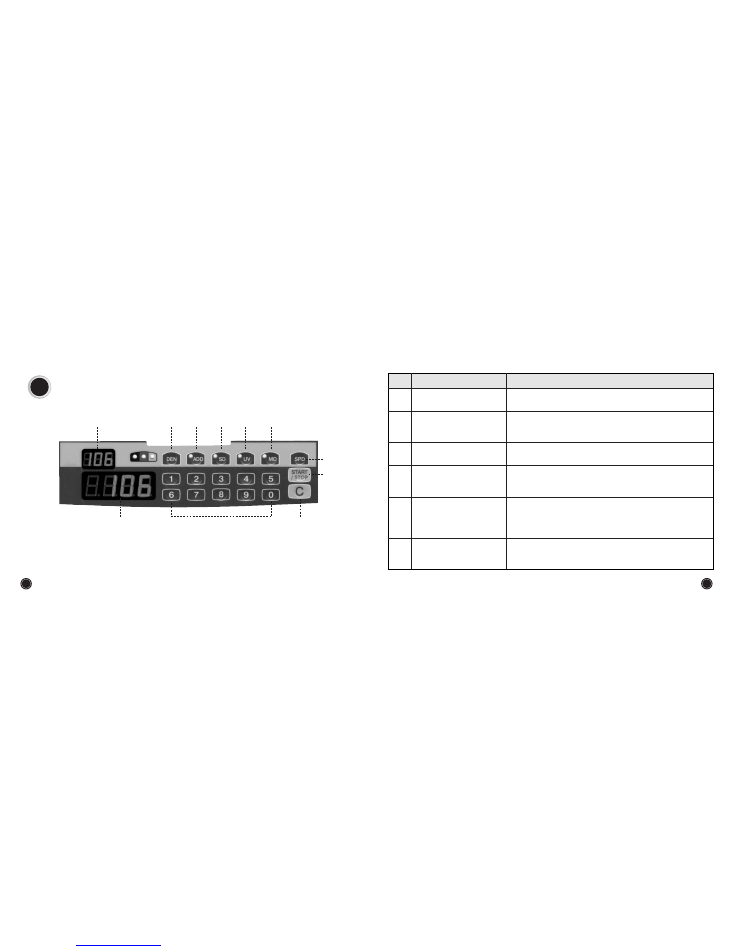
5.
OPERATION PANEL
Turn the power switch ON. The counter will display the following message.
tst
,
good
it is self test function.
FUNCTION
NAME
No
The number of counted notes is displayed here.
Counter numerical display
By pressing any number key, user can freely preset the number
to be counted.
This key is used to clear errors.
Used to stop or to restart the counting temporarily during
counting operation.
Preset key
Clear key
Restart key
3 different counting speeds can be selected by simply pressing
this key. SPD 1
(
High speed
)
, SPD 2
(
Middle speed
)
, SPD 3
(
Low
speed
)
.
Speed key
By pressing this key, the counting will be stopped in case a
counterfeit note is detected through the magnetic features.
Magnetic Detection key
(
OPTION
)
11
10
FUNCTION
NAME
No
By pressing this key, the counting will be stopped in case a
counterfeit note is detected through UV features.
Ultra Violet Detection key
(
OPTION
)
When pressed, the machine will provide accumulative total of all
counted notes.
Use this key to place proper density level for two-sheet detection.
Proper adjustment of density level can ensure correct counting.
ADD key
Density key
(
Double Detection
)
The selected batch number is displayed here.
Batch number display
6.
OPERATION
1
)
Switch on the power, located on the back of the unit.
2
)
Display will default to 100 for the batch, the lower right corner should read “O”
3
)
Adjust the hopper width
4
)
If bills are placed on the hopper, the bills will start counting automatically and it will stop
when last bill has cleared the top of the machine.
During counting of the bills, if you press "S" key, counting will be stopped at
this moment and if you press "S" key again, counting will be resumed.
5
)
You may choose to enable the “SD” or “UV” or “MD” detection features, before counthing
by pressing the appropriate button “SD” or “UV” or “MD” or you may enable all these
functions.
(
OPTION
)
NOTE :
See page 8~10 for key descriptions, and functions
To detect the different sizes for both longer
(
length
)
and
shorter
(
width
)
sides of notes from the target note by size
comparison with accuracy.
SD key
(
OPTION
)
12
13
6
)
How to Sort bank notes
Precautions to insure proper settings for counting of bank notes
Damp and/or badly damaged notes should be avoided.
Check that no foreign matter
(
piece of paper, paper clip, dust, etc.
)
is mixed in the
bundle of notes.
Folded or curled notes should be straightened before they are set on the hopper.
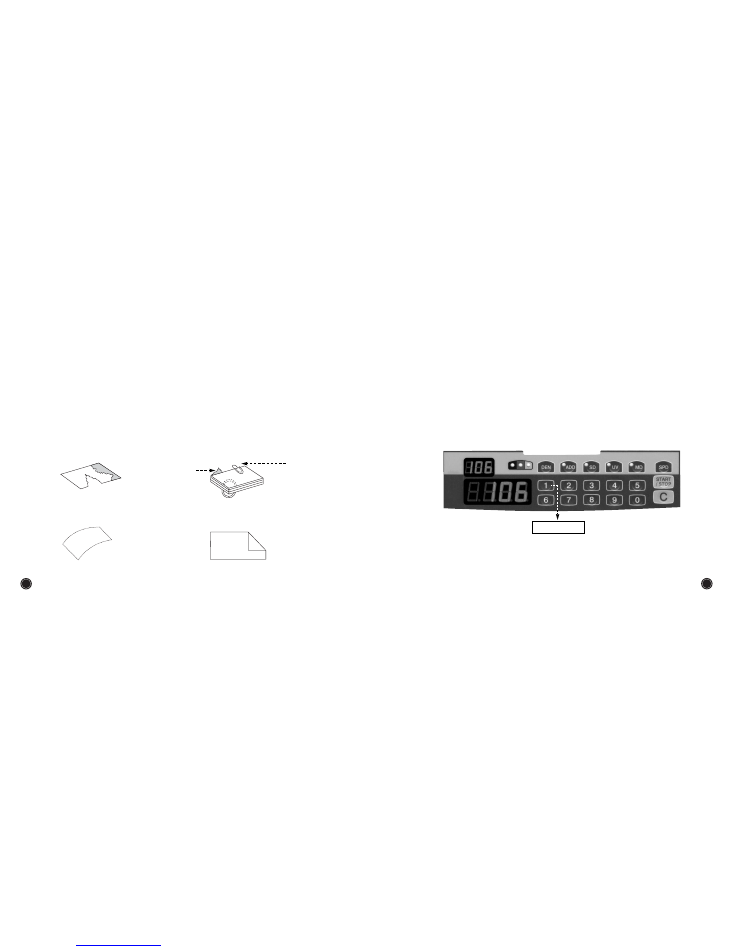
7
)
How to set test mode
Damp and/or badly
damaged note
Curled note
Stack of notes mixed with a paper clip or
piece of paper
Piece of paper
Folded note
Clip
Test mode start
15
14
How to select test mode
Push
â‘
key for 2~3 seconds.
How to select each test mode
When test mode is on standby, set the objective test number on the panel by
pressing key no.
â‘ `
~
`⑨
.
How to finish test mode
Press the
â“’
key.
t
S
t
t
E
S
t
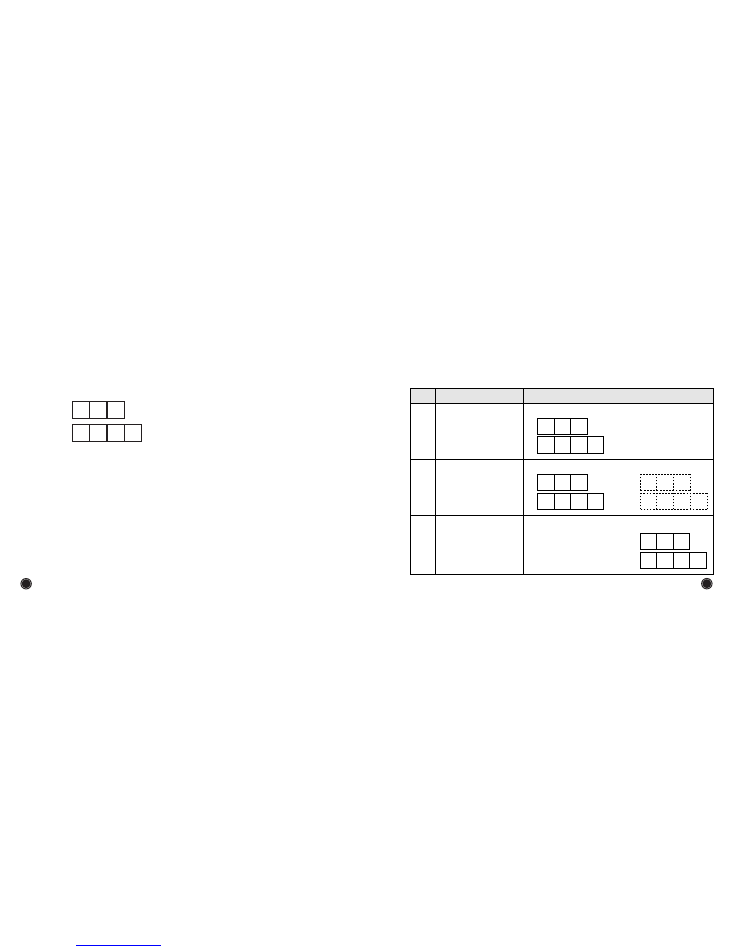
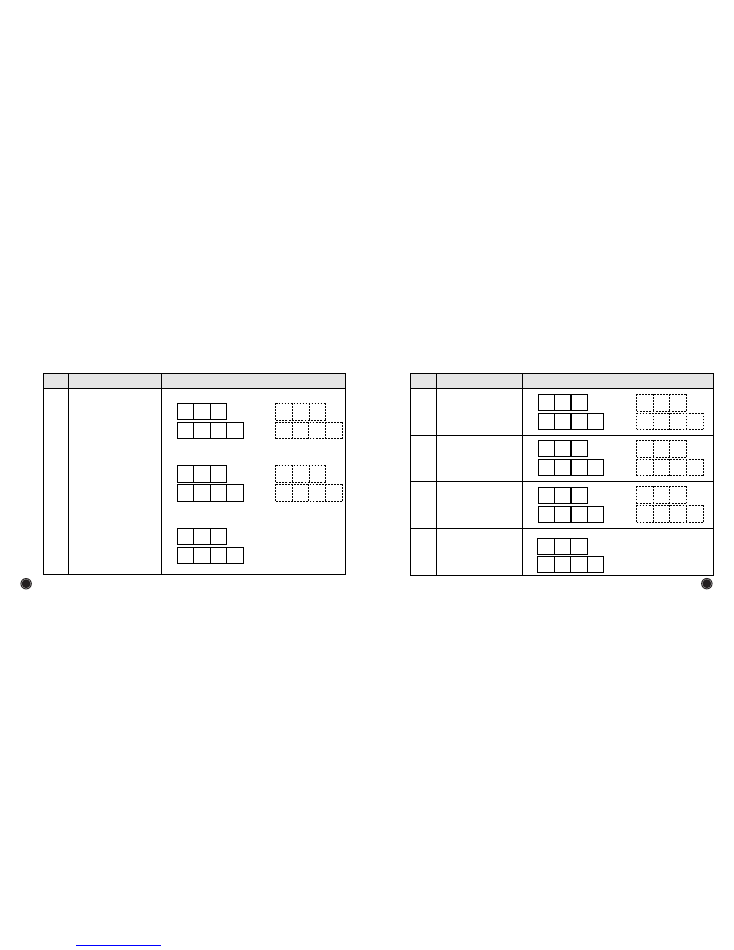
8
)
Test mode
CONTENTS
ITEMS
Key No
Motor condition checking.
â‘
Motor ON/OFF.
②
Indicates sensor condition.
③
Motor is switched ON or OFF every time.
Each sensor name will be
displayed in case the sensor
condition is abnormal status.
LED Display Example for Sensor
condition.
t
-
2
t
-
2
r
u
n
S
t
o
P
,
Motor is operated continuously.
t
-
1
r
u
n
t
S
t
g
o
o
d
All Sensors are normal.
17
16
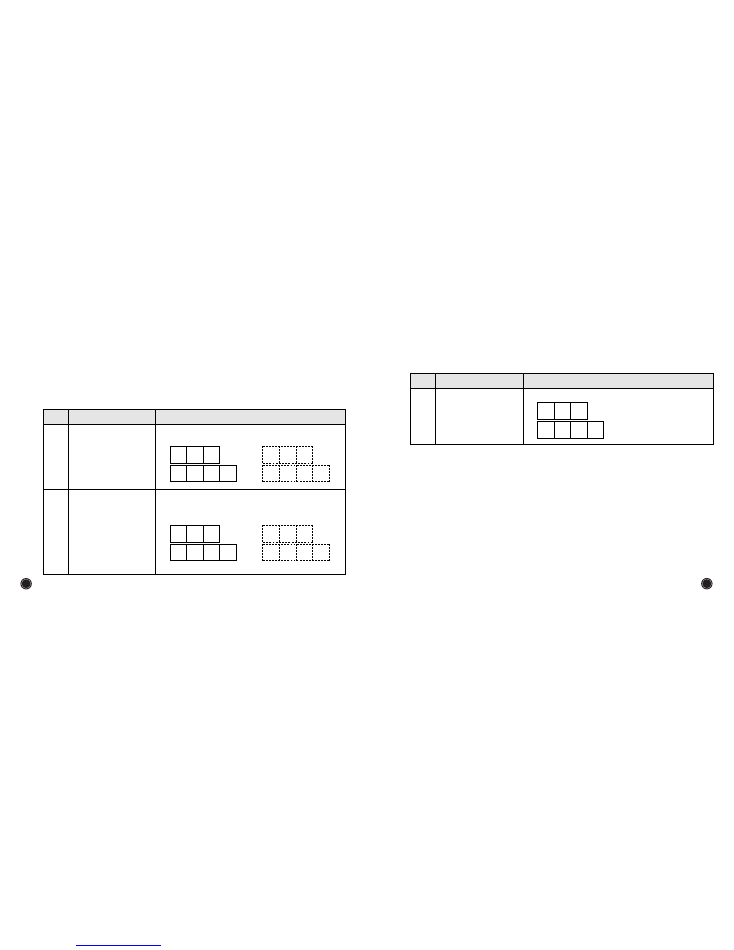
CONTENTS
ITEMS
Key No
Indicates sensor condition.
③
Abnormal status of start & End sensor.
t
-
3
t
-
3
S
t
r
E
n
d
,
Abnormal status of Left & Right sensor.
t
-
3
t
-
3
L
E
F
t
r
H
t
,
Abnormal status of encoder sensor.
t
-
3
E
n
c
o
CONTENTS
ITEMS
Key No
Indicates total number of
passed notes.
â‘Ł
Indicates production
date.
⑤
Indicates serial Number.
â‘Ą
r
E
c
r
E
c
0
0
0
1
6
0
0
2
,
P
r
o
P
r
o
2
0
0
3
0
7
2
2
,
S
E
r
S
E
r
0
0
0
0
2
7
3
6
,
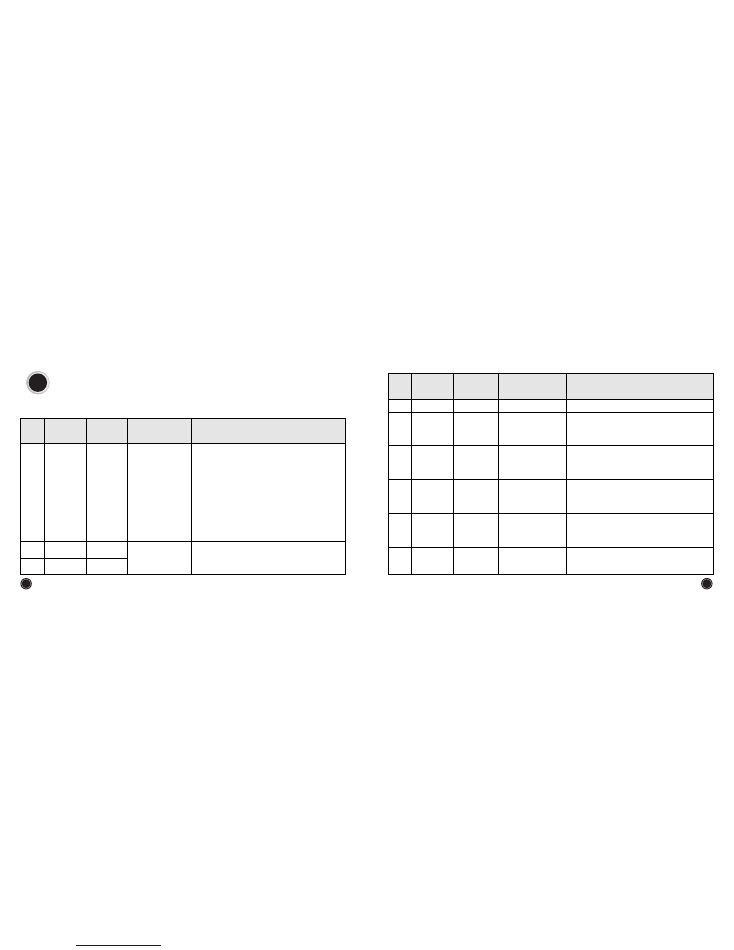
⑦
Program version
indication
Indicates the Program version.
U
E
r
u
-
1
5
18
19
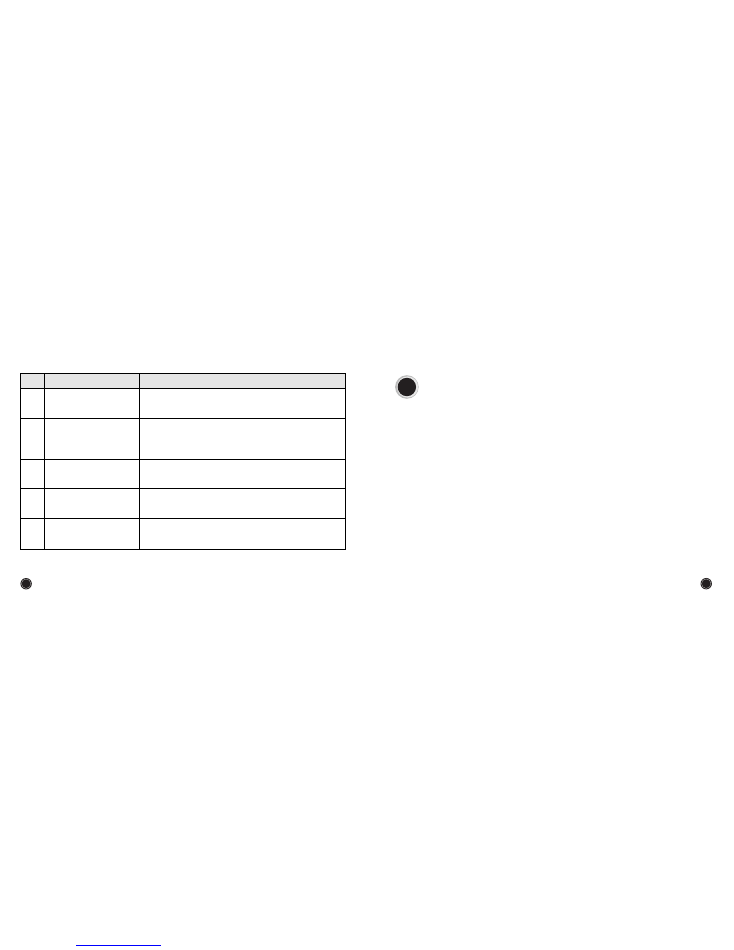
9
)
User mode
Push
⑨
key for 2~3 seconds to enter into user mode. When user mode is on standby,
set the objective setting number,
â‘ `
or
`②
on the panel.
CONTENTS
ITEMS
Key No
Setting automatic start
on/off
â‘
Setting buzzer sound
level
②
Adjustable the buzzer sound level in the range
of high, low, mute with pressing this key.
b
E
L
b
E
L
L
o
o
n
,
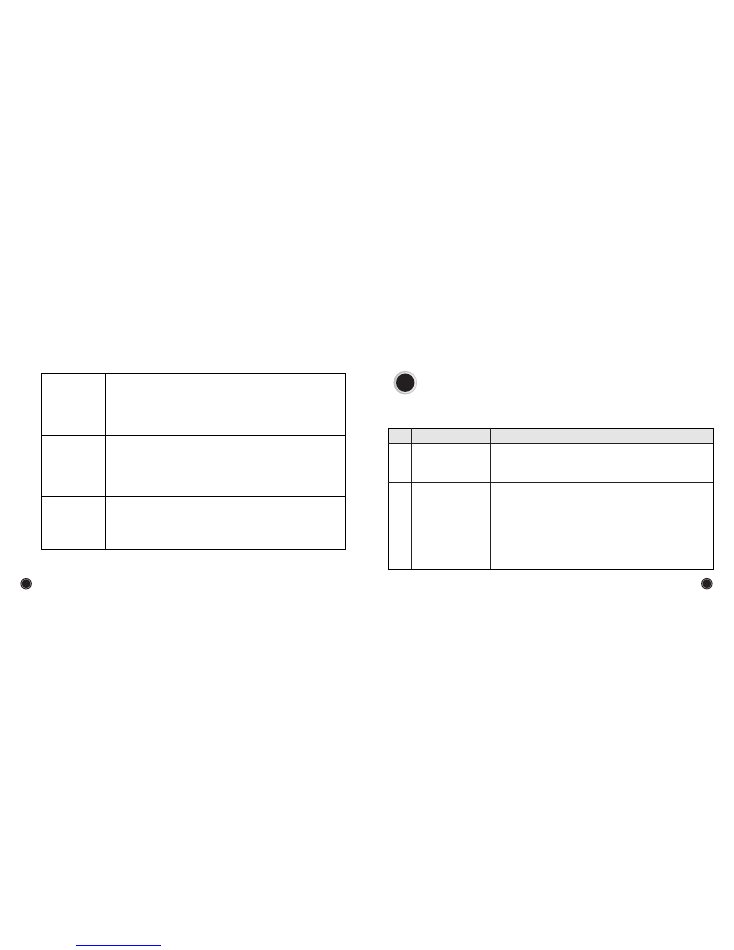
CONTENTS
ITEMS
Key No
Setting buzzer sound
level
②
b
E
L
o
F
F
<
Automatic Counting
>
<
Manual Counting
>
S
t
r
A
u
t
o
S
t
r
n
n
A
n
,
20
21
PROCEDURE FOR REMOVING
THE CAUSE OF ERROR
DISPLAY
No
Check the encoder sensor or Encoder Wheel.
Check the gab between feeding Rollers on the
hopper position and adjust the gab with
thickness adjustment screw to feed the notes
smoothly. Change the density level.
Remove suspected note.
Remove suspected note.
Remove suspected note.
Turn off the power and clean each sensor with
enclosed brush or remove something to be
stuck on the sensor
SH
db
Sd
(
OPTION
)
FC
(
OPTION
)
CF
(
OPTION
)
Str ~ Enco
TYPE OF
ERROR
Short note
Double
detection
error
Different
denomination
FAULT CASH
Counterfeit
Failure of
SENSOR
(
S
)
CAUSE OF
ERROR
Thickness gab or
density level is not
proper
A suspected different
denomination
note was detected
(
Sd detection
)
A suspected
counterfeit note
was detected.
(
UV detection
)
A suspected
counterfeit note
was detected.
(
MD detection
)
Sensor is dirty or
something is stuck
on the sensor
7.
ERROR CODES
PROCEDURE FOR REMOVING
THE CAUSE OF ERROR
DISPLAY
No
1. Remove notes placed in the hopper and / or
stacker.
2. Open the upper part of the hopper and remove
the jammed note
(
s
)
.
3. Restart counting operation after clearing the
error by
â“’
key.
4. Check the gab between feeding Rollers on the
hopper position and adjust the gab with
thickness adjustment screw to feed the notes
smoothly.
JAn
TYPE OF
ERROR
Jam
CAUSE OF
ERROR
Note is jammed in
the machine.
When an error occurs, error code will be displayed. Confirm the problem indicated by the error
code and try to remove the error according to the following procedures.
Remove all the notes from the hopper.
Check the gab between feeding Rollers on the
hopper position and adjust the gab with thickness
adjustment screw to feed the notes smoothly.
HF
CHn
Half note
Chained note
Abnormal note is
mixed in the bundle of
notes to be counted.
CAUSE AND TROUBLESSHOOTING
TROUBLES
No
1
)
The power supply cable is not inserted fully.
2
)
The fuse has blown. Replace it. If trouble continues after the
replacement, there is an interal problem in the machine.
3
)
Contact your nearest CDMservice center.
Power is not turned on
even if the power
switch is turned on.
1
)
Hopper guides are not positioned properly.
2
)
Notes are not in a good condition.
3
)
Notes are not placed properly in the hopper.
4
)
The gap is too narrow. Turn the paper thickness adjustment screw to
the direction of
ccllo
occk
kw
wiis
se
e to w
wiid
de
en
n the gap a little.
5
)
The gap is too wide. Turn the paper thickness adjustment screw to
the direction of cco
ou
un
ntte
errccllo
occk
kw
wiis
se
e to n
na
arrrro
ow
w the gap a little.
6
)
The surface of the feeding drum or rollers is dirty.
(
Clean the
surface
)
Note feeding is not
carried out smoothly.
Notes are fed
intermittently.
Chain, double errors
occur frequently.
2 or 3 notes are
caught at a time.
8.
TROUBLESHOOTING
If a problem occurs, please check the following “Troubleshooting Guide”. By taking the corrective
measures suggested, you will be able to resolve the problem. If the problem is persisted, please
contact your nearest CDM service center.
23
22
Note 1.
Note 2.
CAUTION
Sensors are used for the counting system in this machine. As these sensors
are of optical construction, the system may cause miscounting if dust or dirt
are stuck on the sensors.
Clean the sensors with enclosed brush.
Pieces of paper, dust and / or trash etc. accumulated in the hopper and / or
stacker may be taken into the machine: this may cause malfunctioning of the
machine.
Clean the hopper and stacker in the same way as above.
1
)
Before the hopper is opened, make sure to turn off the power switch.
2
)
Clean the machine after turning off the power.
3
)
Do not use chemicals for cleaning the machine.
24
25
9.
SELF CLEANING
1) Dust collector
The dust arose from the counting operation will be gathered in this dust collector and user can
remove the dust easily with the simple disassembling of this device.
2) Cleaning method
â‘
Before cleaning, power off completely.
②
Disassemble the dust collector.
③
Clean the inside of the dust collector, Fan, cover and so on with the brush.
â‘Ł
When the cleaning is over, Please assemble the dust collector.
CAUSE AND TROUBLESSHOOTING
TROUBLES
No
1
)
Same as above No
2
)
Stacker vane is bent or folded.
2
Notes are not arranged
properly in the stacker.
1
)
See No
of Error Codes on page 21
2
)
Check No
of this troubleshooting guide
2
5
Double errors occur frequently.
1
)
Foreign material is stuck on the feeding drum or rear guide.
(
Remove clips, adhesive tape, etc.
)
Abnormal sound during
counting.
1
)
Some notes are left in the stacker
2
)
When operation is stopped due to an error, remove notes
from stacker and press
â“’
key.
1
)
Press the
â“’
key or turn on and off the power switch to see
the condition of the machine.
2
)
See No
of Error Codes on page 21
3
)
Contact your nearest CDM service center.
9
Counting does not start
automatically when notes are
placed on the hopper.
The following error code is
displayed on the LED display.
Str : Start Sensor Error
LEft : LEET Sensor Error
rHt : RIGHT Sensor Error
End : END Sensor Error
Enco : Encoder Sensor Error