Full Text Searchable PDF User Manual

Dear Customers
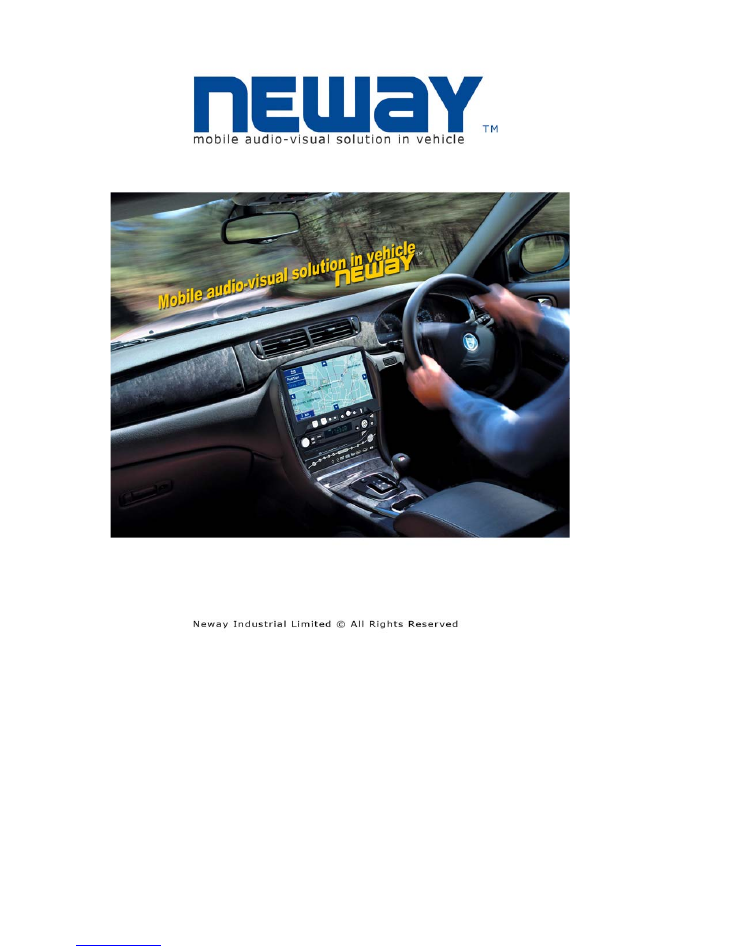
Thank you for purchasing our TFT LCD monitor .
This product incorporates the new international integrated circuit that powers the
high quality TFT & TFD modules. Our monitors feature low power consumption,
superior quality screens that produce no X-ray radiation, to reduce eye strain &
improve picture quality, plus many other features, and a modern stylish compact
design. These monitors are ideal for cars, trucks, buses, boats, airplanes, or
anywhere else a mobile display is needed. Ideal uses include mobile video in
vehicles, boats, small aircraft, etc. We have designed our products to ensure that
you will have years of trouble free enjoyable viewing
Important Safeguards & Precautions
1. Only use the included power adapters to avoid damaging the electrical
components
2. Do not open the unit or remove the back panel. If service is required please
call a qualified service technician
3. Do not expose the monitor to direct sunlight, heat, or humid conditions for
prolonged periods of time
4. Avoid dropping the unit or any other sudden impact that could damage the
unit.
5. For the best picture quality avoid viewing in direct sunlight & keep the screen
clean.
6. Do not use chemicals or cleaning products to clean the monitor. Simply wipe
with a soft cloth. If it should become soiled wipe with a damp towel and then
dry.
If you do not plan to use the monitor for extended periods of time on during
thunderstorms unplug the unit as a precaution
CONTENTS
•
Functions………………………………
•
Remote Control………………………..
•
Cable Identification…………………….
•
On Screen Display Menu……………..
•
Tchnical specs…………………………..
•
Accessories……………………………...
•
Troubleshooting…………………………
To install the touch screen drivers and for information relating to the
operation of the touch screen and its features please read the Users
Manual section of the included mini disk. Open my computer>right click
on drive w/ mini disk> left click explore>scroll down to Users Manual>left
click on that.
Ⅰ
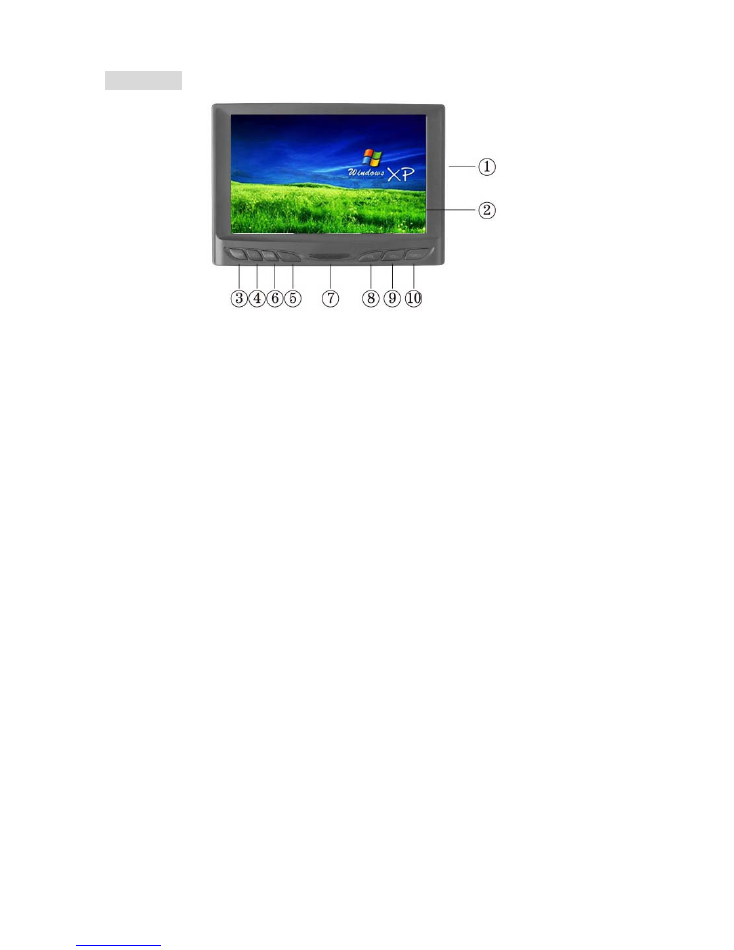
.FEATURES
1. AV: AV input with SKS jack
2. TFT LCD Screen
3. PC/AV: computer/AV optional
4. <: Program selection key or using to select function in OSD
5. >: Program selection key or using to select function in OSD
6. MENU: Display MENU key
7. IR sensor
8. VOL-: Volume key or used to adjust the numberof selected
function in OSD
9. VOL+: Volume key or used to adjust the numberof selected
function in OSD
10. POWER: ON/OFF/STAND BY
Ⅱ.
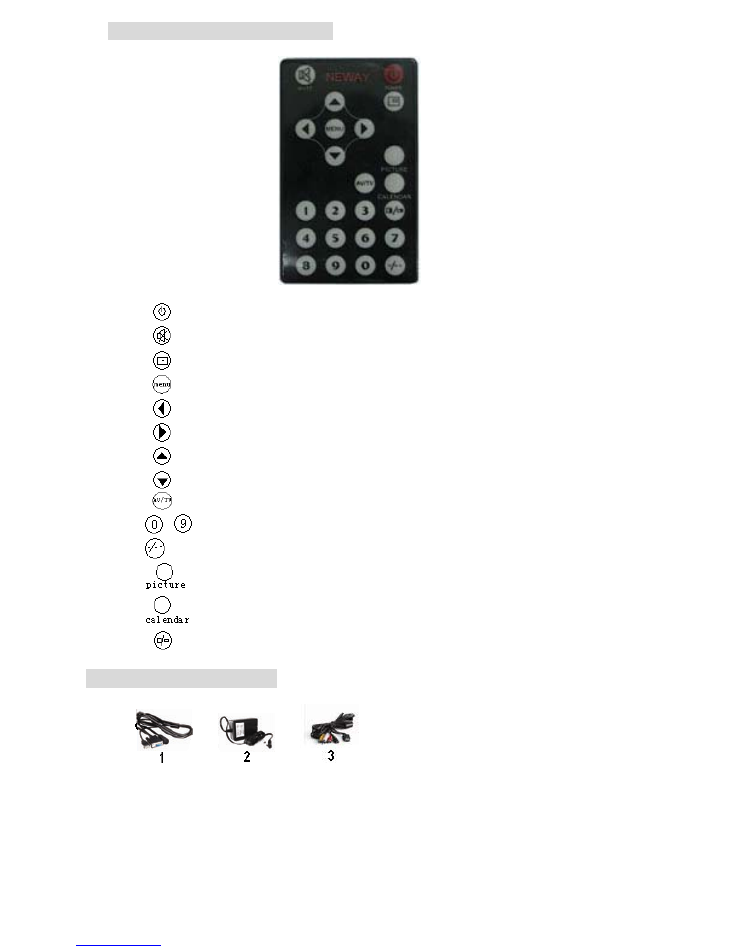
REMOTE CONTROL FUNCTIONS
: POWER ON/OFF
: MUTE
: Display inputted mode
: Display MENU key
: Volume down or to adjust the value of setting function
: Volume up or to adjust the value of setting function
: Selection key
: Selection key
: AV1,AV3, PC switch
~
: Number keys (NO USE)
: Unit, double-digit, three-figure.(NO USE)
: NO USE
: NO USE
: NO USE
Ⅲ.
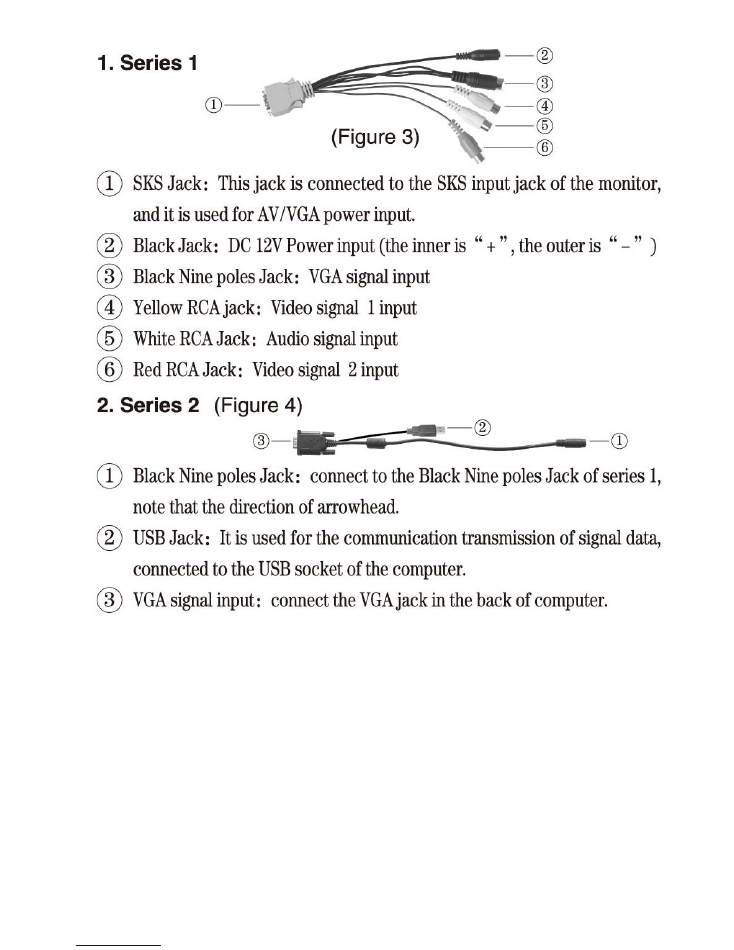
CABLE IDENTIFICATION
1.
VGA & Touch screen Cable- Connects the USB & VGA Wires to the
Computer & to The Aux Cable
2.
DC12V adapter
3.
AV cable
Ⅳ.
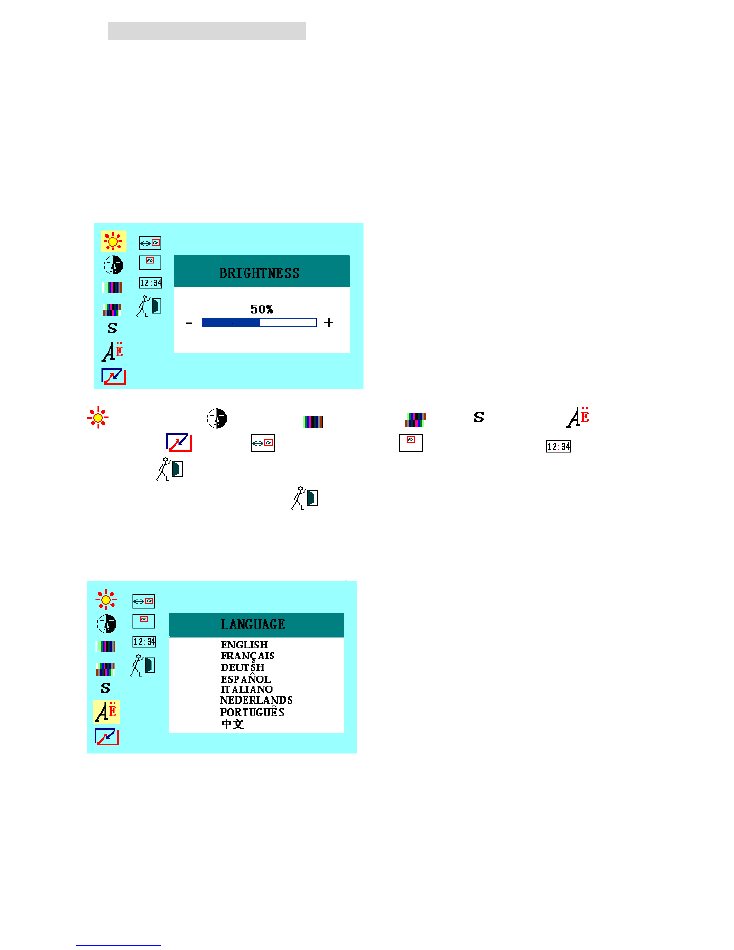
ON SCREEN DISPLAY MENU
After properly connecting the cables, turn it on and, press the menu button on either
the remote or on the front of the monitor. This will all you to use the “^ ”, “ v” (on the
remote controller), “< ”, and “>”(on the unit) arrows to navigate through the menu in
OSD mode so you can change the settings to your personal preferences. After
select functions adjust the functions with -, +, < & > keys on either the monitor or the
remote control .You may also do this at a later time if you desire.
In AV mode:
Picture Adjustments (in order)
brightness ,
contrast ,
saturation,
tint ,
sharpness,
language ,
reset ,
OSD H- position,
OSD V-position ,
OSD
duration,
exit .
After your setting please select
to exit or the OSD will disappear in 5-8sends.
※
Note:
There is 9 language approved of the menu, namely English, French,
Deutsch, Espanol, Italiano, Nederland, Portuguese and Chinese.
IN PC MODE:
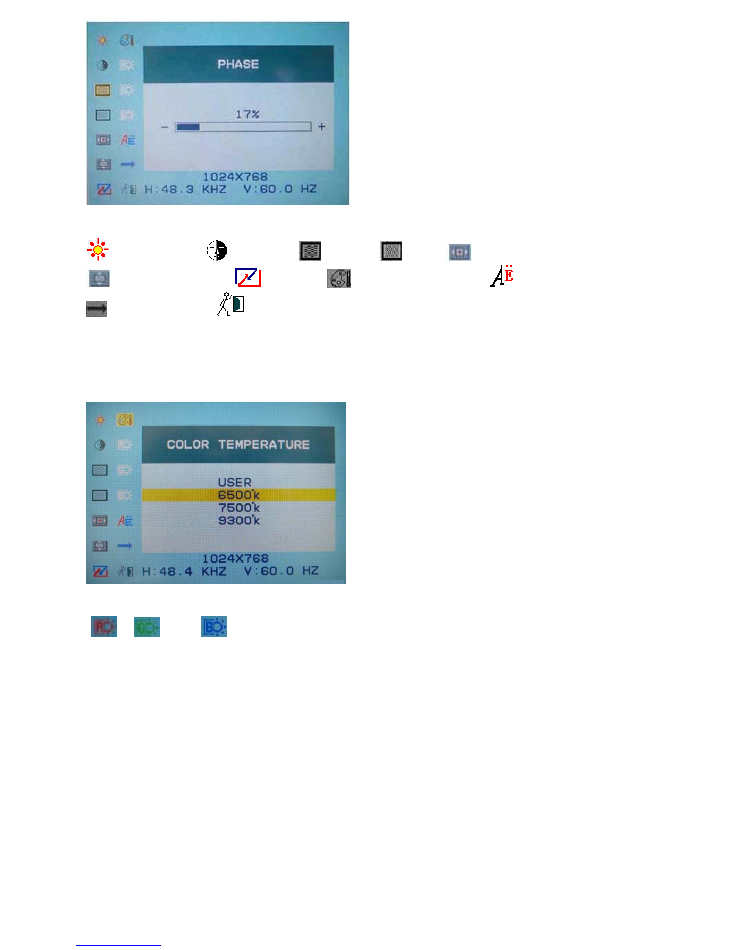
Picture adjustment (in order)
brightness ,
contrast ,
phase,
clock ,
OSD H- position,
OSD V-position,
reset,, ,
color temperature ,
language,
miscellaneous,
exit OSD
※
OSD COLOR TEMPERATURE
You can choose color temperature such as: 6500 Ks, 7500 Ks or 9300 Ks. as picture
Otherwise you can adjust a color temperature that needs the options “USER". Then adjust
“
”, “
” and “
” at will by pressing “–“, “+”, “<” & “>” keys on either the monitor or the
remote control. As picture following
“RED”
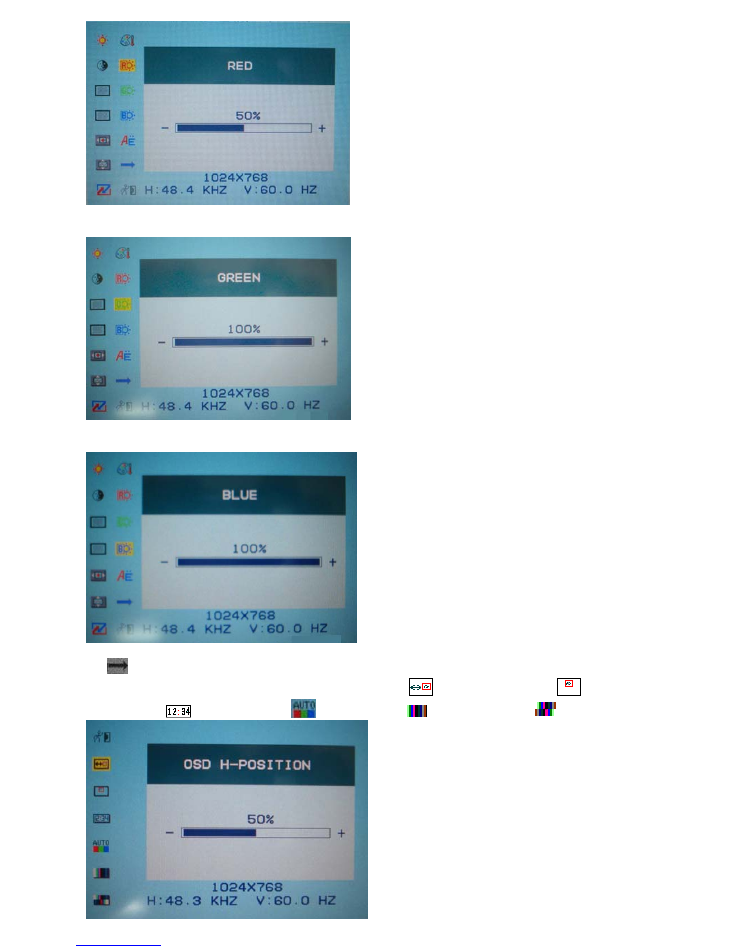
“GREEN”
“BLUE”
※
miscellaneous
OSD miscellaneous is to enter into sub menu “
OSD H- position,
OSD
V-position
OSD duration
auto color,
saturation and
tint” adjustment.

Ⅴ.
TECHNICAL SPECS
TFT LCD Screen 7 inches/177 mm
Highest Resolution 840 x 480 VGA
Brightness 400 cd/m2
Contrast Ratio 200:1
Viewing Angle 130/105 (horizontal/vertical)
Color System PAL-4.43 NTSC 3.58
Audio Output 100mW
Input Voltage DC 10.8-13.8V
Power consumption < 10W
Signal Input PC, AV1, AV 2
Ⅵ.
ACCESSORIES
Ⅶ.
Trouble shooting
Only black –and –white image
i.
Make the level of color saturation and brightness is proper
ii.
Power on but no picture
Make sure the AV& VGA cable are tightly connected from the video out connector &
VGA signal output connector .Make sure you are using the standard power adapter
Coming with the monitor
iii.
Wrong or abnormal colors
If any color is missing, check the cables to make sure it is securely connected .Broken or
loose pins in the cable connector can cause a bad connection
iv.
Remote controller doesn’t work
Check the battery to make sure the battery is installed properly and make sure it is not a
low battery. The signal is interfered by some obstructions
λ
Remark:
If there are still any problems you connect with the related deals
If interruptive image occurs, it maybe that the VGA signal frequency isn’t matched with
normal standard
If is a normal condition that some bright lines appear on the screen when you turn the unit