Full Text Searchable PDF User Manual
Although the Propel Drive is very dependable, never
pedal out farther than you are willing to paddle back.
OWNERS MANUAL
ASSEMBLY, MAINTENANCE, AND WARRANTY
2
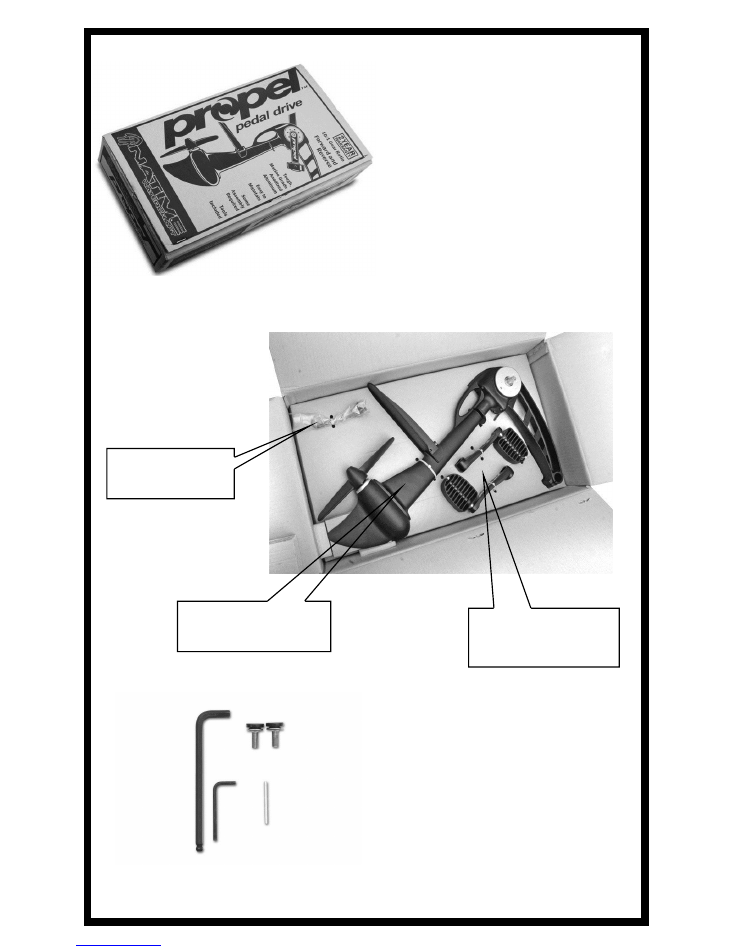
Your Propel comes shipped to
you in this robust box to help
prevent shipping damage and
requires some assembly.
Propel Parts Bag.*
Left and Right
Crankarm Assemblies
Main Propel Assembly
*The Propel Parts Bag
includes:
1) 4mm Hex Wrench
1) 8mm Hex Wrench
2) Crank Arm Bolts
1) Spare Shear Pin
3
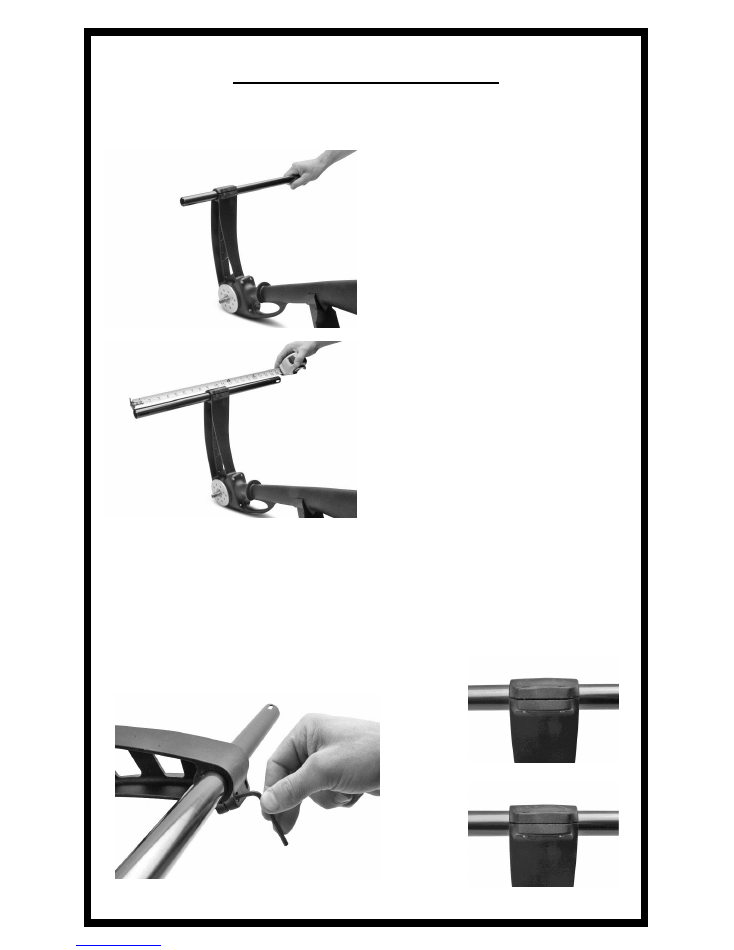
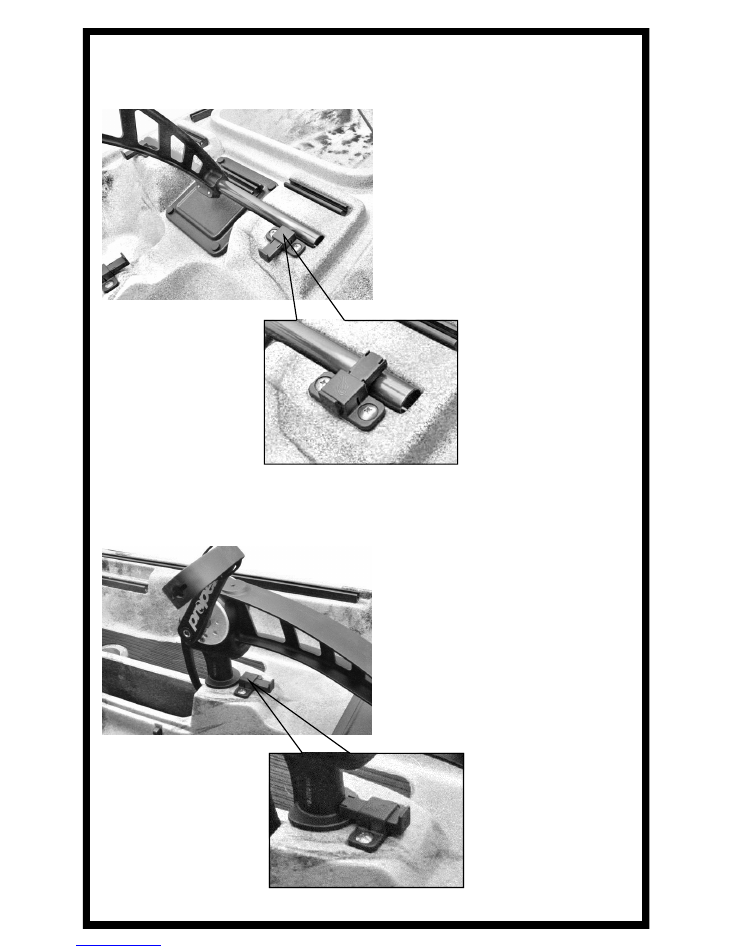
Retrieve your thwart tube from
your kayak and insert the tube
through one side of the thwart tube
clamp.
Center the thwart tube on the
thwart clamp.
Assembly Instructions
Step 1. Install Thwart Tube
Secure the thwart tube in place by tightening the screws to
35 in/lbs (4Nm)
of
torque, utilizing the included 4mm hex wrench . This is just enough pressure
to keep the bar from spinning when rotated with a firm grip.
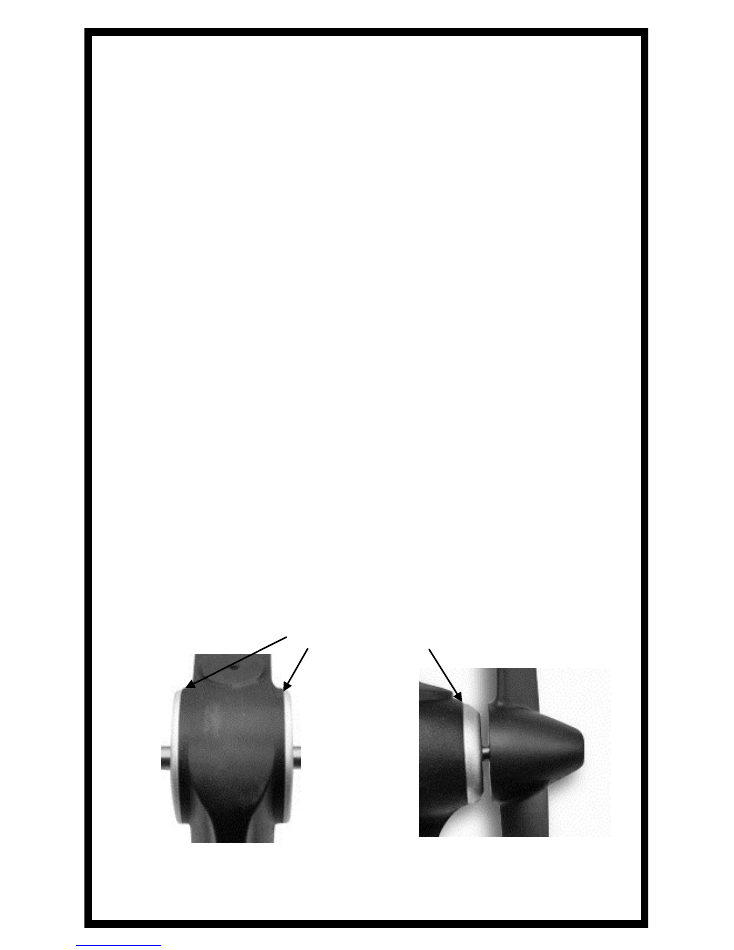
Do not over tighten these two screws. Over tightening will result in
damage not covered under warranty.
Correct
Incorrect
4
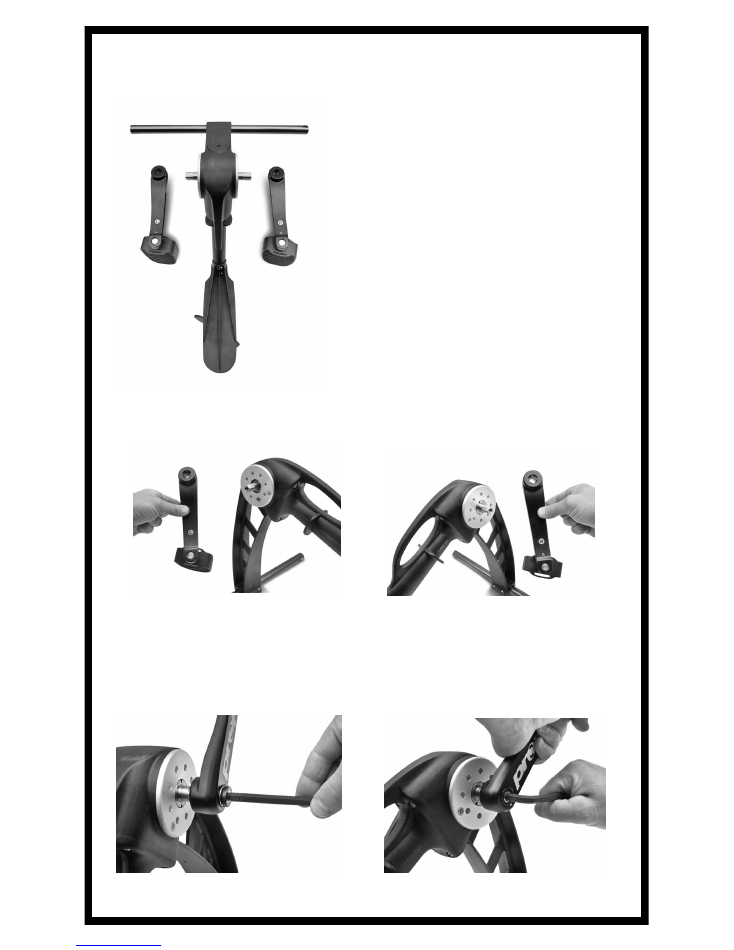
The Crankarms on the Propel, like
a bike, are Left and Right specific.
The correct orientation of the Pro-
pel is with the prop facing you and
the thwart away from you, as you
would pedal it in your kayak.
Left Right
2.
Install the Left and Right Crankarms
On the Crankarms and caps are color coded “L” and “R” stickers. There is
also a “L” and “R” laser etched into the Crankarms for future reference.
Left side color coded Orange
Right side color coded Green
Install the Crankarm bolts; starting them by hand and then tightening
to
25 ft/lbs. (35Nm)
utilizing the included 8mm hex wrench.
5
3.
Install your Propel™ in your Kayak
4.
Lock Propel™
Set the aluminum thwart tube into
the half round recesses located in
front of the drive box. Push the
slider latch forward to lock the tube
in place. To remove the Propel™ ,
push the slider latch backward to
unlock the tube, repeat on opposite
side.
Lower the Propel™ through the
drive box. Lock the Propel™ in
position with the slider latch in-
stalled on the front of your drive
box. Replace the drive box cover.
6
Maintenance and Service
Much like the drive train of a bike, the Propel™ will require routine
inspection and maintenance. Native Watercraft recommends maintenance
every 6 months, or 75 days of use. The main purposes of these services are
to ensure the internal gears of the unit remain properly lubricated and the
covers remain tight and sealed. Failure to maintain these two key points may
result in abnormal wearing of the gears and eventual failure of the unit. If
you do not feel comfortable performing the prescribe maintenance, please
contact your local dealer or Native Watercraft for assistance.
Cleaning of your Propel™
Spray off
Propel™
with a water hose after each use, especially after use in
saltwater. Do not use a high pressure car wash type sprayer
.
Regular Maintenance Instructions
Check Covers
The covers are threaded into the Propel™ frame and use thread locker to
ensure they do not come loose due to vibration and the rotational motion of
the spindle. However, to ensure the proper function of the internal gears, it
is important that the covers are completely threaded and flush to the frame.
Visually inspect the top and bottom covers and, if necessary, use a spanner
wrench to tighten. These covers should be inspected before every use. If the
covers are loose, or have been removed, they should be reassembled using
blue thread locker on the cap threads.
Covers should be flush with frame.
Note: Operating the Propel™ with loose covers may result
in damage to the gears that is not covered under warranty.
7
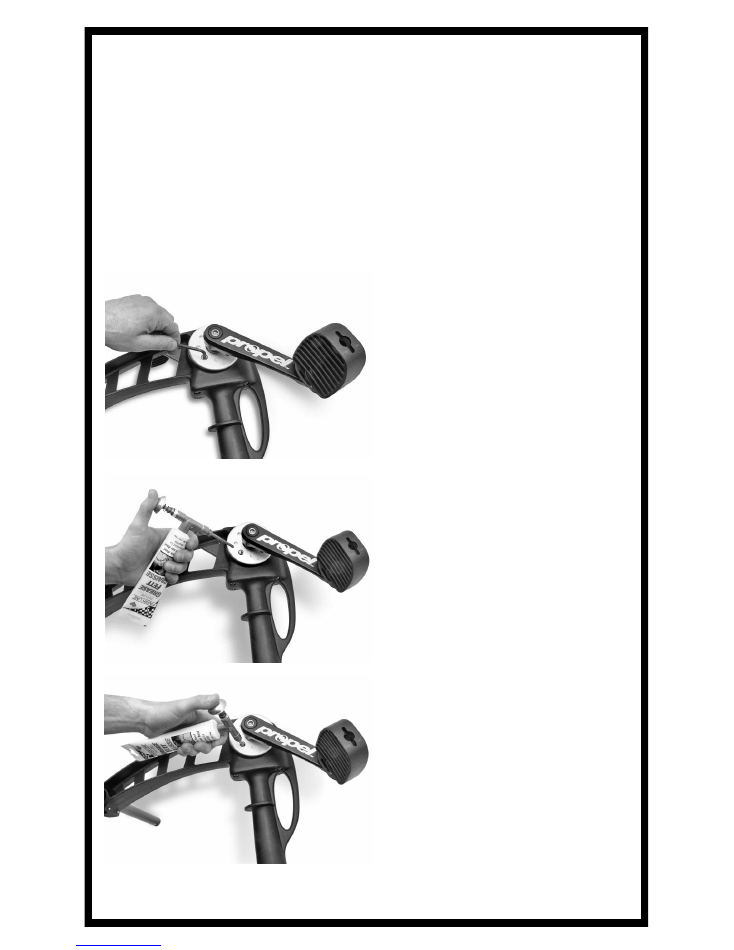
Lubricate Upper Gear Set
Your Propel™ utilizes gears that have been specifically designed for the
most efficient and quiet transmission of your pedaling power. In order to
ensure the same smooth function from the day you first purchased your
boat, the gears will require a small amount of lubrication. Through the
convenient grease port, you will be able to apply grease directly to the
gears using an extended nozzle and Teflon grease. A lubrication kit can
also be purchased from your local dealer.
Inject 2 to 3 pumps of grease
and replace grease port screw.
Rotate crank arms slowly to
apply grease throughout the
gear assembly.
Use an extended nose grease gun
to reach gears.
Remove grease port screw using
a 3/16” hex wrench.

8
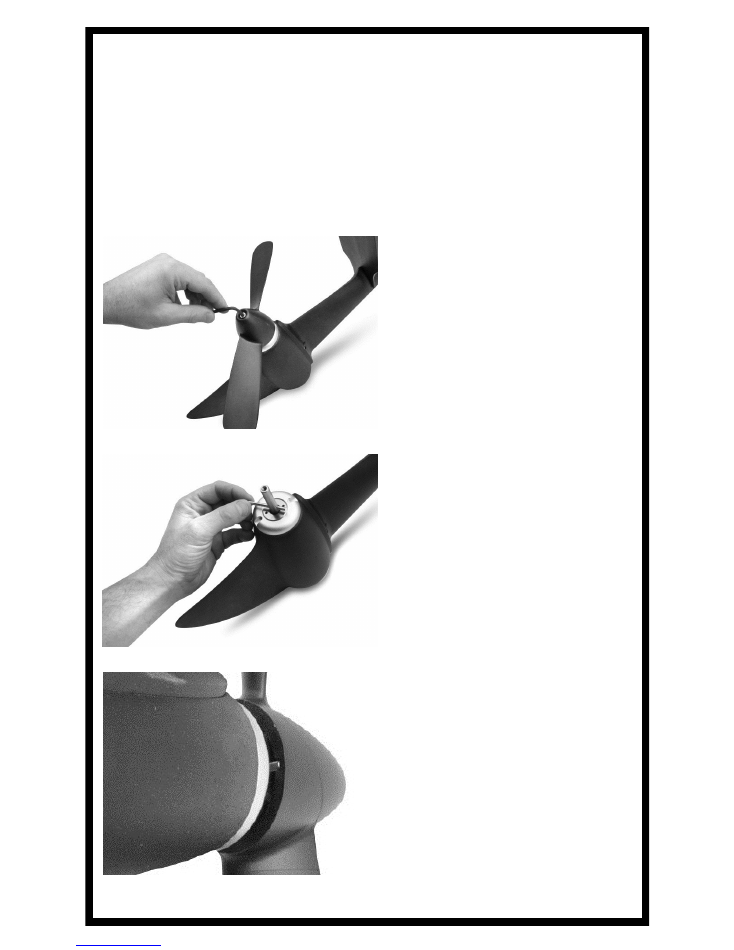
Lubricate Lower Gear Set
Return the cartridge to the main body.
Be careful of gear conflict
during the replacement of the housing.
To avoid damage to gears,
tighten by hand as much as possible, and if you feel resistance, stop
and rotate the propeller spindle counterclockwise a few degrees .
Grease the Propeller Gear
on the cartridge with 2
pumps from the grease gun.
Remove the propeller by
following the “Shear Pin
Replacement” instructions
on the facing page. Next,
remove the cartridge using
a spanner wrench with
3/16” pins.
Grease the Lower Trans-
mission Gear by inserting
the extended nose grease
gun and injecting 2 pumps
onto the gear.
9
Remove the end bolt using a
4mm hex wrench. Pull the prop
straight back to remove the prop
and expose the shear pin.
Shear Pin Replacement
In order to ensure that the gears of your Propel™ are not damage if the prop
is hit during rotation, your propeller is fixed to the drive shaft with a shear
pin. An extra shear pin is included with your new boat to ensure you are
never without your Propel™. In the event that you need a new shear pin,
please contact your local dealer to order replacement components.
Replace the shear pin.
Replace the prop, making sure the
pin sets into recesses the in prop.
Replace the bolt and tighten 1/2
turn past the bolt engagement with
the propeller.
Note: The prop bolt only holds the
prop to the shear pin, it does not
drive the propeller, so it does not
need to be very tight..
10
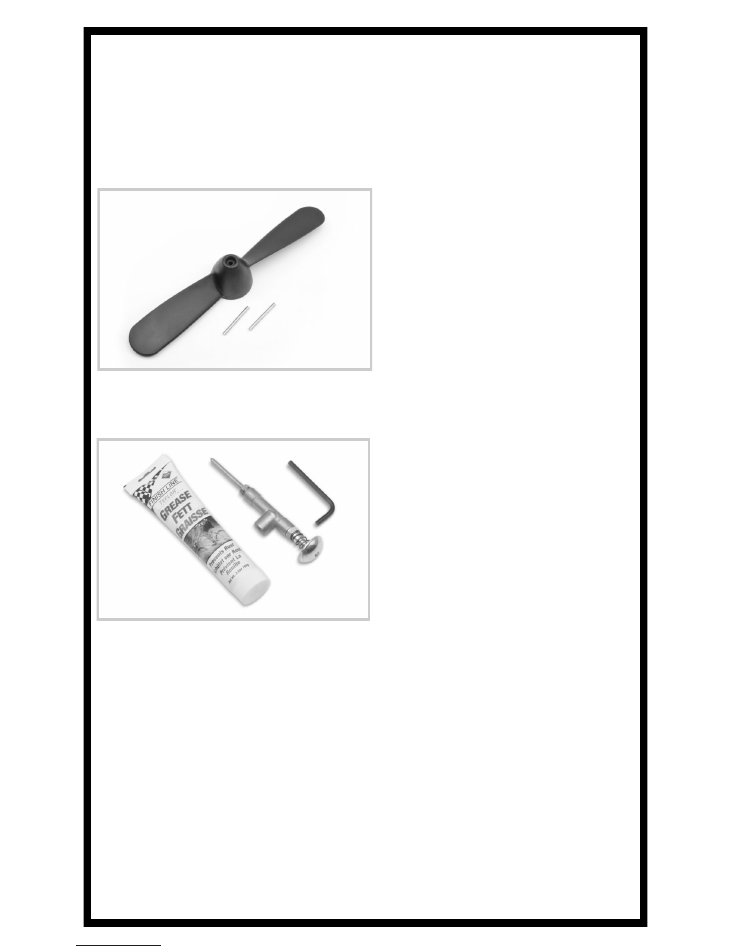
Propel™ Easy Cruz Kit
- Propeller and Shear Pin
Replacement Kit.
- Includes Propeller and 2 Shear
Pins.
Propel™ Lubrication Kit
- For recommended maintenance
of the Propel™ gear system.
- Includes 3.5 oz. of Teflon
lubricant, pump with an extended
nozzle, and 3/16” hex key to
access fill port.
Propel™ Kits
Kit # AKIT001
Kit # APRO002

11

12
WWW.NATIVEWATERCRAFT.COM
Two Year Limited Warranty
We at Native Paddlesports take great pride in the Propel™ line of boats we
produce. Your Propel™ is manufactured to stringent standards, built for
endurance, and sold exclusively by our outstanding dealer network. Native
Watercraft guarantees and warrants your new Propel™ against defects in
workmanship and materials for two years from its purchase date.
For warranty to be valid, the original purchaser must have registered their
boat via the Native Watercraft website within two weeks of the purchase.
Warranty is only valid to the original owner.
To submit a warranty claim:
The warranty claim must be submitted to Native Watercraft by the dealer
from which the Propel™ was originally purchased. In submitting the
claim, the dealer will need:
Serial Number of the Boat
Serial Number of Propel™
Proof of purchase
Physical inspection of the Propel™ or pictures of the area in question
This warranty does not cover:
Normal wear to the Propel™
Damage caused by abuse or misuse
Damage caused by failure to perform routine maintenance
Failure due to improper transportation
Issues resulting from modifications to the boat or Propel™ that were
made by anyone other than a Native Watercraft Authorized Dealer.