Full Text Searchable PDF User Manual
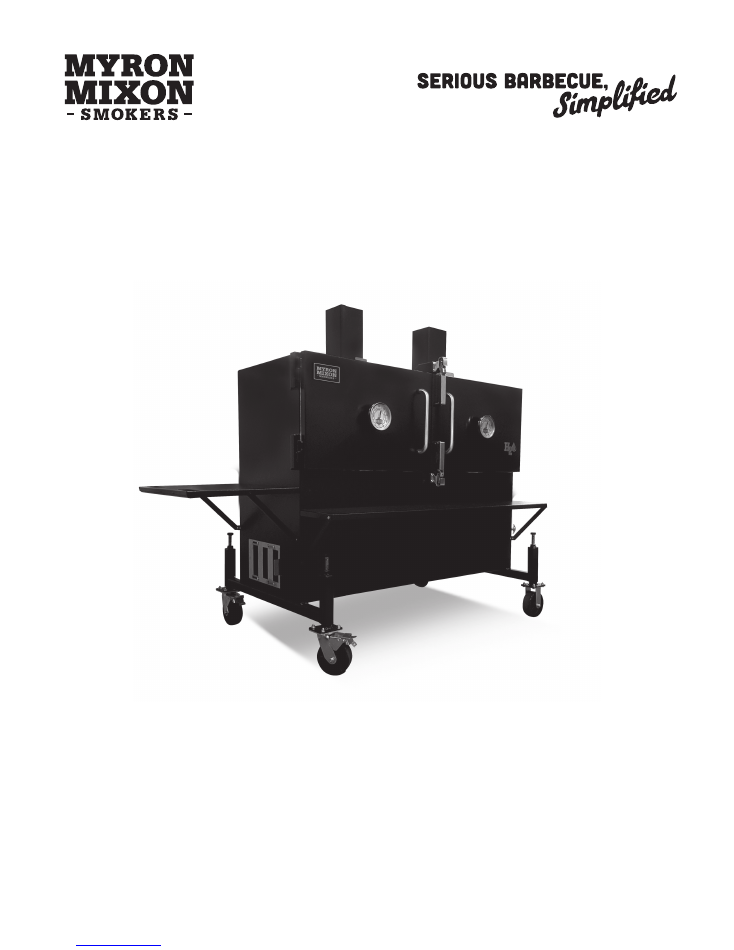
H2O Smokers
Owner’s manual


Table of Contents
Introduction
4
Components of your Smoker
5
Flat Rack Model Overview
6
Operating Instructions
9
Maintaining Your Smoker
10
Frequently Asked Questions
11
Myron’s Times and Temperatures
13
Recipe – The Perfect Brisket
14
Myron Mixon Smokers Guarantee
15

4
Introduction
We would like to congratulate you on the purchase of your new Myron Mixon Smoker. With proper operation and
maintenance, your smoker will provide you with delicious barbeque and years of smoking enjoyment.
Our goal is to ensure that you’re satisfied and that your “Barbecue is Simplified”
We’ll help you get started with this Owner’s Manual.
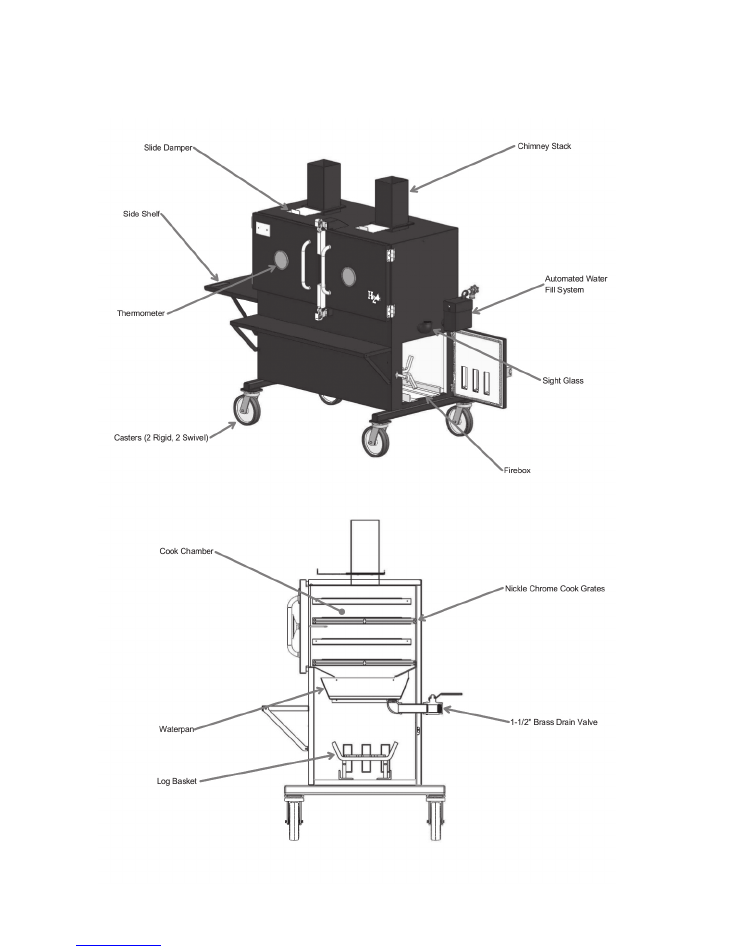
All Myron Mixon Smokers come standard with the following:
• 100% Fully Insulated with a Military Grade Insulation
• Automatic Water Fill System
• Durable Black Powdercoat Finish with zinc primer base coat
• Our “Waterpan Technology”™ runs the entire length of the cook chamber
• Firebox with SS Slide Damper Assembly
• (2) Chimney Stacks with SS Slide Damper Assembly
• Myron Mixon Smokers Temperature Gauge
• 6” Casters (2 Rigid, 2 Swivel)
• (2) Myron Mixon Shelves (Front and Side on MMS 36” MMS 48”, and MMS 60”)
• Stainless Steel Handle
• Flexible rack locations
• 4 in the 36”, 48”, 60” and 72”
• 5 in 72”XC, 1K
• Durable nickel chromed wire racks specific to Myron Mixon Smokers
• (2) racks – 36”, 48”, 60” and 72”
• (3) racks – 72”XC, 1K
• Sight Glass Elbow
• 1.5” Drain
• Myron Mixon Badge of Approval
5
Components of your H2O Smoker
6
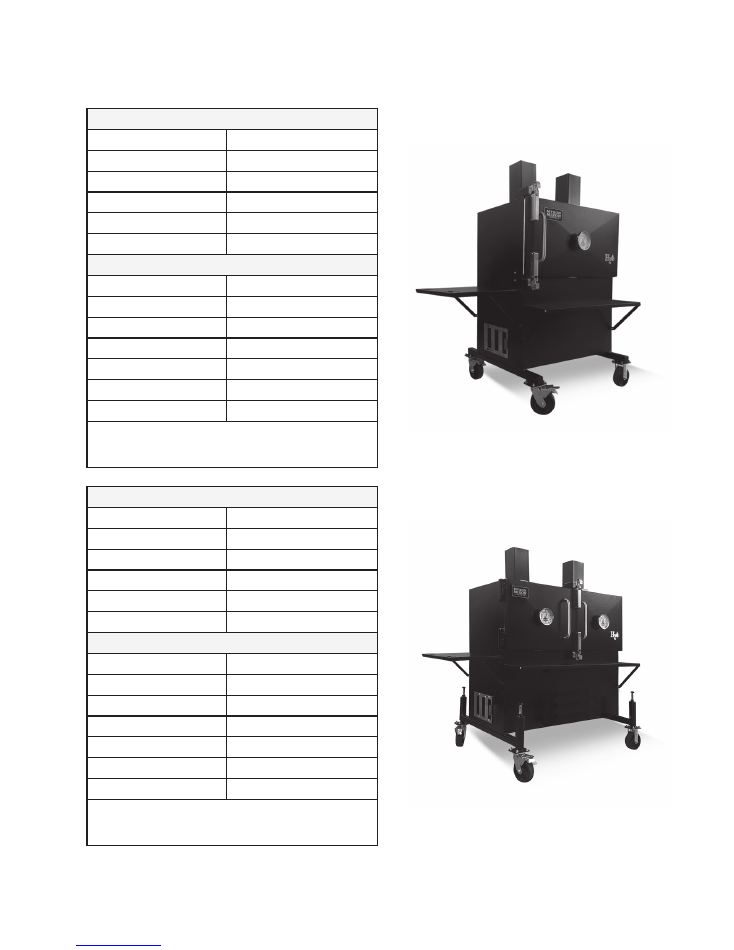
flat rack models
MMS-36
Approximate Weight
680 lbs.
Overall Dimension
36” W x 24” D x 68.5” H
Cooking Racks
2 STD, 4 MAX
Cooking Rack Dimensions
32.75” x 21.75”
Cooking Capacity*
712 sq/in STD, 2849 sq/in MAX
H20 in Waterpan**
4.5 gal
Cooking Capacity (variable)***
Whole Chickens (4-6lbs.)
16
Chicken Wings
96 STD, 192 MAX
Bone in Pork Butts (7-9lbs.)
16
Brisket (15-18lbs.)
6
Babyback Ribs
16 STD, 32 MAX
St. Louis Ribs
10 STD, 20 MAX
Whole Hog
60 lbs.
*Can be increased by adding 3rd or 4th grate.
**Capacity varies depending on fl oat box setting. Numbers represent
middle setting.
***Varies based on size, cuts & placement of meats.
MMS-48
Approximate Weight
840 lbs.
Overall Dimension
48” W x 24” D x 68.5” H
Cooking Racks
2 STD, 4 MAX
Cooking Rack Dimensions
44.75” x 21.75”
Cooking Capacity*
1947 sq/in STD, 3893 sq/in MAX
H20 in Waterpan**
6.1 gal
Cooking Capacity (variable)***
Whole Chickens (4-6lbs.)
20
Chicken Wings
128 STD, 256 MAX
Bone in Pork Butts (7-9lbs.)
20
Brisket (15-18lbs.)
8
Babyback Ribs
24 STD, 48 MAX
St. Louis Ribs
14 STD, 28 MAX
Whole Hog
80 lbs.
*Can be increased by adding 3rd or 4th grate.
**Capacity varies depending on fl oat box setting. Numbers represent
middle setting.
***Varies based on size, cuts & placement of meats.
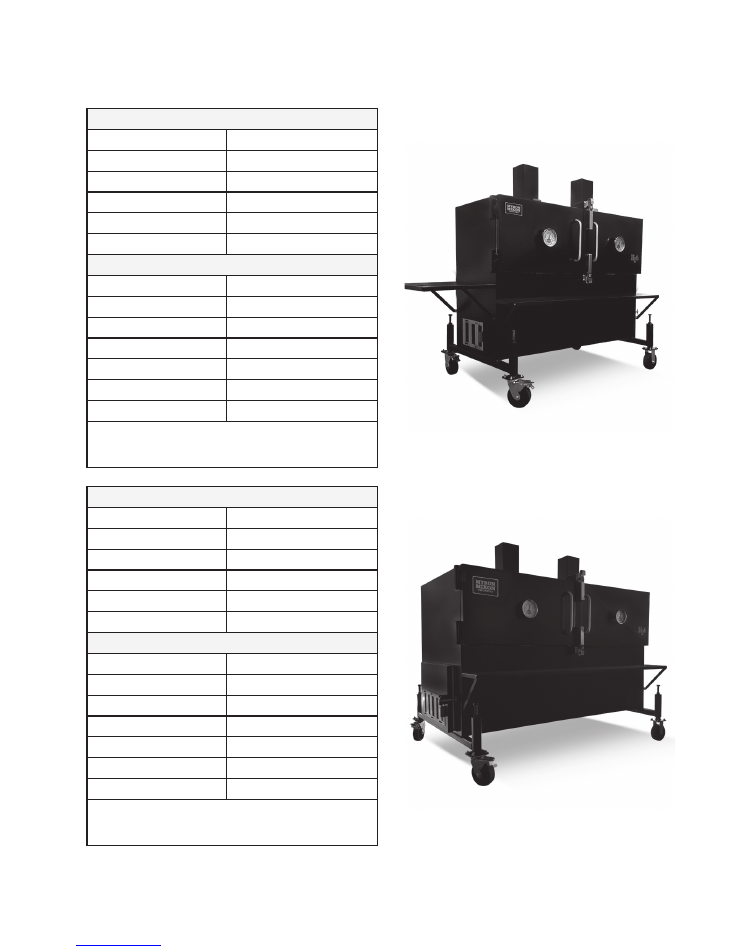
*Leveling legs are an optional upgrade.
7
MMS-60
Approximate Weight
960 lbs.
Overall Dimension
60” W x 24” D x 68.5” H
Cooking Racks
2 STD, 4 MAX
Cooking Rack Dimensions
56.75” x 21.75”
Cooking Capacity*
2469 sq/in STD, 4937 sq/in MAX
H20 in Waterpan**
7.8 gal
Cooking Capacity (variable)***
Whole Chickens (4-6lbs.)
28
Chicken Wings
168 STD, 336 MAX
Bone in Pork Butts (7-9lbs.)
28
Brisket (15-18lbs.)
10
Babyback Ribs
28 STD, 56 MAX
St. Louis Ribs
18 STD, 36 MAX
Whole Hog
15 0lbs.
*Can be increased by adding 3rd or 4th grate.
**Capacity varies depending on fl oat box setting. Numbers represent
middle setting.
***Varies based on size, cuts & placement of meats.
MMS-72
Approximate Weight
1440 lbs.
Overall Dimension
72” W x 36” D x 68.5” H
Cooking Racks
2 STD, 4 MAX
Cooking Rack Dimensions
68.75” x 32.75”
Cooking Capacity*
4436 sq/in STD, 8872 sq/in MAX
H20 in Waterpan**
16.5 gal
Cooking Capacity (variable)***
Whole Chickens (4-6lbs.)
56
Chicken Wings
300 STD, 600 MAX
Bone in Pork Butts (7-9lbs.)
64
Brisket (15-18lbs.)
16
Babyback Ribs
52 STD, 104 MAX
St. Louis Ribs
34 STD, 68 MAX
Whole Hog
250 lbs.
*Can be increased by adding 3rd or 4th grate.
**Capacity varies depending on fl oat box setting. Numbers represent
middle setting.
***Varies based on size, cuts & placement of meats.
*Leveling legs are an optional upgrade.
*Leveling legs are an optional upgrade.
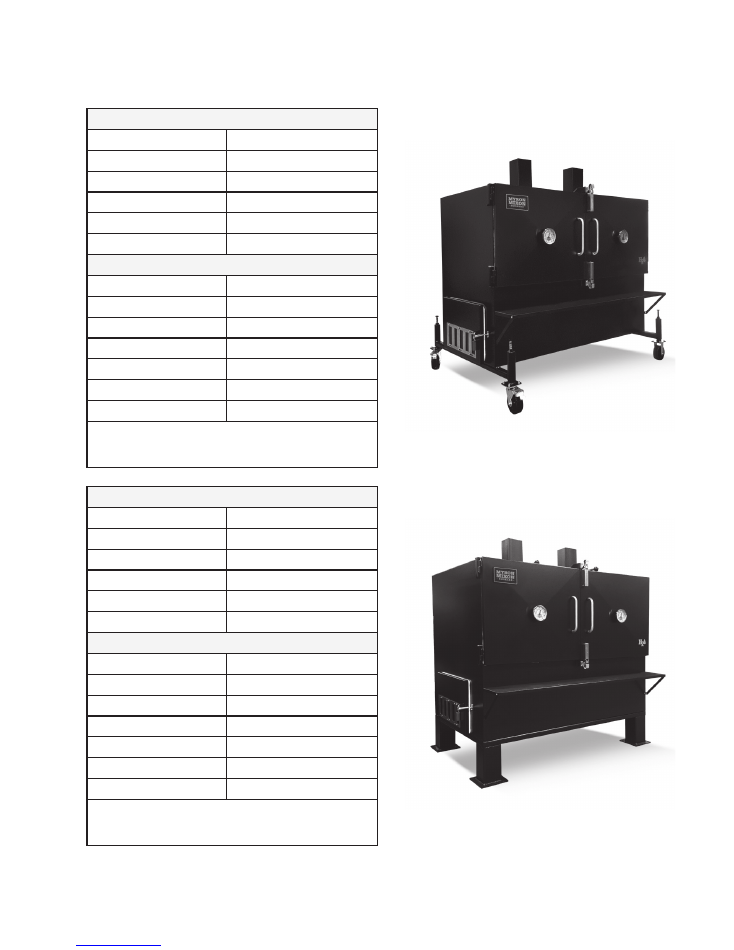
8
MMS-72xc
Approximate Weight
1540 lbs.
Overall Dimension
72” W x 36” D x 80” H
Cooking Racks
3 STD, 5 MAX
Cooking Rack Dimensions
68.75” x 32.75”
Cooking Capacity*
6654 sq/in STD, 11,091 sq/in MAX
H20 in Waterpan**
16.5 gal
Cooking Capacity (variable)***
Whole Chickens (4-6lbs.)
84
Chicken Wings
450 STD, 750 MAX
Bone in Pork Butts (7-9lbs.)
96
Brisket (15-18lbs.)
24 STD, 32 MAX
Babyback Ribs
78 STD, 130 MAX
St. Louis Ribs
51 STD, 85 MAX
Whole Hog
2 x 250 lbs.
*Can be increased by adding 3rd or 4th grate.
**Capacity varies depending on fl oat box setting. Numbers represent
middle setting.
***Varies based on size, cuts & placement of meats.
MMS-1k
Approximate Weight
2000 lbs.
Overall Dimension
72” W x 36” D x 72” H
Cooking Racks
3 STD, 5 MAX
Cooking Rack Dimensions
68.75” x 41.25”
Cooking Capacity*
8441 sq/in STD, 14123 sq/in MAX
H20 in Waterpan**
28.8 gal
Cooking Capacity (variable)***
Whole Chickens (4-6lbs.)
105
Chicken Wings
600 STD, 1000 MAX
Bone in Pork Butts (7-9lbs.)
120
Brisket (15-18lbs.)
30 STD, 40 MAX
Babyback Ribs
102 STD, 170 MAX
St. Louis Ribs
66 STD, 110 MAX
Whole Hog
3 x 250 lbs.
*Can be increased by adding 3rd or 4th grate.
**Capacity varies depending on fl oat box setting. Numbers represent
middle setting.
***Varies based on size, cuts & placement of meats.
*Leveling legs are an optional upgrade.

9
Operating Instructions
Leveling your Smoker:
Make sure your smoker is on a flat, even surface to ensure that the water in your water pan remains level to maintain
even heat. Optional leveling legs are available, if needed, to use:
• You’ll need a small level and 1 1/8 hand wrench (open end, socket or adjustable).
• Adjust the casters until the level indicates that each side of your smoker is at a level position. It is important to check
each side and not just the front of your smoker. Leveling legs are an add-on option.
Seasoning your smoker: Seasoning the racks will help prevent any initial rusting.
Start by pulling a rack half way out. Using a non-stick spray start seasoning the racks moving from the back to the
front of the rack until you’re close to the outside of the cook chamber. Push the rack in and season the rest of the
rack. Although the cooking spray doesn’t damage the paint trying not to get any on the outside of the smoker will
minimize clean up.
Repeat on the other rack.
We also suggest you season the interior of the smoker and cook chamber door.
Filling up your water pan:
Make sure the drainage valve on the back of the smoker is in the closed position and the valve to the water float box
is in the open position. Attach the garden hose to your smoker and the float valve in the water will automatically cut off
the water supply when the water pan reaches the desired level. To ensure that no debris gets into the float box let the
hose run for a few minutes before attaching it. You can set the water levels in the pan from approx. 1 ½ to 2 ½ inches
by adjusting the top of your float box. Placing the screws in the top notch will result in approx. 1 ½ inches of water.
Screws in the middle notch will result in approx. 2 inches. Placing the screws in the bottom notch will result in approx.
2 1/2 inches of water in the water pan.
To ensure that there is no debris gets into the float box let the hose run for a few minutes before
This smoker cannot be used without water in the pan. DO NOT open the drain valve while the smoker is in
operation or while burning wood or hot coals are still in firebox.
Now let the H20 technology do the rest.
We recommend that you use the sight glass periodically to check that water levels are still adequate.
If there is water in the bottom then your levels are all set.
Starting your fire:
Start by fully opening the chimneys and side dampers. There are several ways you can opt to start the fire; such as,
charcoal, fatwood, a chimney starter or even lighter fluid. There is no wrong way to fire up your smoker, it’s up to you
and your comfort and confidence in your technique.
We here at Myron Mixon Smokers prefer using charcoal to start our fires.
Once the fire has started, increase your temperatures using your fuel source of choice. If the temperature goes
beyond your desired cooking temperatures, gradually begin to close the side dampers to the firebox to bring the
temperature down.
Shutting your fire down:
If you have the time we recommend you let your fire burn out by keeping the dampers wide open to burn clean. If you
are pressed for time you can choke your fire by closing the dampers on the side doors. To accelerate it even more
you can choke your chimney dampers as well.

10
Maintaining Your Smoker
Cleaning Instructions
Cook Chamber
• For your safety keep the hose on until the water has cooled to at least a safe temperature of 110 degrees or less.
• Keeping the hose on will ensure that water remains in the water pan as it cools. If the hose is turned off and the
water evaporates prior to it cooling the heat could warp or damage the water pan.
• Shut off the water supply and drain the water pan and water inlet box by opening the drain valve.
• Caution: the liquid coming out of the drain could be extremely HOT.
• Use a water hose or pressure washer to rinse out the water pan through the drain valve.
• Remove the food racks and clean thoroughly.
Float Valve
• Remove the top off the float box and clean the float valve of any grease that may have flowed back in during the
cook. Failing to do so could cause the valve to stick in either the open or closed position.
Firebox
• Rake out all ashes and coals and then sweep or shop vac to remove any excess, if desired
Do not rinse or wash the firebox. This is a dry area and introducing water could cause rust.
Outside of Smoker
• Use Zep stainless steel cleaner or similar product. Spray Zep onto a soft cotton cloth (not directly) on the smoker
and rub. A little goes a long way. This is gentle on the smoker, leaves no residue and helps keep the sheen. You can
find this product at your local home stores.
Although all our smokers are primed and painted with an industrial Powdercoat to protect it from the elements.
We suggest getting a cover for added protection. You can find our custom smoker covers at
www.myronmixonsmokers.com

11
Frequently Asked Questions
What is the advantage of “Waterpan Technology”™?
Our “Waterpan Technology”™ makes our smokers the best on the market. The waterpan helps to keep a consistent
temperature in the smoker by circulating the heat and helps the meat retain its natural moisture and tenderizes
throughout the cooking process. This provides better yields on your meats, eliminates hot spots, and reduces fuel
consumption. Because this process is so forgiving you could cook hot and fast if that is your cooking preference.
Are the cooking grates removable?
Yes, the cooking grates can easily be removed for cleaning with soap and water.
What types of fuel can I use?
You can cook with charcoal, wood or a combination of both. Some of the larger models also offer a gas
burner package.
How long does it take for my smoker to get up to temperature?
The time to get up to temperature can vary depending on the size of your smoker and the temperature you are
cooking at, but typically within 30 minutes. The real benefit of the “Waterpan Technology”™ comes when the water
starts to boil and the steam.
How do I control my temperature?
Once you reach your desired temperature, you can easily control the temperature with the dampers on either side of
the firebox.
Do I have to keep water in my pan?
Yes. Our smokers use the water in the waterpan to keep your meat moist and tender. Because our firebox sits directly
below the cook chamber it provides a safety barrier between the meat and the fire to prevent the meat from burning
or drying out. If you do not keep water in the water pan, you could potentially damage your smoker and cause a
grease fire.
How much water do I need to have in my waterpan and how much does the pan hold?
Using any of the manufactured pre-set settings on the automated water fill system will provide anywhere between 1
1/2” to 2.5” of water.
My waterpan is rusting, is that normal?
On the standard models it is normal to have some rusting in the waterpan. To prevent it from rusting, you can spray
it with cooking spray before you fill it. The more it is used and seasoned the less likely you are to see rusting. The
certified UL/NSF units have a stainless steel waterpan.
What if I don’t have a hose hookup available?
The sight glass elbow on the side of your smoker next to the water system provides you a manual solution to filling
your smoker when access to a hose is not available. You can also visually maintain your water level through the side
sight glass as well so that you do not have to open your door and risk losing any heat. You could fill your waterpan
water pan capabilities
Water in Gallons
1K
Hole
Position
in. of Water
36”
48”
60”
72” and XC
in. of Water
Water in
Gallons
Top
1.5
3.3
4.5
5.8
12.3
1.625
17.6
Middle
2
4.5
6.1
7.8
16.5
2.625
28.8
Lower
2.5
5.7
7.8
9.8
20.8
3.625
40.2

12
from the front if you have not started your cook yet. We do not recommend maintaining your water levels this way,
since it would cause you to open the door frequently which would cause you to let out all that precious heat.
Where do you ship?
We can ship anywhere. We offer freight services that cover the entire United States. While we do not provide
exportation services, we can prepare your smoker for an overseas shipment and refer you to a company who can
assist you with getting the smoker to its final destination. You tell us where you want your smoker and we will help
you get it there.
Why do you not suggest gas assist on your smaller flat rack models?
Gas assist can be done on the smaller flat racks; however we are so confident in our quality construction that we
feel it unnecessary to maintain temps. Our smokers are 100% fully insulated using a military grade insulation, which
means you just don’t need gas. Our smokers get up to temperature and maintain their temperatures like no other
smoker on the market. In addition with the “Waterpan Technology”™ you will also have the ability to cook much hotter
and faster if you choose. No need to stay up all night spending a lot of time tending to your fire.
Does the grease go out of the same drain as the water?
Yes. The waterpan is slightly pitched towards the drain, so after your cook, all of the grease and the water will easily
drain out together.
What size is the drain valve?
The drain is a 1.5” NPT valve. If you want to extend the drain with a pipe or a hose, you would need a 1.5” NPT Male
thread fitting to connect them.
Can I still cook in the winter?
Yes. Our smokers are fully insulated and will maintain their temperatures even in the colder winter climates.
Do need I a temperature control fan?
Due to our quality construction and insulation, our smokers have unmatched heat retention and can maintain
temperatures throughout the cook, we believe we would be steering our customers wrong by offering the Guru
upfront. We recommend that you get your smoker, get comfortable with your fire, and cook on it a few times.
If after a few cooks you still want to use a temperature control fan then you can contact us to order control fan
adaptable dampers.
Can I start my fire directly on the bottom of the firebox chamber?
We do not recommend it. We suggest starting your fire on the grates provided. It is ok for the coals to fall through and
smolder on the floor. By elevating your fire it allows for oxygen to pass nicely through underneath while optimizing our
damper heights.
Can I remove my firebox basket/grate?
Yes, they come out for easy cleaning.
Do I need to move my meat around during the cook?
One of the biggest benefits of our smoker is that you do not need to continually open the door to move your meat
around. Our “Waterpan Technology”™ ensures a consistent cooking temperature while keeping your meat moist and
tender. There is little to no variance in temperature in the cook chamber. Just be sure to keep about a fingertip width
in between your meats to allow the smoke to move freely and evenly in the cook chamber.
How often do I need to add fuel to my fire?
There are so many variables that play a part such as, the flow of oxygen, temperature you are cooking at, how much
meat you are cooking, fuel sources used or type of wood. A good rule of thumb once you are up to temperature, you
generally only need to add a small split log every 30 - 45 minutes. Many of the smaller models such as the 36, 48 and
60 burn charcoal also at about 2 to 3 lbs. per hour. Fuel consumption can vary on the larger model smokers but we
are confident you will use much less fuel under the same temperature conditions of any model you are cooking on

13
now due to our technology and construction.
How do I clean my float valve?
We recommend cleaning the float valve after every cook or at a minimum after every 5 cooks or so to make sure it
stays clean and doesn’t get caked with grease. You can simply wash it with dish detergent and water.
Will the exterior of the smoker rust if I leave it outside uncovered?
All of our smokers go through a 2-step, powder coat process. Powder Coating is tougher in the face of weathering
and chemical erosion. It provides a superior and attractive finish and is four times more durable than paint. We apply
a zinc primer base coat for added durability and we then finish with a high-temp exterior powder coat, which is rated
for 5,000 salt spray hours. We do however recommend covering your smoker when not use to protect it from
the elements.
Myron’s Times and Temperatures
Boston Butts Bone In – 8 lbs.
• Smoker temp - 325 degrees
• Cook time 3 to 4 hours
• Internal temp should be 200 degrees
• Let rest at least 3 – 4 hours
Brisket – 14 lbs.
• Smoker temp 325 degrees
• Cook time 3 to 4 hours
• Internal temp should be 200 degrees
• Let rest at least 4 – 5 hours wrapped in blankets
Shoulder – 18 lbs.
• Smoker temp 250 degrees
• Cook time 8 hours
• Internal temp should be 200 degrees
• Wrap in blankets to rest
Chicken Pieces
• Smoker temp 275 degrees
• Cook time 2 ½ hours
Ribs
• Smoker temp 275 degrees
• Cook time 4 – 5 hours

14
The Perfect Brisket Recipe
What I like to eat and what I like to cook, especially in competition, are often different things. Now, I’ve been around
pork my entire life. It is a key component of any barbeque competition and as such it’s been the focus of my career.
Pork, from whole hog to shoulder and ribs, dominates. I know very well how to cook a pig, so pork’s supremacy never
bothers me. But, as delicious as it is, I get burned out on pig. At home I like to cook beef, both on and off the smoker.
Whether it’s a nice thick porterhouse or a hunk of a brisket’s burnt end, beef is my favorite meat to eat when I’m in my
backyard, and I’d wager heavily – which I don’t unless I’m planning to take somebody’s money – that I’m not alone.
Below you’ll find my favorite brisket recipe. I hope you enjoy it as much as I do! – Myron Mixon
Serves 20 to 25 people
One 15 to 20 pound whole untrimmed brisket, preferably wagyu
What you’ll need:
2 aluminum pans
Injector
Blanket
1 recipe beef injection and marinade
1 recipe beef rub
Beef injection and marinade (Makes 1 quart)
• 1 quart water
• 3 tablespoons Minor’s brand beef base or beef bouillon powder
• 3 tablespoons Minor’s brand beef au jus concentrate or 1 15-ounce can strong beef broth
In a large stockpot over high heat, bring the water to a boil. Add the beef base and the beef au jus to the water, and
stir until dissolved. Remove from the heat. If reserving for a later use, let the liquid cool; then pour it into a jug or
bottle. This can be stored in the refrigerator for up to 2 weeks.
Beef Rub (Makes about ¼ cup)
• 1 teaspoon kosher salt
• 2 tablespoons coarsely grounded black pepper
• 1 teaspoon sugar
• ½ teaspoon chipotle pepper powder
• ½ teaspoon chili powder
• 1 teaspoon garlic powder
• 1 teaspoon granulated dried onionIn a large bowl, combine all the ingredients thoroughly. You can store this rub in
an airtight container indefinitely.
Trim your brisket.
Place the brisket, fat side up, in an aluminum baking pan. Inject it by eyeballing 1-inch squares all over the brisket
and injecting half of the beef injection in those squares. Flip the brisket over, fat side down, and pour the remaining
injection/marinade over the meat. Cover and refrigerate for at least 6 hours or overnight
Thirty minutes before you are ready to cook the brisket, heat a smoker to 350 degrees F.
Remove the brisket from the marinade and discard the marinade. Using your hands, apply the beef rub all over the
meat. Place the brisket in a clean aluminum baking pan, place the pan in the smoker, and cook for 2 ½ hours.
Remove the pan from the smoker and cover it with aluminum foil. Put it back into the smoker and cook for another 1
½ hours or until the temperature in the point end of the meat reaches 205 degrees.
Remove the pan from the smoker and wrap the pan, still covered with aluminum foil, in a thick blanket. Let it rest at
room temperature for 3 to 4 hours.

15
Unwrap the pan, discard the foil, and remove the brisket, taking care to save the accumulated juices. Set the brisket
aside. Strain the juices of all the grease, and pour the juices into a medium saucepan. Warm the juices over medium
heat and allow them to come to a simmer. Meanwhile, slice the brisket against the grain; try to make the slices as
consistently sized as possible. Place them on a warm platter and pour the juices over them, Serve immediately.
Myron Mixon Smokers Guarantee
Here at Myron Mixon Smokers, we are passionate about barbeque and stand behind each and every smoker we build and sell. All of
our smokers pass Myron Mixon’s championship standards for craftsmanship and are manufactured and tested to exceed our highest
standards for quality. Like your treasured family recipes, our smokers are engineered to be enjoyed for generations to come.
We guarantee that our smokers will be free of defects in material and workmanship for a period of two years following date of
delivery. Mechanical components (burners, valves, regulators, extraction fans, control panel, motor, bearings and gear boxes) are
guaranteed by the manufacturer’s vendor warranty for one year parts and labor following date of delivery.
Myron Mixon Smokers’ liability and obligation is limited to repair or replacement of the product, at the discretion of Myron Mixon
Smokers, provided the purchaser returns the claimed defective product to Myron Mixon Smokers or an Authorized Distributor with
transportation charges prepaid and, upon examination of the product by Myron Mixon Smokers, the product is deemed defective.
This LIMITED WARRANTY SHALL NOT COVER the following: Charcoal trays, fire grates, log lighters, front and side shelves,
cosmetic issues such as scratches, dents, corrosions, or discoloring by heat, abrasive and chemical cleaners, surface rust or the
discoloration of surfaces. Paint is not warrantied and may require touch up. RUST is not considered a manufacturing or
materials defect.
This warranty extends to the original purchaser only and is non-transferable. Only consumers purchasing from one of our authorized
Sales Associates may obtain coverage under the limited warranty.
Myron Mixon Smokers will not provide any warranty coverage, unless claims are in compliance with all the terms of the warranty
statement included with the smoker or rotisserie purchased. The purchaser must follow the proper return procedure and, to request
warranty service, will need to provide:
1. The sales receipt or other evidence of the date and purchase
2. A description of the problem
3. Written communication to Myron Mixon Smokers via email or postal mail
Because Myron Mixon Smokers cannot control the product owner’s use and maintenance of equipment manufactured by Myron
Mixon Smokers, this warranty does not cover: any component or part disassembled after the product is received by the owner,
damage due to improper cleaning, blown fuses, gaskets, electrical elements or accessory components not installed or supplied by
Myron Mixon Smokers. Wetting or hosing down the electrical boxes and elements may cause electrical failures and are not covered
by warranty.
Myron Mixon Smokers will not be liable for any damage that is a result of misuse, abuse, altercation of the original design,
unauthorized service or breakage of items. Myron Mixon Smokers will not be liable for any loss or consequential damage or
expense accruing directly or indirectly from the use of equipment covered by this warranty including any production or product
losses or other damages, which may occur as a result of equipment malfunction or failure.
This warranty is exclusive and is in lieu of all other warranties and representations, expressed or implied, and all other obligations
or liabilities on the part of Myron Mixon Smokers. Myron Mixon Smokers’ liability in all events is limited to, and shall not exceed, the
purchase price paid.

855-464-7853
Mon-Fri: 8am - 5pm
180 Cross Road
Waterford, CT 06385
www.myronmixonsmokers.com