Full Text Searchable PDF User Manual
Service Manual UC 3 WLAN LINUX
METTLER TOLEDO
Page 1 / 10
27/10/2011
Mettler-Toledo (Albstadt) GmbH ME 2201 9298
UC 3
Service Manual
UC3 WLAN Linux
ME-Num. 2201 9298 Printed in Germany 0111/8.11
Edition : January 2011
Address
Mettler - Toledo (Albstadt) GmbH
D-72458 Albstadt, Germany
Tel.
+49 74 31 / 14-0
Fax
+49 74 31 / 14-640
Internet
:
http://www.mt.com

Service Manual UC 3 WLAN LINUX
METTLER TOLEDO
Page 2 / 10
27/10/2011
Mettler-Toledo (Albstadt) GmbH ME 2201 9298
Contents
Page
Verzeichnis wo die Blockschaltbilder sind
H
\\De03sw23b\TEAM\Retail\LW\Blockschema
R:\Retail\LW\Blockschema
Service Manual
UC3 WLAN Linux
METTLER TOLEDO
Seite 3 / 10
27/10/2011
Mettler-Toledo (Albstadt) GmbH ME 2202 9298
1. General
The WLAN option allows the scale to be operated just as if it is connected to your network
via a cable. The only difference is the setting of the network parameters. Please have the
configuration settings of your WLAN infrastructure at hand.
1.1. Modifying WLAN option settings
WLAN option settings take place at the operating system level. After startup, the scale
runs either the Startup Wizard (in the case of starting up the scale for the first time) or the
scale application:
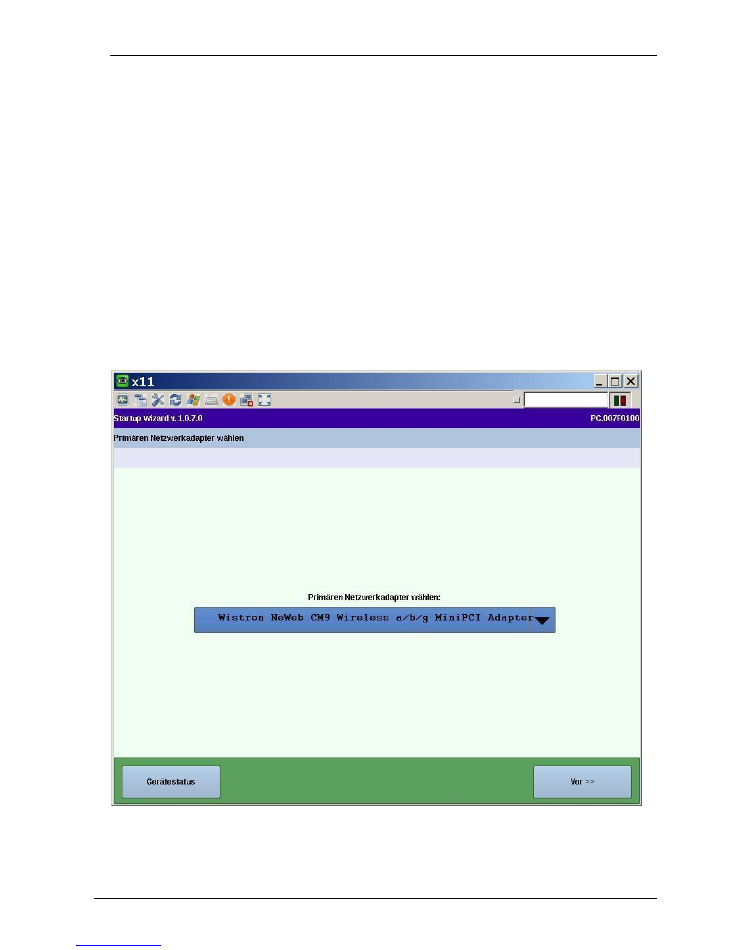
In the case of an entirely WLAN connection, set the primary network adapter to "
Wistron"
Service Manual UC 3 WLAN LINUX
METTLER TOLEDO
Page 4 / 10
27/10/2011
Mettler-Toledo (Albstadt) GmbH ME 2201 9298
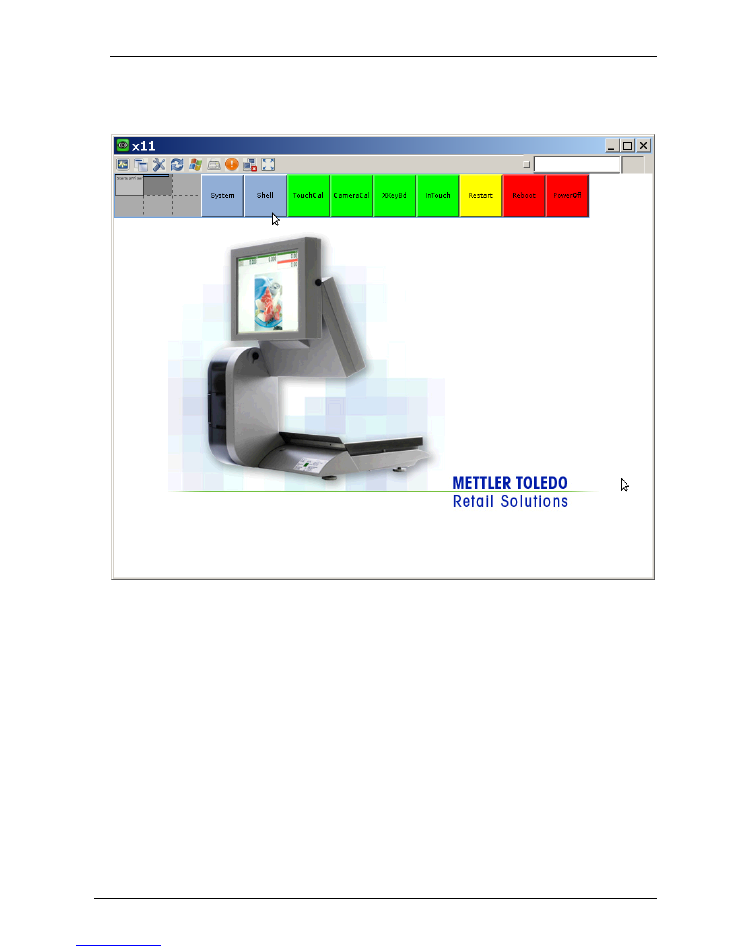
The key combination <SHIFT><ALT><CURSOR-RIGHT> switches to the second desktop
in which the settings can be made:
Service Manual UC 3 WLAN LINUX
METTLER TOLEDO
Page 5 / 10
27/10/2011
Mettler-Toledo (Albstadt) GmbH ME 2201 9298
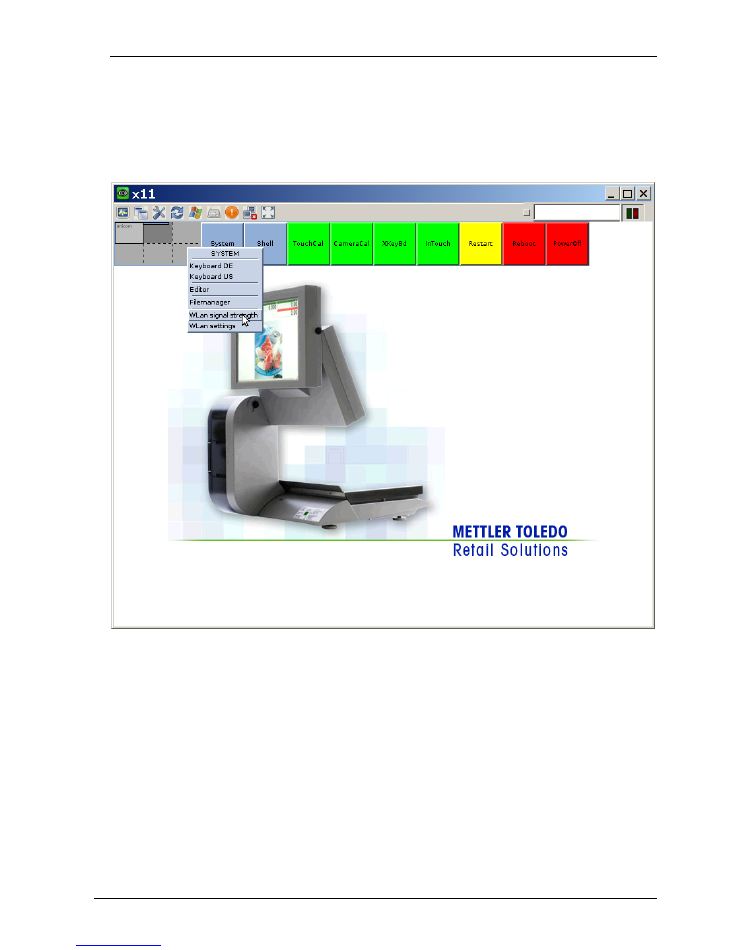
The WLAN module settings are found on the System Menu:
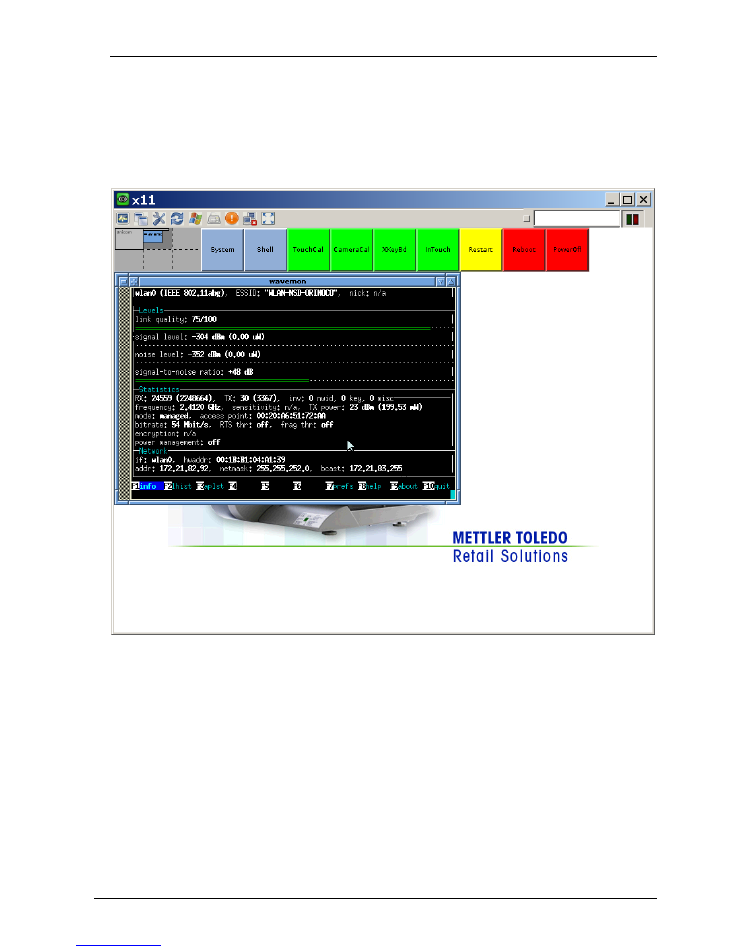
WLAN signal strength (wavemon tool)
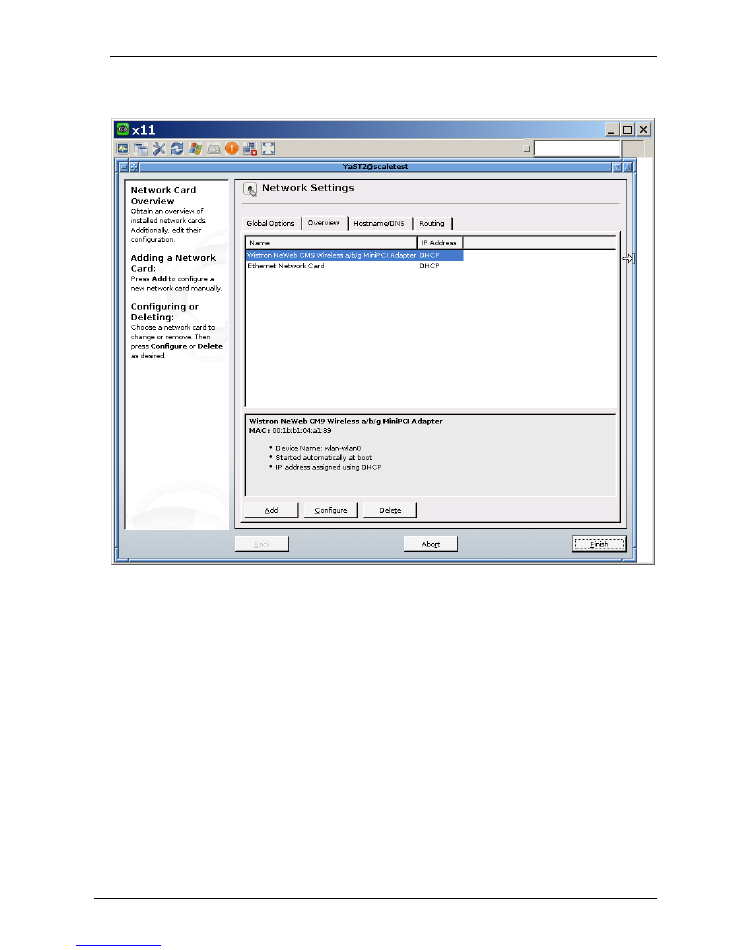
WLAN settings (yast2 lan)
Service Manual UC 3 WLAN LINUX
METTLER TOLEDO
Page 6 / 10
27/10/2011
Mettler-Toledo (Albstadt) GmbH ME 2201 9298
WLAN signal strength
indicates the signal quality. Note this is the signal quality of an
associated access point. The scale should therefore be configured for
WLAN settings
in
advance.
Service Manual UC 3 WLAN LINUX
METTLER TOLEDO
Page 7 / 10
27/10/2011
Mettler-Toledo (Albstadt) GmbH ME 2201 9298
WLAN settings:
Service Manual UC 3 WLAN LINUX
METTLER TOLEDO
Page 8 / 10
27/10/2011
Mettler-Toledo (Albstadt) GmbH ME 2201 9298
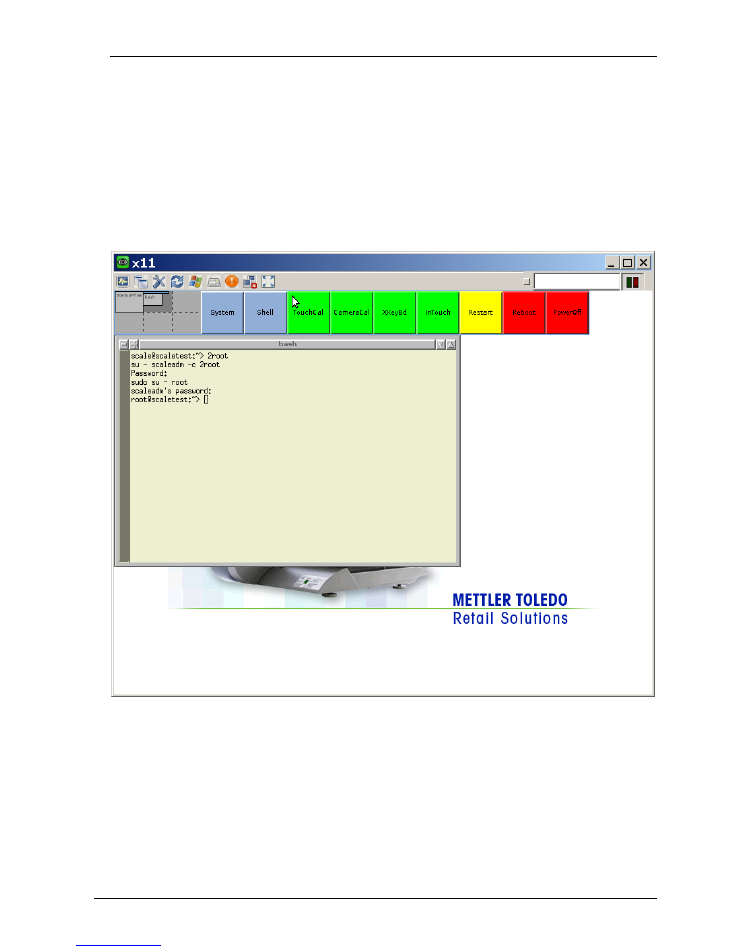
Alternatively - the console for purists:
Opening a shell and running the script ‘2root’ causes the required authorisation requests to
appear (the script ‘2root’ has a double password request, because the user changes from
‘scale’ via ‘scaleadm’ to ‘root.’):
Please request the preset password from a service technician.
Service Manual UC 3 WLAN LINUX
METTLER TOLEDO
Page 9 / 10
27/10/2011
Mettler-Toledo (Albstadt) GmbH ME 2201 9298
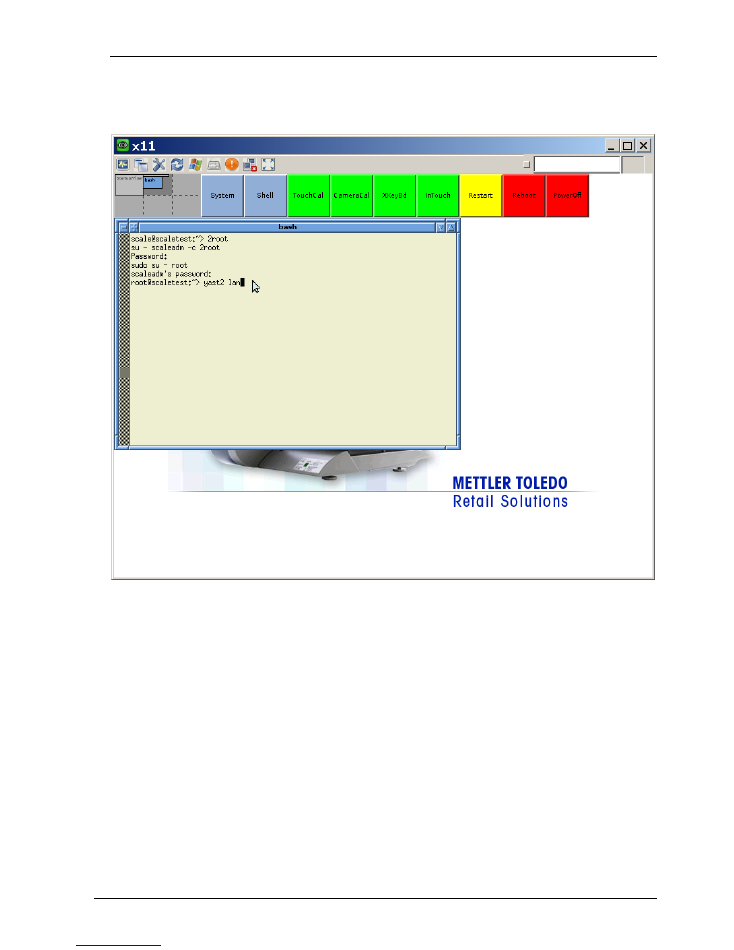
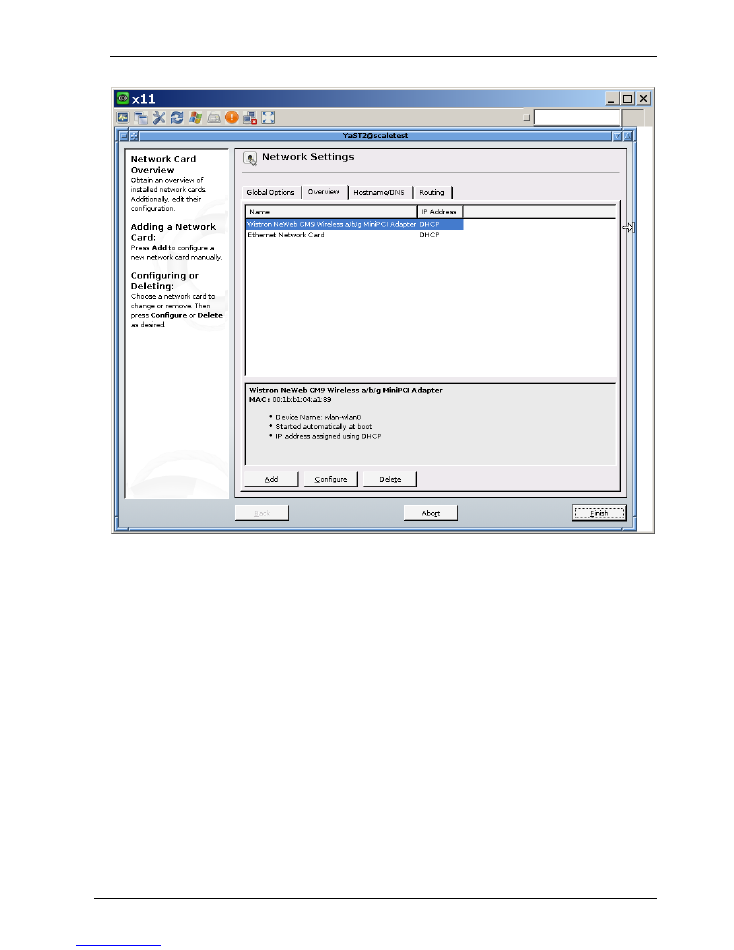
The relevant LAN/WLAN settings are made by running the OpenSuSE setup tool (yast2):
Note:
yast2 is only supplied with the required modules and not with the full extent to which some
users are accustomed
Service Manual UC 3 WLAN LINUX
METTLER TOLEDO
Page 10 / 10
27/10/2011
Mettler-Toledo (Albstadt) GmbH ME 2201 9298
You can adjust the size of the dialog box by dragging its upper left corner with the mouse.
The dialog box can thus be conveniently centred on the menu bar.
The WLAN adapter appears as ‘Wistron NeWeb CM9 Wireless a/b/g MiniPCI’ and its
typical WLAN settings are configured using the menu option ‘Configure.’ After entering the
suitable settings for your infrastructure (‘Next’->‚Next’->‚Finish’), your settings are activated
and yast2 closes automatically.
It is best practice to now reboot the network and perform an initial test.
/etc/init/network restart
ping known_IP_address
If the test fails, check the settings once more (ensure the WLAN adapter uses the ‘ath5k’
kernel module).
Some DHCP servers only assign a lease after a device has been restarted, if settings
have been changed, therefore restarting via 'Reboot' is also an option...