Full Text Searchable PDF User Manual
Quick
Guide
| SYNC
®
2
2
Using the touch screen
Be sure to use these tips when operating the
SYNC
®
2 system:
•
Ensure that your hands are clean, dry and
free of moisture.
•
Touch and release the screen features you want.
•
Notice how the system responds before continuing.
•
Touch anywhere in the quadrant, in addition to the
corners, to access features.
•
Avoid any continuously rapid pressing
of the same button.
•
Clean the display with a clean, soft cloth.
LCD screen/laptop wipes from an electronics
store can also be used. If dirt or fingerprints are
still visible, apply a small amount of alcohol to
the cloth. Never use regular glass cleaner,
alcohol spray, detergent or any type of solvent,
as it could damage the screen.
•
To keep the system operating at peak performance,
your Ford dealership may perform system soft ware
updates when available.
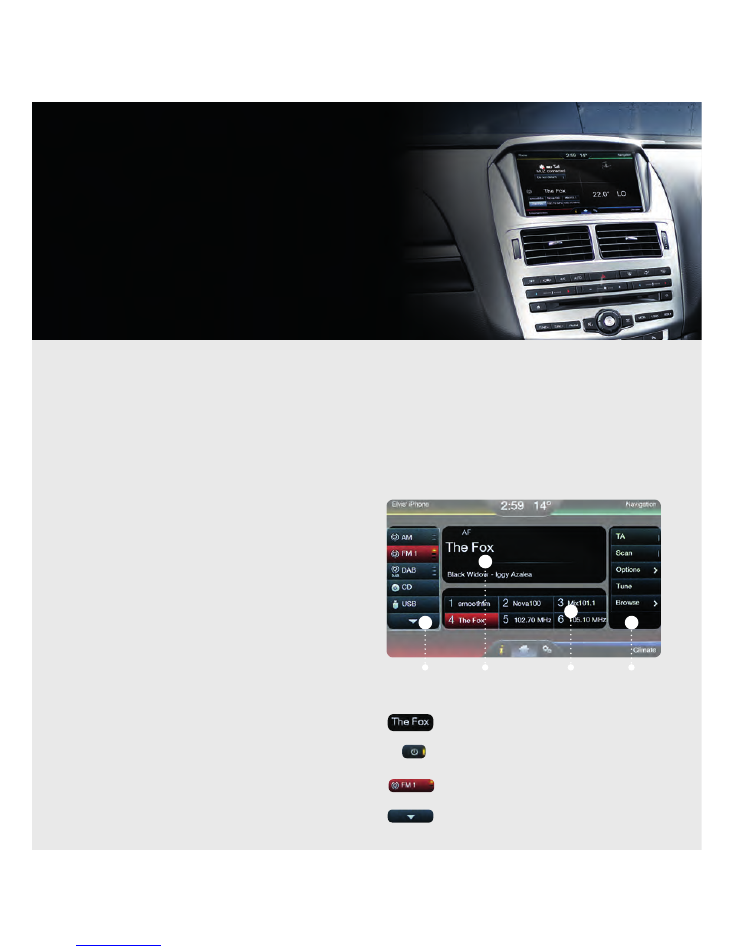
Consistent controls
To make the system easy to use, you’ll find a
common layout structure throughout. A grid helps
define a consistent location and size of features
available to you.
High-priority features appear much larger than
low-priority ones.
Toggle buttons have a consistent look with on/off
behaviour.
Some buttons have multiple light bars to highlight
that additional features are available.
Arrows indicate additional content
using page up or down.
SECONDARY
CONTROLS
CONTENT
CONTENT
CONTROLS
PRIMARY
CONTROLS
Operating certain parts of this system while driving can distract your attention away from the road and possibly cause an accident
or other serious consequences. Do not change system settings or enter data non-verbally (using your hands) while driving.
Stop the vehicle in a safe and legal manner before attempting these operations. This is important since while setting up or changing
some functions you might be required to distract your attention away from the road and remove your hands from the wheel.
GENERAL TIPS
▲
▲
▲
▲
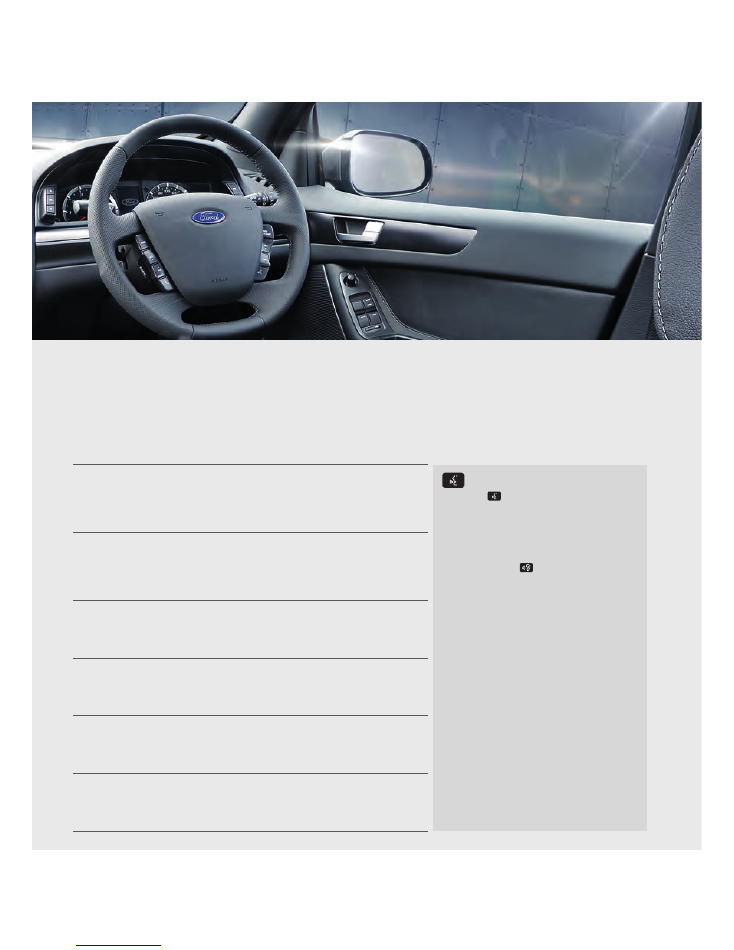
Keep your eyes on the road and hands on the wheel using
SYNC
®
2 driver-connect technology. It puts you in control of
what you want when you want it — through voice, touch or a mix
of both. There are also settings and controls you can personalise
to suit your interests and the level of engagement you desire.
Plus, the Navigation System (where applicable) provides turn-by-
turn directions with 3D maps, points of interest and more.
Make sure you read your SYNC
®
2 Owner’s Manual before using
this feature for the fi rst time. This QuickGuide provides useful
information on commonly used features but is not intended to
replace the detailed instructions and warnings contained in your
SYNC
®
2 Owner’s Manual.
Quick
Guide
| SYNC
®
2
Quick
Guide
| SYNC
®
2
Speed-restricted features
Ford proactively locks out access to typing via the touch screen while the vehicle is travelling more than 5km/h
(eg. typing a navigation destination). However, some of these features are still available via voice commands.
Mobile
phone
•
Pairing a
Bluetooth
®
1
phone.
•
Lists/entries are limited for phone contacts
and recent phone call entries.
Tips for using voice:
- The
Voice
feature allows you to operate
various functions of the SYNC
®
2 system by voice
commands, to minimise driver distraction.
- When the
Voice
button on the steering wheel
is pressed, a “SYNC” tone sounds. A second tone will
sound when the system is ready for a voice command,
and a
Listening Ear
will be displayed in the
screen's lower menu bar.
- Say commands in a smooth, confi dent voice at a
normal pace, directing your voice at the SYNC
®
2
microphone located in the overhead console.
Avoid “
ahhs
” and “
umms
” when saying a command.
- Say all the words of a command in the correct
order (eg. “
Call John Doe.
” “
Find an address
”).
- Say
“What can I say?”
for a written list of
voice commands on the screen or say
“Help”
if you want audible help for the current mode
(eg. Phone, Radio, Navigation, USB).
- Ensure the vehicle interior is quiet (windows
closed, passengers not talking) for optimum
SYNC
®
2 voice recognition.
- Once SYNC
®
2 has completed your voice
command action, the
Voice
feature is turned off .
For another voice command, the
Voice
button
must be pressed again.
Refer to the Voice Commands section for more
popular commands.
Text
messages
•
Composing text messages.
•
Viewing received text messages.
•
Editing preset text messages.
Navigation
(where applicable)
•
Using the keyboard to enter a destination.
•
Adding/editing address book entries or avoid areas.
Wi-fi
®
/
wireless
•
Editing wireless settings.
•
Editing the list of wireless networks.
Photos/
graphics
•
Editing the screen’s wallpaper.
or adding new wallpaper.
System
functionality
•
Editing settings while the rear view camera
is active.
1.
Bluetooth®
is a registered trademark of Bluetooth SIG Inc. and is used under licence. Some phones not compatible.
4
1.
Bluetooth®
is a registered trademark of Bluetooth SIG Inc. and is used under licence. Some phones not compatible.
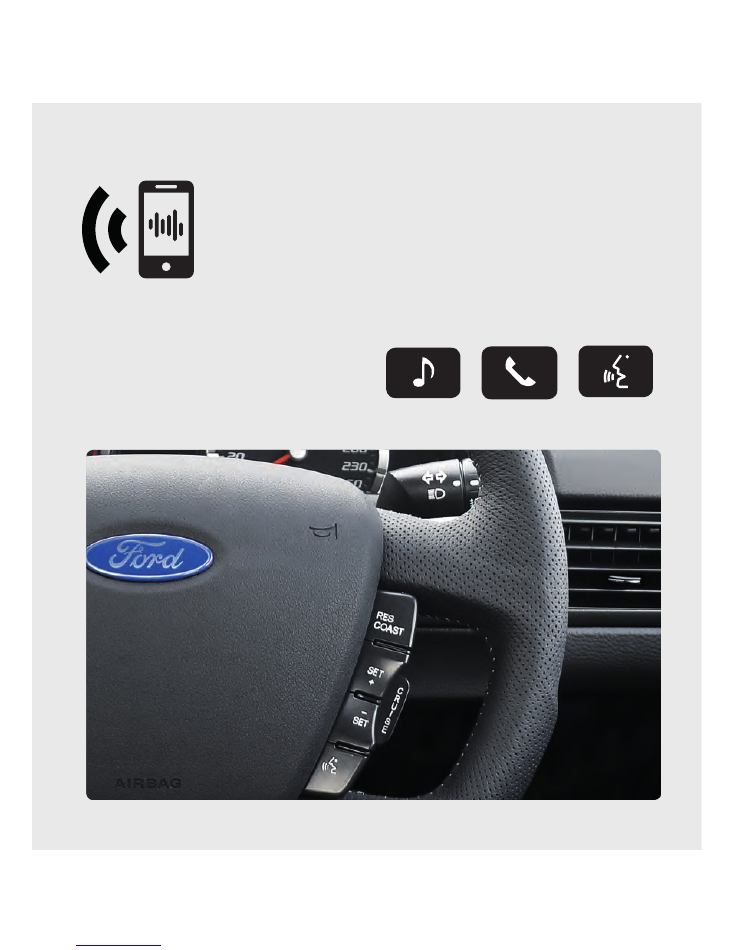
Master the basics
In some vehicles, traditional knobs and buttons
have been replaced by controls and screens familiar
to anyone with experience using remote controls or
gaming systems.
Audio
Phone
Voice
GETTING FAMILIAR
To optimise your experience using SYNC
®
2, there are two essential devices to have with
you;
Bluetooth®
-enabled phone and digital media player.
Bluetooth
®
1
is the wireless technology that is used to connect your vehicle with your
phone or other compatible devices. For details on compatible devices, visit www.ford.
co.nz/owner for a dynamic device compatibility tool that is frequently updated with the
latest technology on the market.
Quick
Guide
| SYNC
®
2
Four-corner touch screen
(standard)
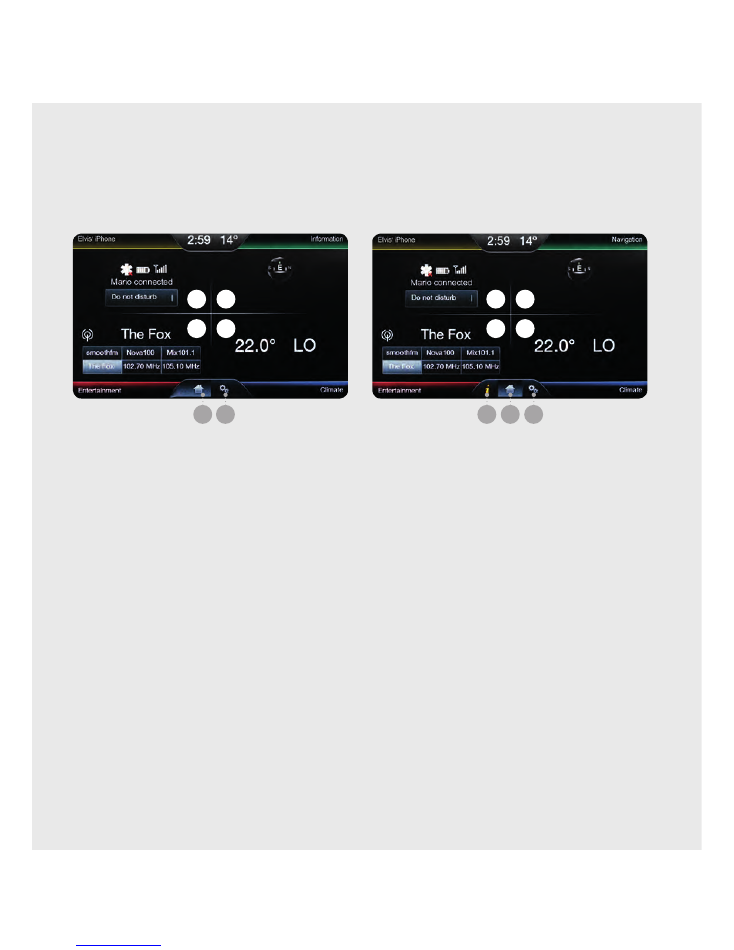
Any of the four main categories can be made active by
touching anywhere in the function’s respective quadrant.
Phone
(A) touch this corner to access the phone
functions.
Information
(B) touch this corner for SYNC
®
2
system messages, Calendar and Apps options.
Entertainment
(C) touch this corner to access all
available music/media sources.
Climate
(D) touch this corner to access all available
climate functions.
Home
(F) touch this to return to the home screen.
Settings
(G) touch this to access personalised
system settings.
Four-corner touch screen
(when Navigation is standard)
Phone
(A) touch this corner to access the phone
functions.
Navigation
(B) touch this corner to access
navigation maps or directions.
Entertainment
(C) touch this to access all available
music/media sources.
Climate
(D) touch this corner to access all available
climate functions.
Information
(E) touch this to get SYNC
®
2 system
messages, Calendar, Apps options and current
location.
Home
(F) touch this to return to the home screen.
Settings
(G) touch this to access personalised
system settings.
Touch screen
The touch screen uses four “smart corners” to organise functions into four categories:
Phone, Entertainment, Information or Navigation and Climate.
A
C
B
D
F
E
G
F
G
A
C
B
D
6
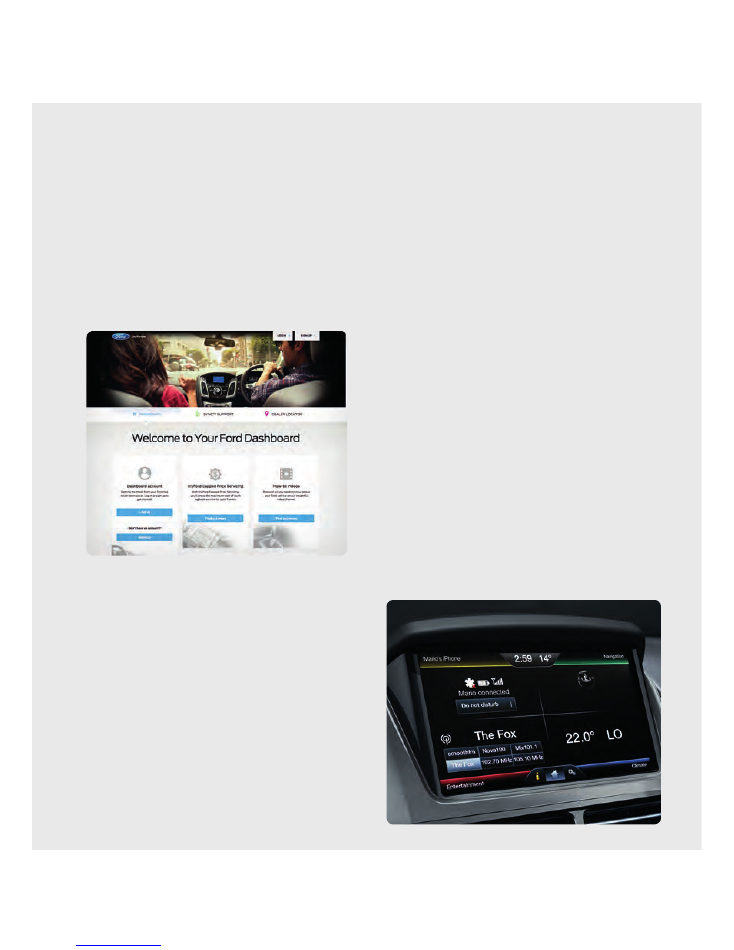
Set up your owner account
Learn more about how SYNC
®
2 works, discover how
to personalise your experience, get support when you
need it and much more.
1.
Go to
www.ford.co.nz/owner
2.
Select
Dashboard Account > Sign up
3.
Follow the on-screen instructions
Pair your phone
To optimise the performance of your
Bluetooth
®
,
1
ensure that you have the latest soft ware installed
on your device and that your phone is compatible
with SYNC
®
2.
2
Pairing is what allows
Bluetooth
®
devices to
communicate with each other securely. It can only
be done when the vehicle is not in motion.
1.
Make sure that your vehicle is in (P)
Park
and both
your ignition and radio are turned on.
2.
If no phone has been previously paired, touch
Pair Phone
. If another phone is to be added, touch
Connect a Phone
and
Add Device
.
“Find SYNC
®
2” will appear on the screen, and instructs
you to begin the pairing process from your device.
3.
Make sure that
Bluetooth
®
is set to on and your
mobile phone is in the pairing mode:
–
A message will appear on the touch screen
indicating that your device is trying to pair with
SYNC
®
2. A 6-digit pin will appear on your device.
–
If your device does not support secure
simple pairing, you will have to enter the pin
manually. Search for devices on your mobile
phone until your phone finds SYNC
®
2.
Then, select SYNC
®
2 and add the 6-digit
pin displayed on the touch screen.
4.
When prompted on your phone’s display,
confirm that the pin provided by SYNC
®
2 matches
the pin displayed on your mobile phone.
5.
The display will indicate when the pairing
is successful.
6.
Confirm voicemail number set
Auto Phonebook
Download
to on and touch
Apply
.
7.
A message will appear on your phone requesting
access to your messages and Contacts. Select
OK
.
1.
Bluetooth®
is a registered trademark of Bluetooth SIG Inc. and is used under licence. Some phones not compatible. 2 Refer to phone compatibility list on
www.ford.co.nz/owner.
GETTING STARTED
Begin with the most important things that will optimise your experience.
Quick
Guide
| SYNC
®
2
Insert SD card for Navigation
(if equipped)
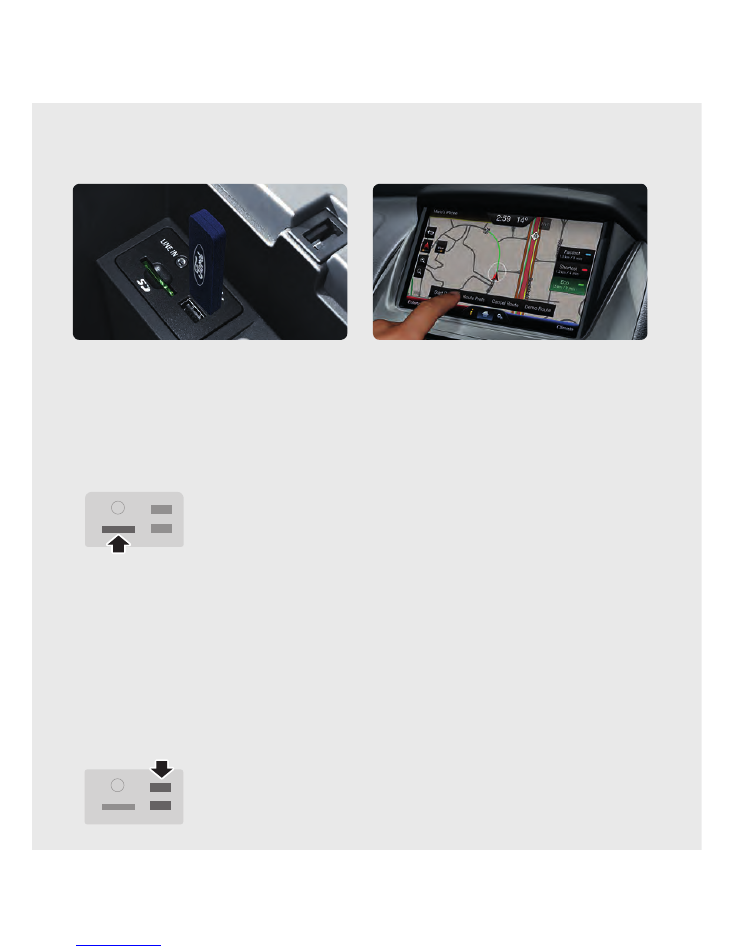
1.
In vehicles fi tted with the
Navigation
feature,
an SD card is supplied that contains the maps
2.
Ensure that the SD card is inserted into the media
hub located in the centre console.
3.
Navigation features will only work if the SD card is
properly installed .
Set up your digital media player
1.
Connect your device to the USB port.
2.
Touch the
Voice
button and say
“USB.”
3.
Wait until indexing is fi nished to gain complete voice
control. (Depending on how many digital media files
are on your connected device, the screen may display
Indexing until the indexing function is completed).
4.
You will then be taken to the
Play
menu.
5.
Say
“Play track <name of song>.”
Set my home for Navigation
(if equipped)
You can set home as the nearest intersection
to ensure privacy or your specific home address.
Make sure the vehicle is in Park first.
1.
Touch
Dest
. on the
Navigation
corner.
2.
Touch
My Home
and answer
Yes
to the
“Home address empty. Add it now?”
prompt.
3.
Touch either (i)
Address
or (ii)
Junction
, and you
can begin to input the desired information:
(i) where address chosen - use the keyboard
and enter the city/suburb, street and number.
Touch
Go
to save this address as My Home.
(ii) use the keyboard to enter the city/suburb,
the fi rst street and the second street. My Home
will be automatically saved.
4.
For both selections, My Home appears as an entry in
the
Favourites
screen when fi nished.
Set your radio presets
Refer to the
Entertainment
section of this guide.
8
Make and receive calls
1.
Press the
Voice
button
on the steering wheel
to make a call, then say “
Call <say name exactly as in
phonebook>
” or “
dial <desired number>.
”
2.
To receive a call, press the
Phone
button
on
the steering wheel or accept using the green phone
icon on the touch screen.
3.
To end a call, press and hold the
Phone
button for
at least 2 seconds.
4.
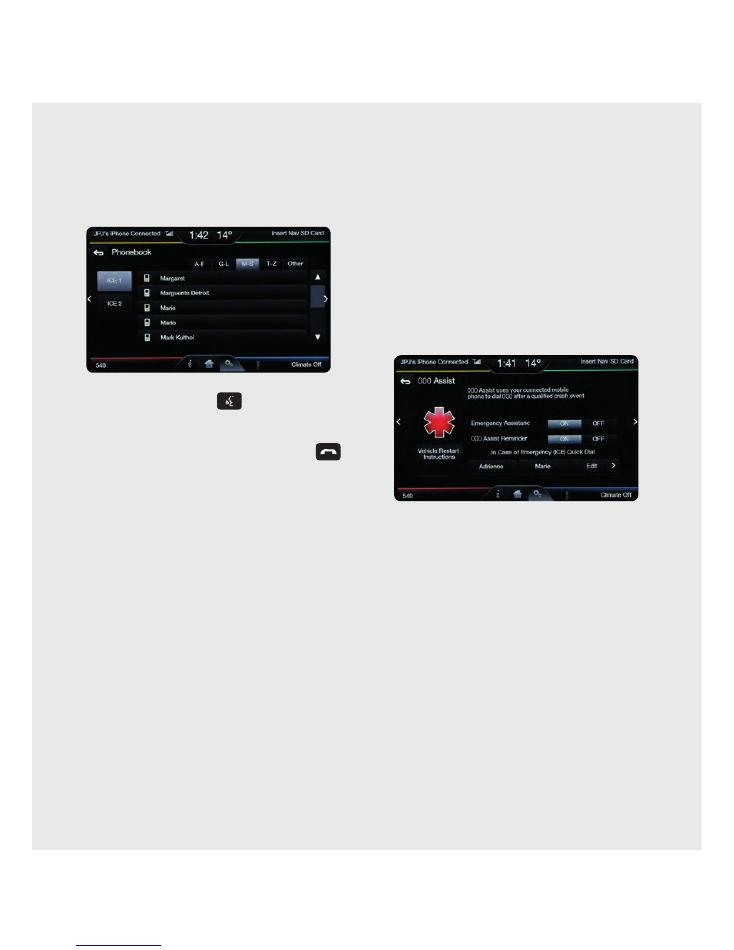
Browse your Phonebook in the phone menu.
Confirm your contacts have been downloaded to
SYNC
®
2. Remember to say the contact name just
as it is listed.
Text messages
•
Text messages can be received and viewed
(if under 5 km/hour) or SYNC
®
2 can read the
message out to you at any time.
When the message arrives, an audible tone sounds and
the screen displays a pop-up menu. You can then select
to view, listen, dial or ignore via the screen or voice.
•
Text messages can be composed and sent
(if under 5 km/hour) or preset texts can be sent via
voice at any time.
Note: some phones don’t support this feature of SYNC
®
2.
(Refer to phone compatibility list on ford.co.nz/owner).
Do more
Your phone connects you with many other features:
•
Transfer
calls seamlessly from SYNC
®
2 to phone as
you get into or out of your vehicle.
•
Do Not Disturb
feature: In the home screen, touch
Do Not Disturb
from the Phone corner to divert
incoming calls to voicemail and suppress ringing
from calls and texts.
Updating Phone Firmware/Soft ware
When updating firmware/soft ware on the phone or
adding many contacts to the Phonebook, it may be
necessary to do a “clean” pairing with SYNC
®
2.
•
Delete SYNC
®
2 from the phone and the vehicle.
•
Re-pair the phone to SYNC
®
2.
PHONE
Voice-control your phone for hands-free calling with your phone securely put away. With SYNC
®
2, you won’t even
need to dial the phone number. Just say the name of the person you want from your Contacts.
Quick
Guide
| SYNC
®
2
Set a destination
You can use the touch screen to set a destination
in many ways, like a street address, a city centre,
a place on the map or a POI (Point Of Interest).
The easiest way is by voice command.
1.
Press the
Voice
button on the steering wheel, then
say “
Find an Address.
”
2.
The system will ask you to say the full address and
will display an example on screen. You can then say
the address naturally, such as: “
one two three main
street, anytown
” (say each number individually).
3.
The system searches for the city first, and then
locates the street within the city.
4.
If you’d like to change something, pop-up screens
for street address, intersection or point of
interest can help guide your input with available
Voice
commands.
Cancel a destination
In
Map
mode, touch
Dest
on the top menu bar
and choose
Cancel Route
or simply press the
Voice
button and say “
Cancel Route.
”
Note: if metallic solar fi lm is fi tted on the front windshield,
GPS signal and navigation accuracy may be aff ected.
Choose a route
When fi rst using SYNC
®
2 navigation, your route
preference will be set to “Fastest Route.”
Use navigation settings and route preferences to set
a new preferred route as your route choice, or to
disable the “Always Use Preferred Route” option.
When setting a route, you have three diff erent
options of how to get there, plus you can view a map
of the route before you begin driving:
•
Fastest Route uses the fastest moving roads.
•
Shortest Route uses the shortest distance.
•
Eco-Route uses the most fuel-effi
cient route.
Note: ETA (Estimated Time of Arrival) will vary
depending upon route preference, rest breaks taken, etc.
Map updates
Please contact your nearest Ford Dealership for
map updates.
Save a Favourite and assign a Voicetag
1.
Decide what you’d like to save as a Favourite
.
For example, it could be a favourite POI or a
specific address.
2.
Aft er fi nding the specifi c address on the screen,
three options for this Destination are displayed on
the lower menu bar. Touch
Save to Favourites
.
3.
Touch
Dest
and select the Favourite you want
to Voicetag.
4.
Touch
Edit
>
Name
and type in a Voicetag Name
(eg. Work).
5.
Touch
Voice Nametag
to assign the voicetag
name to this Favourite destination.
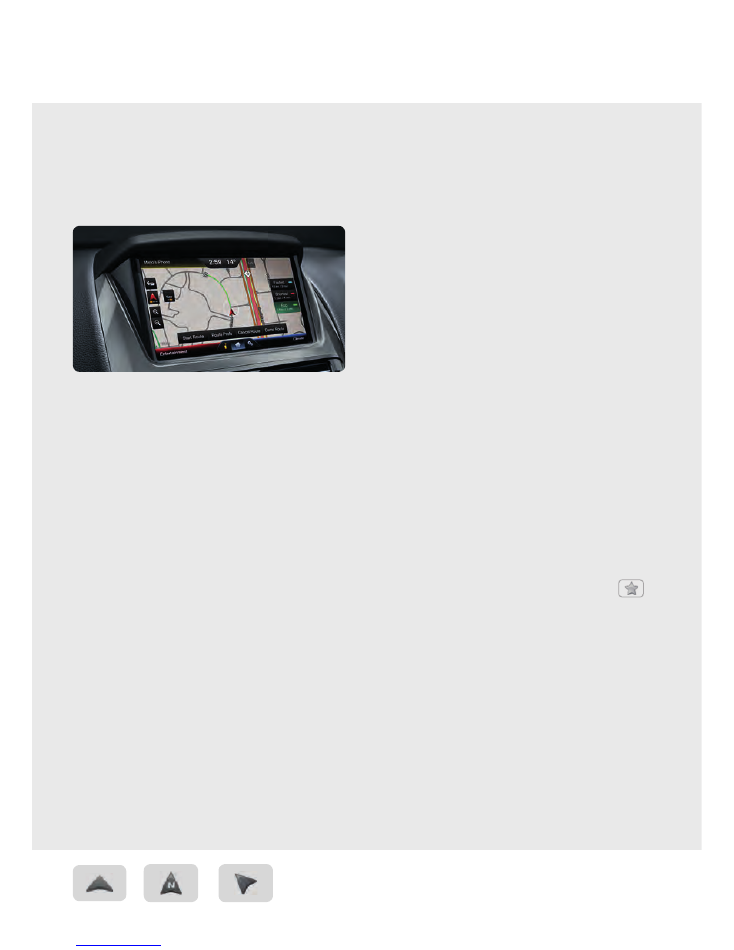
You can touch buttons with multiple light bars to see additional
features available. For example, changing your map mode from 3D
to north-up or heading-up.
NAVIGATION
(WHERE APPLICABLE)
In places familiar and unfamiliar, you can always get home or go to someplace new. Just say where you want to go
and follow the directions with 3D maps and a detailed list of the route for easy travelling.

10
Set your radio presets manually
(for AM/FM)
1.
Touch the entertainment corner on the touch screen
2.
Touch
AM
or
FM
.
3.
Touch
Tune
.
4.
Enter the desired station frequency and touch
Enter
.
5.
Touch
Presets
and then touch and hold one
of the memory preset buttons to save it. You will
hear a brief mute and the sound will return when
the station is saved.
Automatic radio presetting
(for AM/FM)
1.
Touch the entertainment corner on the touch screen.
2.
Touch
AM
or
FM
.
3.
Touch
Options
.
4.
Touch
Autostore Presets (AST)
to have the
system automatically store the six strongest
stations in your current location.
Note: the Auto Radio Preset function is not available
for DAB stations.
Bring in your own music
CD
1
– access the CD menu to select advance, reverse,
scan, shuffl
e or repeat; plus access options to adjust
the sound settings.
USB
2
– access a music source via the media hub USB
port, such as a digital media player or thumb drive.
Note: if your digital music source has a name such as
“Joe’s iPod,” that is what will appear on the screen.
Note:
USB has priority over any other media device.
When charging a device via USB, music playback is
automatically selected. To turn off music while
charging, touch the
Settings
icon at the bottom of
the Home screen, then touch
Settings
>
Media
Player
>
Autoplay Off
on the screen.
SD card
— access media (play audio/access pictures
for wallpaper) available on an SD card inserted into
the media hub.
Line in
— access an audio device via the media hub
audio jack, such as an MP3 player with headphone
jack. Note: for vehicles equipped with rear seat DVD
player, the DVD player audio takes priority over the
audio jack when DVD is ON.
Indexing is the way SYNC
®
2 categorises the music
it finds on your media player. By indexing the music,
SYNC
®
2 can play selections by track, artist, album or
genre categories. SYNC
®
2 automatically indexes your
music every time a media player with new music
on it is connected to SYNC
®
2 through the USB port.
This may take only a few seconds, but if your player
holds thousands of songs, indexing may take longer
to complete. Maximum index up to 30,000 songs.
1.
Acceptable audio formats: MP3, WMA, WAV, AAC 2Acceptable storage device formats: FAT, FAT32, EXFAT
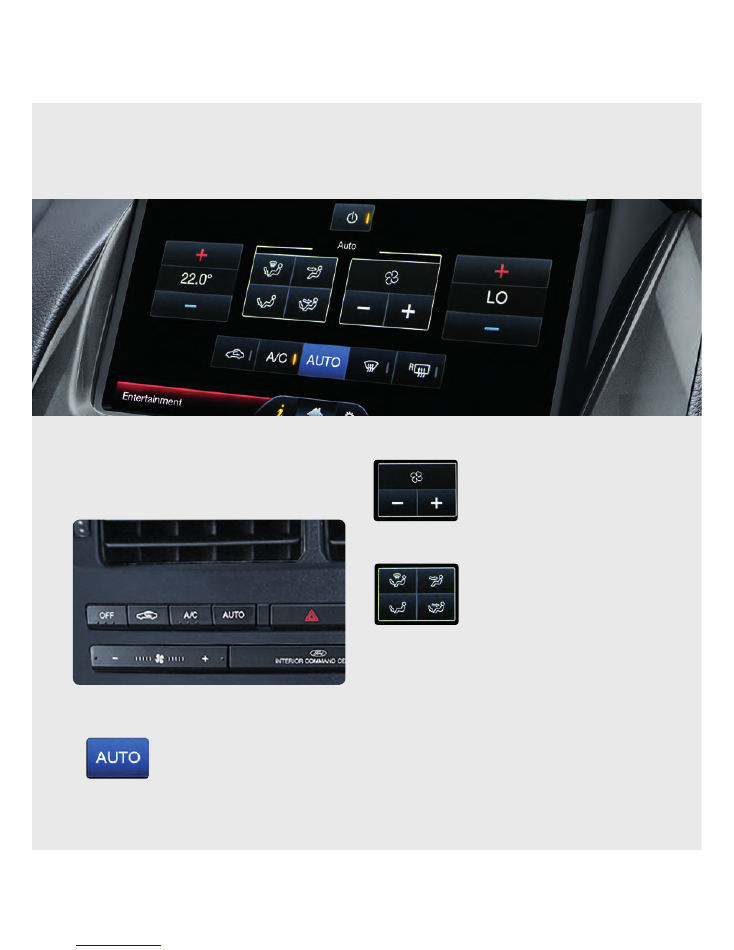
ENTERTAINMENT
Gain access to any audio source by voice and control how each operates, like changing radio stations, CD tracks
or music on your digital media player and more. SYNC
®
2 includes a newly tuned audio system with improved
frequency response, individually tuned for each cabin environment.
Quick
Guide
| SYNC
®
2
Synchronise driver and passenger temperatures
(if equipped with Dual Zone Climate Control).
1.
Touch the
Climate
corner of the touch screen.
2.
Press and hold the hard
AUTO
button located
below the centre air vents to set both sides of the
cabin to your driver’s temperature. Alternatively
you can touch and hold the soft
AUTO
button on the screen when it is
inactive (not highlighted in blue).
3.
If the front passenger later adjusts the temperature
setting on their side of the cabin, independent of your
selection, the synchronised settings will be overridden.
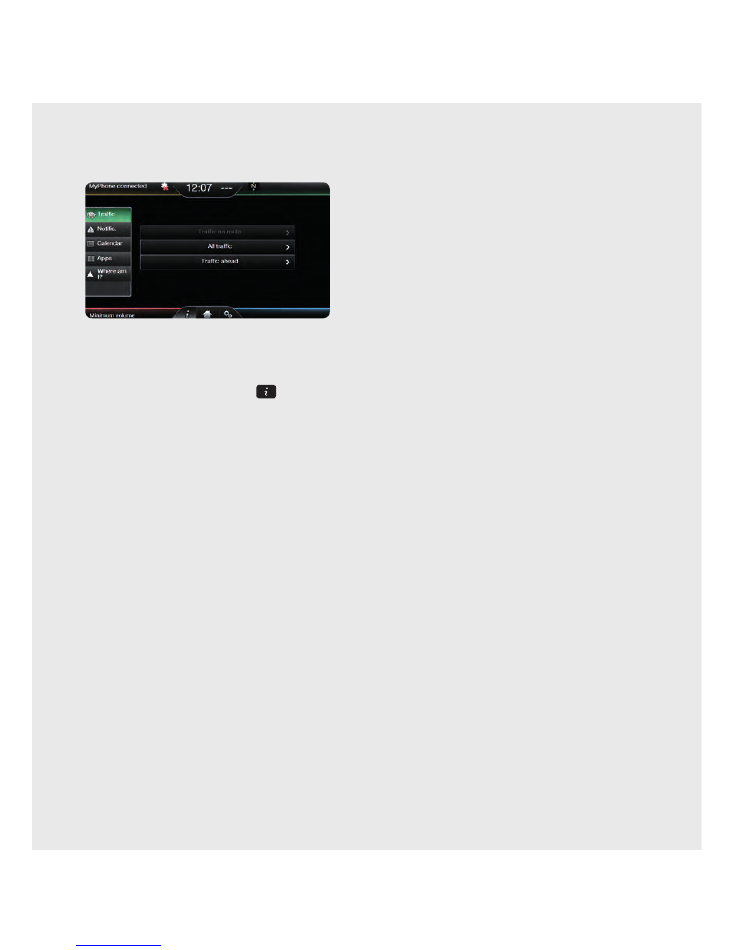
Adjust the temperature and fan speed
Use your voice, the touch
screen (blue area, lower right)
or climate control buttons
(below air vents).
Adjust climate air fl ow modes or A/C On/Off
Use your voice, the touch
screen or climate control
buttons to adjust air fl ow.
Note: In some screens, when Climate Control buttons
below centre air vents are pressed, some of the climate
selections are temporarily displayed on the instrument
cluster but the touch screen does not change.
CLIMATE
Beyond the simple setting for automatic climate control for set-and-forget convenience, you can customise the
climate you want by just saying it.
12
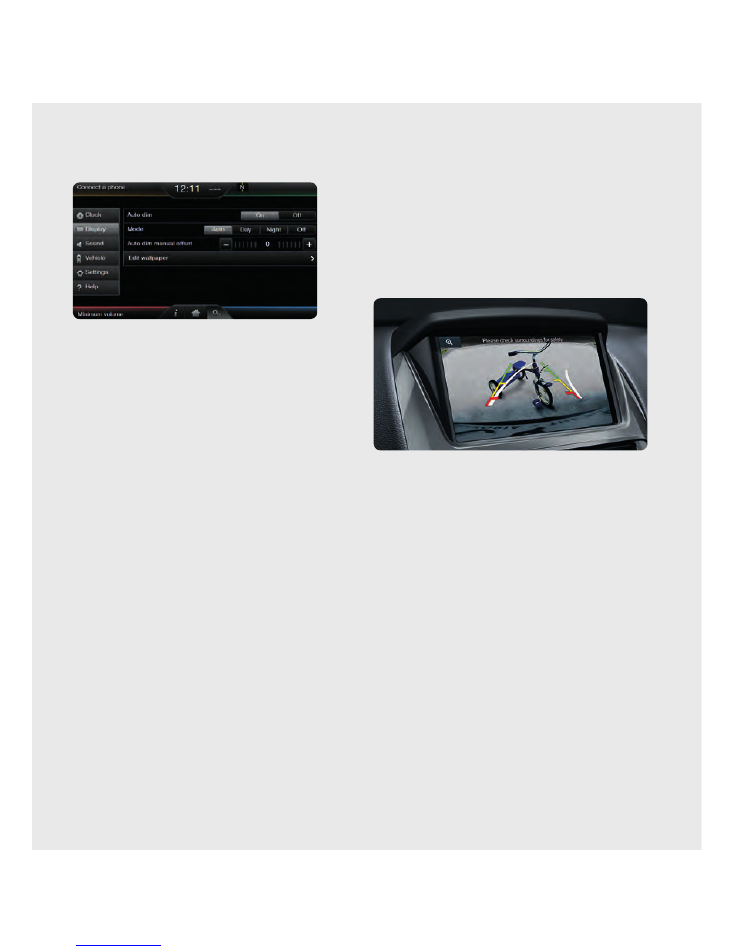
Information displays
The following displays can be selected from the
Information
menu, by touching the
Information
corner of the standard touch screen
(green area, upper right) or the
button at
the bottom of the touchscreen with
Navigation
.
•
Notifi cation
(SYNC
®
2 system messages).
•
Calendar
.
•
Apps
(to install or update Apps).
•
Where am I?
(displays current street or closest
street for vehicle equipped with SatNav and displays
longitude and latitude for non SatNav vehicles)
Reset to Factory default settings
If you want to clear all personal settings/data
from the SYNC
®
2 system, you can conduct a
full reset of the system.
Note: that this reset will delete all Favourites and
personalised settings/data.
Resetting the SYNC
®
2 system
1.
Remove any USB, SD card or Line-In media device.
2.
Ensure ignition is in the On position.
3.
Touch the
Settings
icon at the bottom of the screen.
4.
Select
Settings
from the left menu.
5.
Select
System
>
Master Reset
>
Yes
(confi rm Reset) >
Yes
(accept Warning message).
Note: It may take a few minutes to reset the
SYNC
®
2 system.
Setting the clock
The clock is large and prominent at the top centre of
the touch screen. Changing the time is simple:
Manually
1.
Touch
Settings
>
Clock
.
2.
Touch
+
or
–
to adjust.
3.
Touch
AM
or
PM
.
4.
Touch
Time
or
Date
for clock display.
5.
Touch
12-hour
or
24-hour
for clock format.
Automatically
(if equipped with Navigation)
1.
Touch
Settings
>
Clock
.
2.
Touch
Reset
to set clock to GPS time.
INFORMATION
SETTINGS
Quick
Guide
| SYNC
®
2
Setting wallpaper
You can add a personal photo to save as the wallpaper
on your Home screen. Here’s how:
In order to set your wallpaper, you must first load photos
into the system before you can select the one you want,
or you can use the Default Photo (Ford logo):
1.
Touch
Settings
>
Display
>
Wallpaper
.
2.
Touch
Add
and select your storage device.
3.
Select the file you want when it shows up on the
screen (up to 32 photos can be saved).
4.
To set the wallpaper, touch
Settings
>
Display
>
Edit Wallpaper
, and then select either the
Default Photo
or one of your photos from the
saved photos list.
5.
Once you’ve selected the photo you want
displayed, touch
Save
.
Make sure you have a
properly formatted photo on a USB or SD Card
inserted into the media hub:
- File formats: .jpg, .gif, .png, .bmp
- Maximum file size: 1.5MB
- Maximum number of photos: 32
- Recommended dimensions: 800 x 384 pixels
Setting display brightness
1.
Touch
Settings
>
Display
>
Auto Dim Off
.
2.
Adjust brightness.
Note: that minimum brightness will turn off
screen illumination.
Setting the rear view camera
Use the camera display as a supplemental aid when
backing up, parallel parking or even hitching a trailer.
You cannot cancel it when it’s on, but can confi gure the
delay feature, which keeps the rear view camera displayed
until you reach 10km/hr while driving forward.
1.
Touch
Settings
>
Vehicle
>
Rear View Camera
.
2.
Select
Rear Camera Delay On/Off
.
14
Basic
Commands
What can I say?
-
Voice Instructions.
- List of commands.
- Main menu.
- Previous.
- Next.
- Go back.
- Exit.
- Help.
- Cancel (cancels Voice command).
Phone
Phone list of commands:
- Dial.
- Call <name> at home/at work
(say name exactly as in Phonebook).
- Call voicemail.
- Do not disturb <On/Off >.
- Read/Listen to text message.
1
Climate
Climate control list of commands:
- Climate <On/Off >.
- Climate temperature <18-30> (deg.C).
- Climate, A/C <On/Off >.
- Climate, <Increase/Decrease> Fan speed.
- Climate, Recirculation <On/Off >.
- Climate <Front/Rear> Demister <On/Off >.
Navigation
Navigation list of commands:
- Find an address <number, street, city>
(say each number individually).
- Find a Car Park.
- Destination Home.
- Destination <Voice Tag>.
- Navigation voice <On/Off >
- Navigation volume <increase/decrease>.
- Show <map/north-up/heading-up/3-D>.
- Next page.
- Repeat instruction.
Tips for using voice:
-
When the
Voice
button
on the
steering wheel is pressed, a SYNC
®
2
tone sounds. A second tone will
sound when the system is ready for
a voice command, and a
Listening
Ear
will be displayed in the
screen's lower menu bar.
-
Say commands in a smooth,
confident voice at a normal pace.
Direct your voice at the SYNC
®
2
microphone located in the overhead
console. Avoid “
ahhs
” or “
umms
”
when saying a command.
-
Say all the words of a command
in the correct order (e.g., “
Call John
Doe,
” “
Find an address
”).
-
Say “
What can I say?
” for a written
list of voice commands on the
screen or say “
Help
” if you want
audible help for the current mode
(e.g., Phone, Radio, Navigation, USB).
-
Ensure the vehicle interior is
quiet (windows closed, passengers
aren’t talking) for optimum SYNC
®
2
voice recognition.
-
Once SYNC
®
2 has completed your
voice command action, the
Voice
feature is turned off . For another
voice command, the
Voice
button
must be touched again.
1.
Phone-dependent feature .
VOICE COMMANDS
Virtually anything you can do by touch, you can also do by voice to keep your hands on the wheel and eyes on the road.
The system recognises thousands of commands. Here are some of the most popular :
Quick
Guide
| SYNC
®
2
Entertainment
Audio list of commands:
2
- Audio <On/Off >.
Radio
- FM <87.7-107.9>.
- FM preset <#>.
CD
- Play track <1-512>.
- Shuffl
e <On/Off >.
USB
- Play song <name>.
- Play album <name>.
- Play similar music
.
Voice
Command
Settings
Touch
Settings
>
Interaction Mode
and choose
Novice
or
Advanced.
Interaction Mode
- Novice mode.
provides detailed interaction and guidance.
Advanced mode has less audible interaction and
more tone prompts.
Touch
Settings
>
Confi rmation Prompts
and
choose
Off
or
On
.
Confi rmation Prompts
– The system uses
these short questions to confi rm your voice
command. If turned off , the system simply makes
a best guess as to what you requested.
If set On, the system may still occasionally ask you
to confi rm a voice command.
Operating certain parts of this system while driving can distract
your attention away from the road, and possibly cause an accident or
other serious consequences. Do not change system settings or enter
data non-verbally (using your hands) while driving. Stop the vehicle
in a safe and legal manner before attempting these operations.
This is important since while setting up or changing some functions
you might be required to distract your attention away from the road
and remove your hands from the wheel.
2.
You can also get detailed lists of commands for radio, USB,
Bluetooth®
audio and SD card.

1.
Log on to www.ford.co.nz/owner
2.
Select
SYNC
®
2 Support
and choose
SYNC
®
2
.
When you have a question or need answers, you can
get step-by-step instructions for using and
personalising your SYNC
®
2 system, pairing your smart
phone, updating your Sat Nav maps or system soft ware.
Owner login
Log on to www.ford.co.nz/owner for comprehensive
ownership tools and explore the interactive and
personalised support available, such as: customer
how-to videos and trouble-shooting, phone and
media compatibility lists, vehicle care and servicing,
Roadside Assistance, dealer locations and more.
SYNC
®
2 SUPPORT
Learn more about how SYNC
®
2 works, discover how to personalise your experience, get support when you need it
and much more.
QUICK SUPPORT
To speak with a product advisor during
business hours, contact:
0800 367 369 (0800 FORDNZ),
select option 2
Or write to us:
Ford Customer Relationship Centre,
Private Bag 76912,
Manukau City, 2241.
Printed Febuary 2015. FOR4133.