Full Text Searchable PDF User Manual
FIAS LIGHTING PTY LTD
Page 1
Model: GEN52
Genesis Series
52 inch ceiling Fan
Installation Manual

FIAS LIGHTING PTY LTD
Page 2
Thank you for purchasing FIAS Genesis Ceiling fan.
Please read all information before
use and construction of ceiling fan.
Important
Warranty is VOID if a non licensed Electrician installs the ceiling fan and performs
electrical work.
Please retain this Manual for Future reference
Do not use this ceiling fan if it appears to be tampered or damaged in any manner
The fan must be installed so that the blades are more than 2.1 metre above the floor.
Accessories
Only use remote controls and wall controller Approved by Fias Lighting Pty Ltd
Use of generic accessories will VOID the warranty
Electricians
All ceiling fans should be attached to a solid structure because it creates movement
when working. To avoid hazards, the bracket should be mounted firmly on the solid
structure. You may attach the bracket on a steel structure, concrete ceiling or timber
frame.
FIAS LIGHTING PTY LTD
Page 3
Assembly instructions
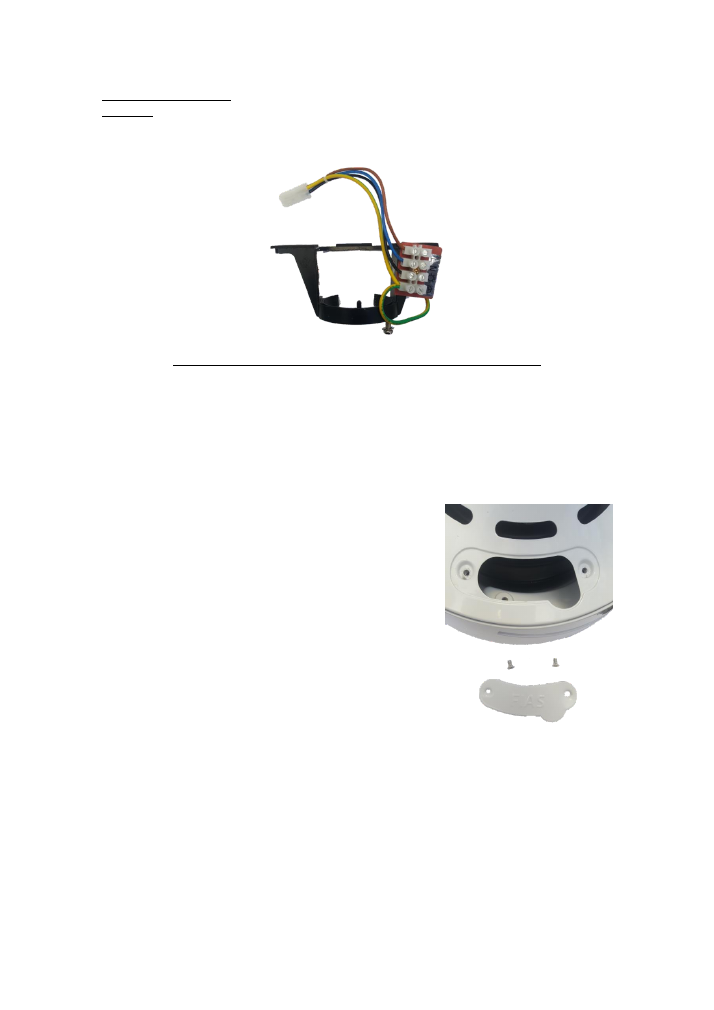
Image 1:
1.
Mount the Bracket that is supplied with the Ceiling fan to a solid structure as
mentioned before. Use the two long screws that are provided in the packaging
to secure the bracket onto the ceiling. (Image 1). A licensed electrician should
complete the wiring.
Image 2
2.
Once the Mounting Bracket has been installed,
you may start the assembly of the ceiling fan.
Remove the two screws that are on the cover
plate which is located on the top of the ceiling
fan. As shown in the diagram. This will give you
access to mount the blades on the ceiling fan.
(Image 2)
Please do not throw the screws or the cover plate.
as you will require them later on.
FIAS LIGHTING PTY LTD
Page 4
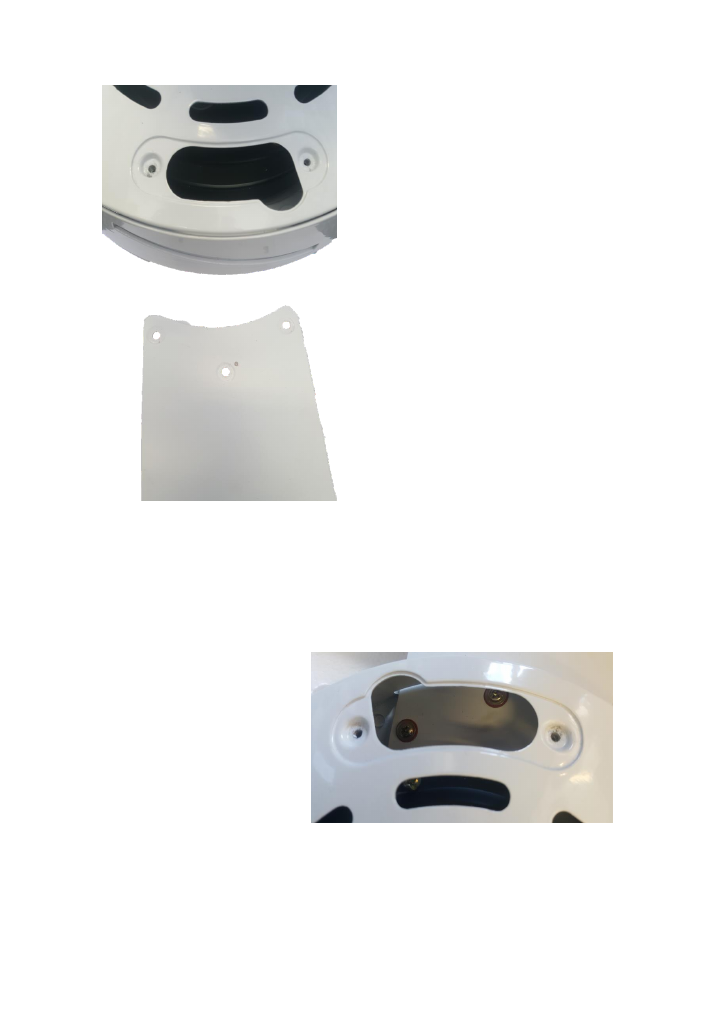
Image 3
3.
Insert the Blades in the slot of the ceiling fan. There are a total of 4 slots and 4
blades. It is easier to mount the blades one at a time rather than slotting all 4
blades into position
4.
Once the blades have been
inserted, use the washers
provided in the box and
tighten the blade screws.
There are a total of 3 blade
screws for each blade.
Image 4
FIAS LIGHTING PTY LTD
Page 5
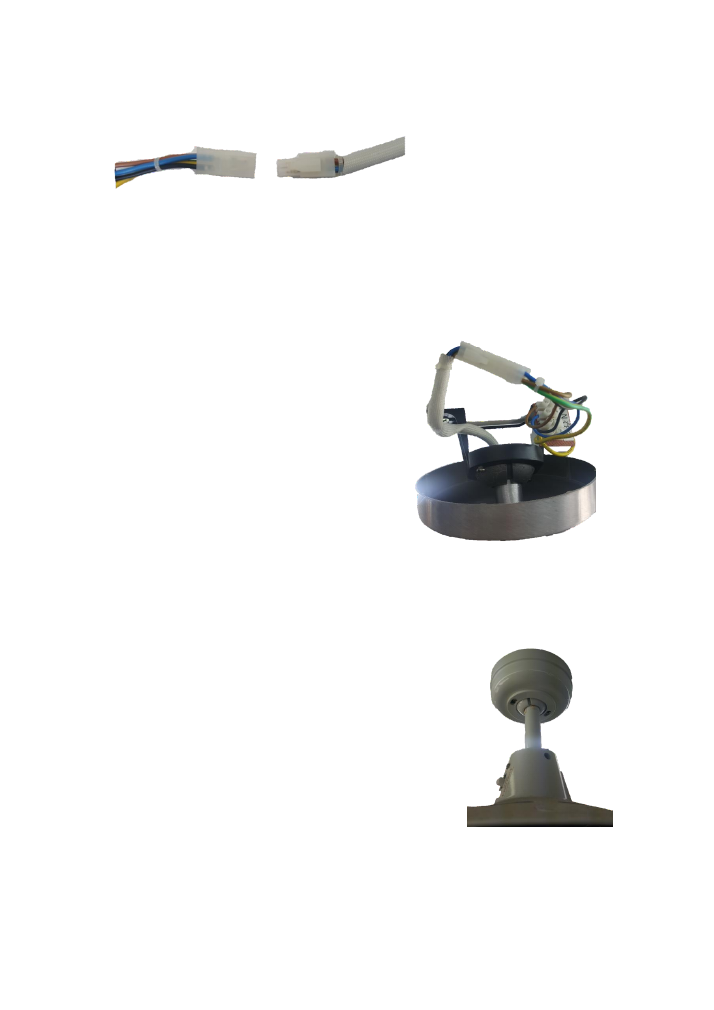
Image 5
5.
After putting the fan together, connect the ceiling fan connector to the Mounting
bracket connector that is already mounted on the ceiling. Image 5
6.
Place the Completed fan into the
bracket with the ball Joint. Twist the
fan around till the fan locks into
place. Once the fan is locked in, the
fan will no longer twist.
Image 6
Image 7
7.
Lift the canopy up to the ceiling bracket and tighten
the screws to hold the canopy in place.
Image 7
FIAS LIGHTING PTY LTD
Page 6
8.
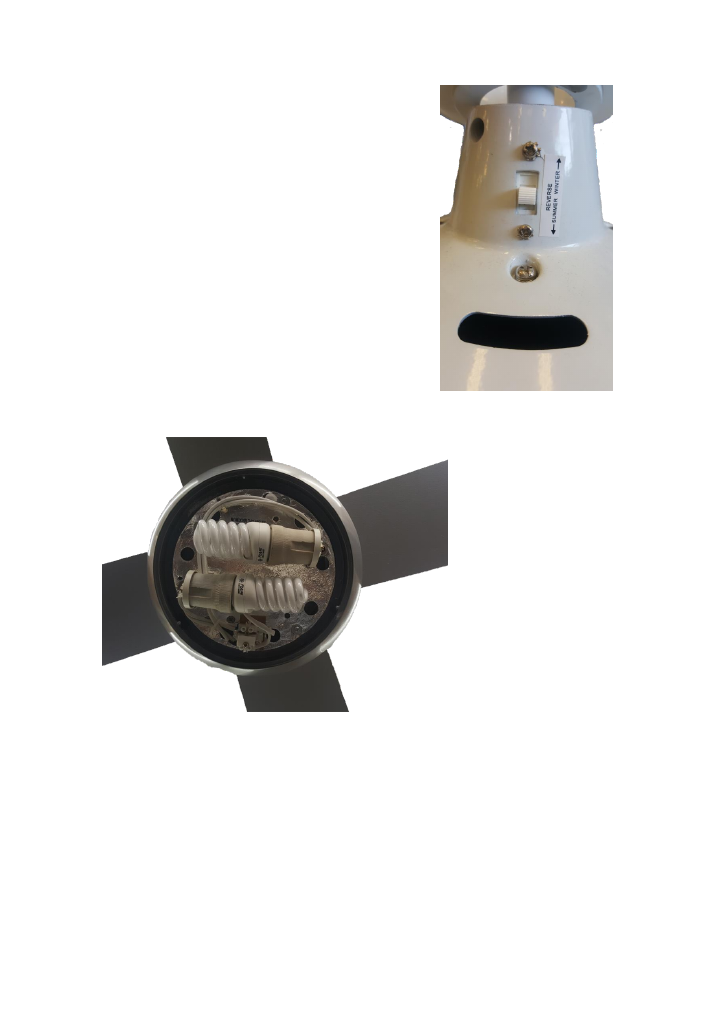
Please make sure the fan is switched off when
using this option. This is the summer and winter
switch. On summer option, the fan will rotate
anti-clockwise which will push the air
downwards, This will have the three standard
speeds. Low, medium and high.
on the Winter switch, the fan will spin clockwise
which will give a upward motion air flow. This
is to circulate the warm air that rises in Winter.
This only runs on the low speed.
Image 8
Image 9
9.
If you have a light option, please make sure the fan is switched off before
inserting the bulbs. Ensure that you use a maximum of 2 x E27 15 Watt energy
saver globes.
Image 9
FIAS LIGHTING PTY LTD
Page 7
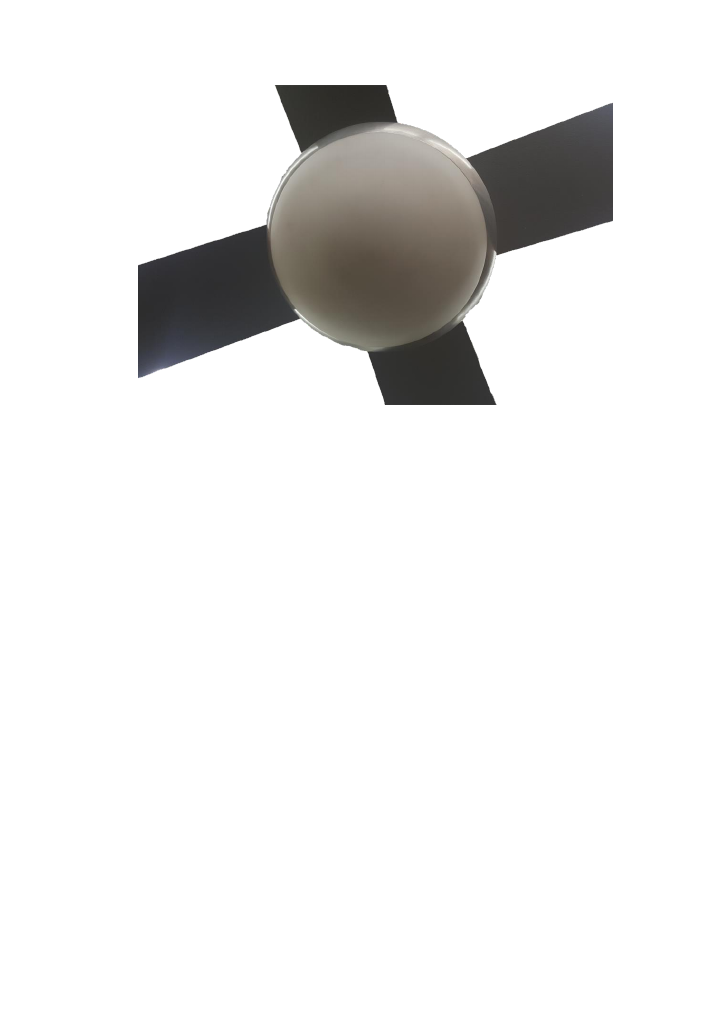
Image 10
10.
Once the bulbs have been installed, you spin the glass clockwise to tighten and
anti-clockwise to loosen. Excessive force may damage or break the glass and
this is not covered under warranty. Image 10
FIAS LIGHTING PTY LTD
Page 8
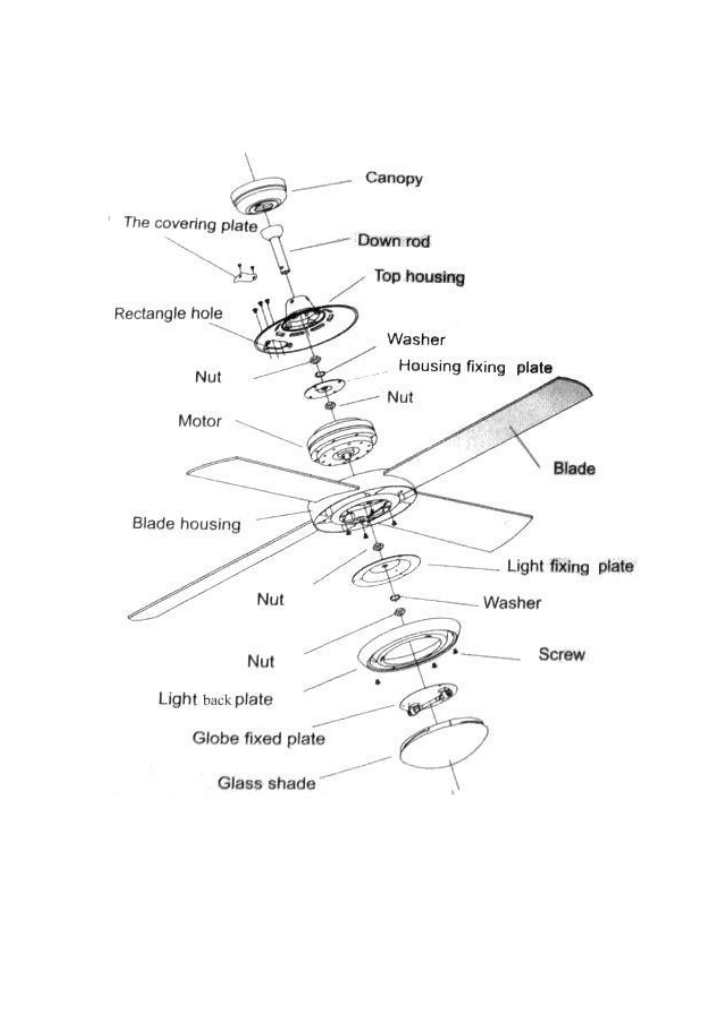
PIECES OF FAN
FIAS LIGHTING PTY LTD
Page 9
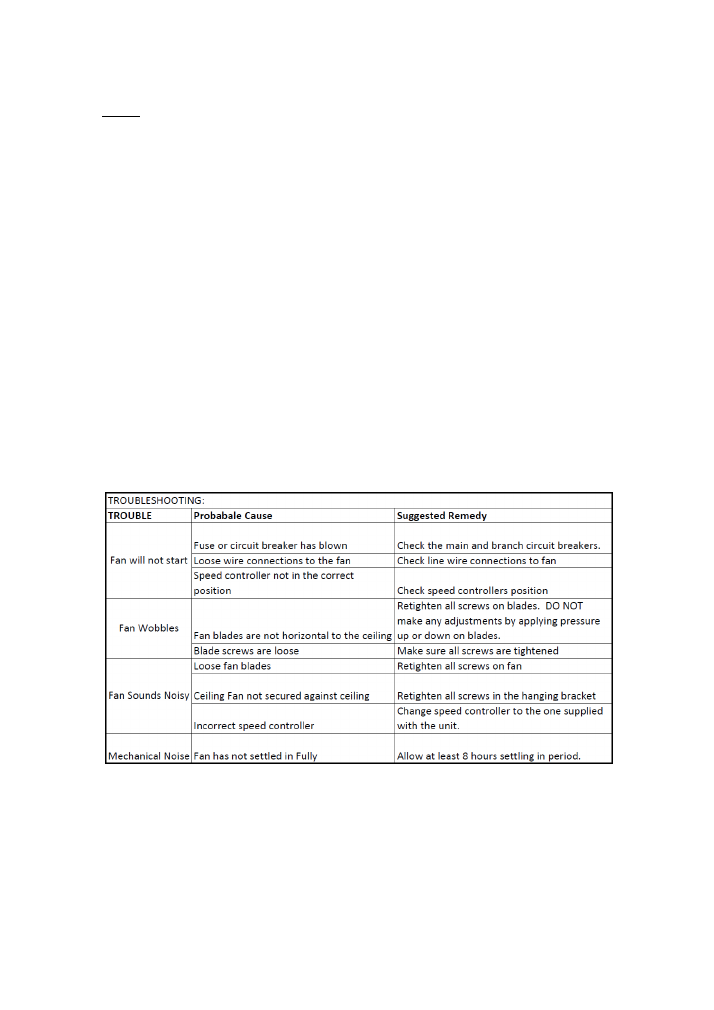
Noise:
The manufacturer warranty covers faults that may develop, but NOT minor complaints
of slight noise as all electric motors in operation make noise to some extent, more so at
low speeds.
Ceiling fans are mounted very securely on the steel brackets with rubber cushioning or
with ball joints to allow free movement and are designed to move during operation,
movement of couple of centimeters is normal, some ceiling fans wobble more than
others even in the same model.
Screws and components slightly loose or blade carriers slightly bent due to bumping can
cause extra wobble and noise. THIS IS NOT COVERED UNDER WARRANTY.
Little care and maintenance can reduce or prevent this problem.
This product is for Domestic use only. Please abide by the instructions set out in this
manual for its intended use. Use of accessories may cause safety hazards

FIAS LIGHTING PTY LTD
Page 10
WARRANTY:
The Purchaser of the FIAS ceiling fan is provided with a 3 year warranty from date of purchase, first 2
years are covered by an in-home warranty on all defective parts, materials and workmanship, these will
be replaced free of charge by Fias Lighting. Subject to the following conditions and provisions.
WARRANTY CONDITIONS:
Warranty valid if the product was purchased in Australia. The warranty is not transferable. The motor
warranty is for replacement parts only and limited to cost of replacing the product, cost incurred for
installation of fan and travel costs by Fias Lighting service agent will be borne by Purchaser of over
$80.00. If service area is outside Fias Lighting network, once the faulty product is returned a full
replacement will be sent and Fias Lighting will re-imburse freight paid by purchaser back to its
warehouse
NOT COVERED BY WARRANTY
Ceiling Fan accessories Extension rods, remotes, light fittings, glass shades etc
Small speed variations in the same model
If NOT installed by a licenced qualified electrician
Replacement fan installation costs over $80.00
Entry of foreign matter into the fan motor Liquid, moisture, dirt, dust etc
Failure due to electricity power fluctuations
Near coastal areas and outdoor use
WARRANTY BY FIAS LIGHTING PTY LTD
only covers Manufacturing faults with the Fan and
does not cover any loss, damage or delay caused by malfunction of the product
Our goods come with guarantees that cannot be excluded under the Australian Consumer Law. You are
entitled to a replacement or refund for a major failure and for compensation for any other reasonable
foreseeable loss or damage. You are also entitled to have the goods repaired or replaced if the goods fail
to be of acceptable quality and the failure does not amount to a major failure.
This fan is suitable to be used indoor areas only
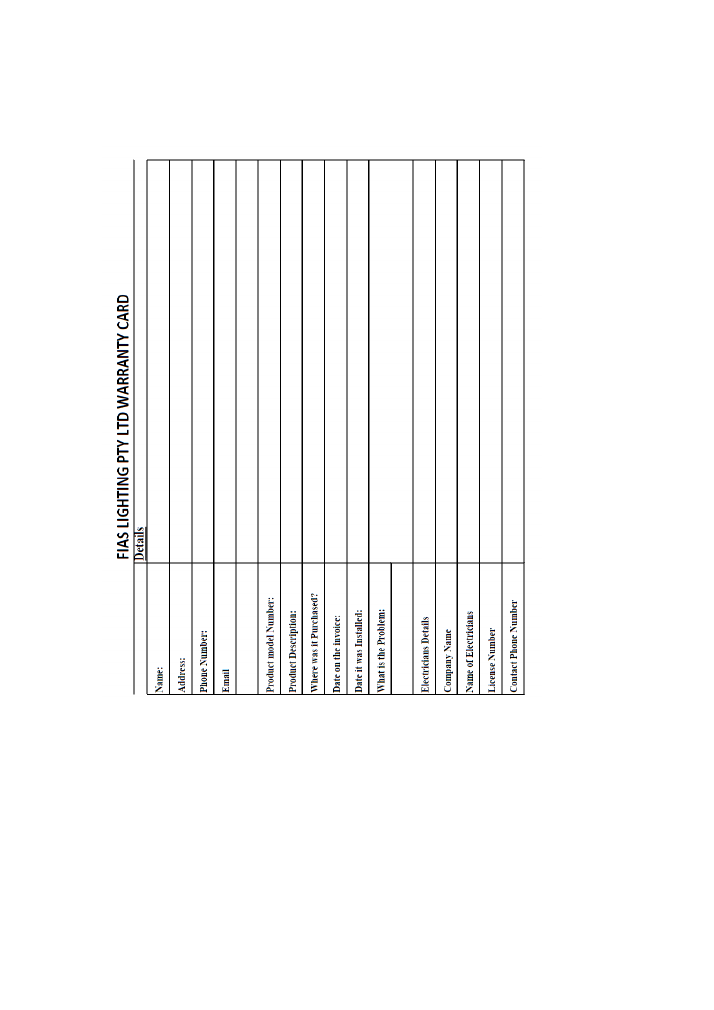
WARRANTY CLAIMS MUST BE ACCOMPANIED BY A COMPLETED WARRANTY CARD.
Please direct all warranty queries to
warranties@fiaslighting.com.au
FIAS LIGHTING PTY LTD
141 Lancaster Circuit, Stretton, Queensland 4116
Phone: 07 3841 8273
Fax: 073841 4849
FIAS LIGHTING PTY LTD
Page 11

FIAS LIGHTING PTY LTD
Page 12
Dear Consumer,
Please fill out all necessary warranty details and fax it to: 07 3841 4849 or email it to
warranties@fiaslighting.com.au
A Fias Lighting representative will contact you once all of the details have been filled
and sent back.
Kindly be advised that when doing an in-home warranty on a ceiling fan, If the fault is
NOT due to Manufacturers fault, all costs incurred by the service agent will be borne by
the purchaser of the ceiling fan.
Name:
Address:
Signature:
Date: