Full Text Searchable PDF User Manual

User’s Manual
X
mirror
No.A00

Contents
---------------
01
l
------------------------------
0
---------------------------------
0
1.1
--------
04
Enter the electronic manual
Precautions
2
Enter the main
menu
interface
Copyright
3
1
Basic operation
2
Function Operation
(
The machine
settings, please refer to table
)
2
.
4
USB
function operation
-----------------
11
Video function operation
-----------------
11
Music function operation
----------------
12
Pictures function operation
--------------
13
2
.
--
14
2
.
6
MHL Function Operation
----------------
14
5
Electronic compass function operation
3
System setup
----------------------------
15
(
The machine settings, please refer to table
)
2
.
1
Navigation
function operation
---------
05
2
.
2
CAR DVR function operation
---------
06
2
.
3
Bluetooth function operation
----------
05
01
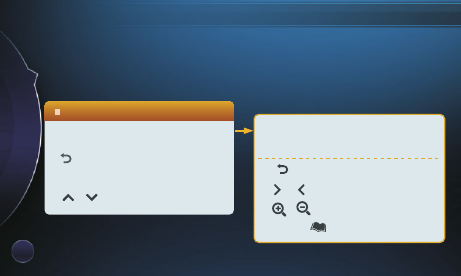
Enter the electronic manual
①
Touch the icon to enter the corresponding
interface.
②
Back
--->
Back to the main interface
③
Numeric Keypad
--->
Input corresponding
number and click ok to confirm.
④ / --->
Menu up
/
down page
Touch icon function description
Enter the corresponding interface, icon
description (Touch anywhere on the screen
to hide or display)
①
Back
--->
Back
to
the
main
menu
② / --->
Up
/
down page
③ / --->
Zoom
in
/
out
④
Contents
--->
Back
to
menu
interface
Touch the menu on left side, find
--->【
--->
【
【
】
】
】
button to enter the electronic manual interface.
SETTING
Other
E-INSTRUCTIONS
02
Precautions
For safety and current operation of the product, the
product shall be installed by professional. Do not
disassemble or repair the product by yourself to
avoid an accident or damage to the product.
To avoid electric shock, damage and fire resulting
from short-circuit, do not place the product in water
or places where are wet.
As for car backing, this system works simply as an
assistant tool. Our company is not responsible for
any potential car backing accidents.
Safety Precautions
Notes
To ensure the traffic safety and avoid contravening
the traffic regulations, please obey the local laws
while the Bluetooth or any other options are working.
And do not watch any programs or operate the
system during driving.
To avoid trouble aroused by rapid
operation, when you operate the
host unit, please do not operate
other functions until the last
execution is finished.
Please turn on/off the machine or
press the reset key when system
error happened.
Except volume button, please do
not use other functions while
making call through Bluetooth.
Please do not do any other
operation on the machine while
using the backing camera.
03
Copyright
★★★★
Copyright
The copyright of this manual is reserved by our company. All rights are reserved.This manual
may not be copied, reproduced or translated in whole or in part without the express written
permission of our company.
Our company reserves the right to improve the product, and its hardware and software.
This manual is an operating guide, but not the warranty of the product. Our company doesn't
guarantee the contents included in this manual.
Since we adhere to the strategy of sustainable development, printing error in the manual,
incompliance with latest materials, software upgrade, and product improvement may be
performed at any time. The product is subject to change without further notice, and revision
will be directly edited to the manual of new edition.
Not all of functions in this e-book are exited for all the modes, different models will configure
different
functions, please
according
to
the
actual
models.
Our company reserves the right of final interpretation for the manual.

1 Basic operation
04
1.1 Enter the main
menu
interface
3)The screen display the current date information on the
of main interface.
right
1)
press
icon on rear view screen to open screen
/
close screen
.
【
】
Touch icon to back to main interface.
After connect the power
:
2) Wave swept from left to right to open screen.
5
)
and etc.
Main function :
NAVI
、
CAR
DVR
、
BLUETOOTH
、
USB(
COMPASS
SETTING
Video/Music/Photo)
、
、
M
HL
、
4)
Slide or touch
button to change different function menu.
The main interface was in selected state, only four functions display on the screen.
/
【
】
05
2.1 NAV function operation
In the main menu press the
【
】
button on the left function interface to
enter the navigation mode.
NAVI
This function is available only when connected with navigation module.
In navigation mode only the touch screen functionality of the navigation software
will be available .If other functions needed you must exit the navigation mode.
2
Function operation
Music function during navigation
When switching to the navigation state from
multimedia changer state, you can enjoy
music normally. When there is navigation
indication, the system will adjust the volume
of the music and navigation.
Volume adjustment
Under navigation status and when there
is music output,it is to adjust the system
volume at this time.
Under the voice navigation status,
it is
only for NAV volume adjustment.
06
2.2 CAR DVR function operation
When the top right of the icon bar displays information indicates
【
】
(flashing),
touch the icon to go to the current video interface,Touch the left analog disc or
【
】
into the driving record instrument interface menu.
CAR
DVR
2 Function operation
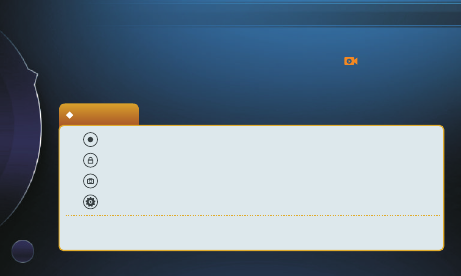
① --->
Recording /pause,
② --->
Quick lock button,lock the current playing video
③ --->
Captured frame images from video.
④ --->
Set interface
Recording
Can set the
【
save video files
】
/
【
recording quality
】
/
【
recording resolution
】
【
boot record
】/
【
Sound Recording
】
/
【
Recording Format Card
】
six options .
07
04
Playback
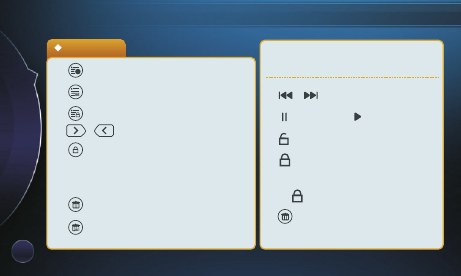
① --->
Exception category list
② --->
Full list
③ --->
Lock list categories
④
/
--->
Up/down icon
⑤ --->
Lock the selected video manually,
The
lock
stitch
icon
will
display
in
front
of
the
file
.
⑥ --->
Delete the selected files
⑦ --->
Delete all files in the list
① / --->
Previous /next
② --->
Pause
--->
Play
③ --->
Unlock the locked file
④ --->
Lock the currently playing file,
The top left of the screen displays
“ ” icon.
⑤ --->
Delete the currently playing
video files.
!
2
Function operation
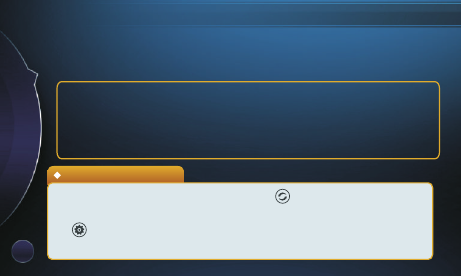
Click the pictures files in the list and
enter Video interface
08
2.3 Bluetooth handsfree function operation
In
the
main
menu
press
the
【
】
on the left function interface,
button
to
enter
the
bluetooth
handsfree
mode.
BLUETOOTH
Bluetooth device interface
2
Function operation
Note
:
As
the
bluetooth
modules
and
software
of
cellphone
with
different
brands some
functions
may
be
different
or
even
not
compatible
with
other
system
in
actual
use please
forgive
us
for
this.
If
the
bluetooth
unconnected the
interface
display
bluetooth
setup
interface.On
the
right
side
of
list
display
paired
and
unpaired
bluetooth
devices.
Click unpaired device to pair
.
After matching the connection can be reestablished automatically.
,
,
,
,
①
Search
--->
Enter search interface.
② --->
Click
start search.
③
--->
Bluetooth settings, such as change bluetooth name and PIN code ,
open/close automatic answer, automatic connect
Pair
--->
Display bluetooth name and PIN.
④
, automatic update phonebook.
09
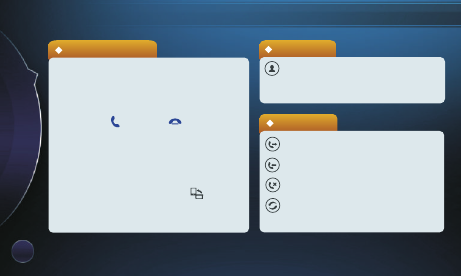
After the connection succeed, you
can dial number through mobile
phone or enter telephone number
on the number button from screen.
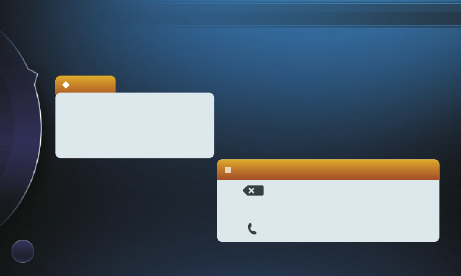
Dial up
① --->
Delete
②
REDIAL
--->
Redial
③ --->
Dial up
Dail interface ---- Icon
function description
After the Bluetooth connection is successful, the main title bar will display the
phone signal strength and power, as well as the Bluetooth icon is blue.
2 Function operation
10
1
)
When there is outside calling, in any mode,
the system will automatically switch Bluetooth
handfree interface, and playing music for
original mode will turn to incoming ring.
2
)
Press
the“
Answer ”,
“ hang
up ”
on
the
screen
to
choose
answer
or
reject
.
If
answer
is
set
up
for
:
automatically
answer
,
after
ring
for
three
times
,
it
will
automatically
connect
telephone
.
3
)
During
communication, click “ switch
”
to
switch
communication
between
car
amplifier
and
mobile
phone
.
Answer the phone
2 Function operation
--->
Phone book images appears, the
phonebook displays incoming calls,
received calls, and missed numbers.
Phone book
Call records
--->
Call
history
--->
Call
recording
--->
Missed calls
--->
Refresh
2.4 USB function operation
In the main menu state, press
【
】
【
】
to enter
interface.
USB
Video
--->
Video
Gently touch
【
】
icon, all the video
files from USB will be shown on the left
of the screen.
Gently touch the video file name, it will be
shown in a small window in the middle of
screen
,
after the video shows for more
than 10s without any operation, it will be
switched to “
full screenstate
” automatically.
2 Function operation
Control menu ---- icon
function
description
In full screen state,click video playback window,
the screen display control menu.
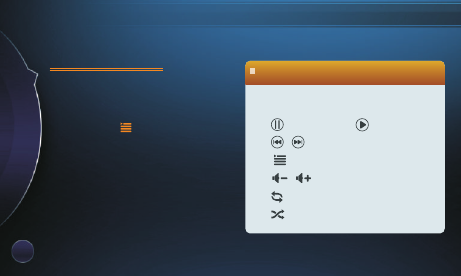
① --->
Pause
--->
Play
② / --->
Previous/next tracks
③ --->
File list
④ / --->
Volume+/-
⑤ --->
Recycle play
⑥ --->
Random play
Video function operation
11
In the main menu state, press
【
】
【
】
to enter Music interface.
USB
Music
--->
2 Function operation
Control menu ---- icon
function
description
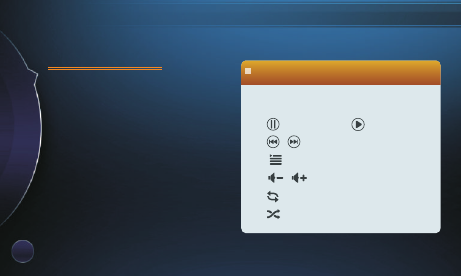
In full screen state,click video playback window,
the screen display control menu.
① --->
Pause
--->
Play
② / --->
Previous/next tracks
③ --->
File list
④ / --->
Volume+/-
⑤ --->
Recycle play
⑥ --->
Random play
Music function operation
12
13
Gently touch
icon all the
picture files from USB will be shown
on the left of the screen; Gently touch
the pic file name it will be shown in a
small window in middle of screen
after the picture shows for more than
10s without any operation it will be
witched to full
screenstate
automatically.
【
】
,
,
,
,
“
”
2
Function operation
In
the
main
menu
state press
【
】
【
】
to
enter picture
interface
.
,
USB
Photo
--->
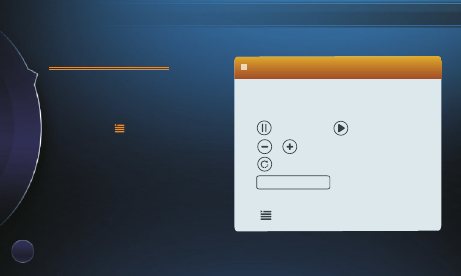
① --->
Pause
--->
Play
② / --->
Zoom in/zoom out
③ --->
Rotate 90 degrees
④ --->
Set as the boot
screen
⑤ --->
File list
In full screen state,touch your pictures show
window which display control menu bar.
Set
as
boot screen
Control menu ---- icon
function
description
Picture function operation
14
2.5 Electronic compass
function operation
In the main menu press
【
】
button on the left function interface to
enter Electronic compass mode.
COMPASS
Using GPS to set direction.Indicate
the
direction
in
the
interface
.
2
Function operation
2.6
、
MHL
function operation
Touch
on simulation disc
,
the
rear view will share the mirror on the
screen with smart phone.
【
】
MHL
Smart phone connect with rear view via
HDMI/MHL then change to MHL menu
,
and the rear view will share the mirror on
the screen with smart phone.
,
15
In the main menu press
【
】
button
on the left function interface
to
enter system setup main interface.
SETTING
Bright setting
3.1 Setups menu
Adjusted Automatic turn off screen
(
never, 10s, 20s, 60s
)
and auto
brightness, Brightness setup
accordingly.
Audio setting
Adjusted key tone and microphone
volume accordingly.
General setting
Time setup: GPS synchronous on/off Adjust the
year, month, day, time by choosing move up or
move down,12/24 hour format select.
3
System Setup
G
-
Sensor
sensitivity
:
Adjust the
sensitivity of high/medium/low
.
SOS
:
Setup
numbers of
SOS.
Navigation info: click / icon to open/
close.
16
Navi setting
Select the NAVI PATH.
Other setting
3 System Setup
Can choose the settings for “STARTUP LOGO” “MAINTENANCE TIPS”
“LANGUAGE ”.
VERSION : Display information about the machine.
E-INSTRUSTIONS: Check the operation guide of machine‘s related
function.
Touch
【
】
icon to back to main interface, touch
【
】
Icon to back to previous interface.